Aperture Science (a.k.a Aperture Laboratories) is a fictional scientific research corporation, whose facility is the setting for the 2007 puzzle-platform video game Portal, as well as its 2011 sequel Portal 2. Aperture’s approach to scientific research is a little… strange, to put it mildly. They have a penchant for testing exotic materials, building maniacal robots, and creating wholesome musical interludes. And, apparently, coming up with long-winded names for storage containers.
The Aperture Science Handheld Dihydrogen Monoxide Containment Unit was a stainless steel water bottle created and sold by Valve Corporation and ThinkGeek for the release of Portal 2, circa 2011. The bottle came in both 40 oz black and 22 oz white variations, with decals for Aperture Laboratories and a disclaimer about the deadly nature of H₂O. Unfortunately it looks like they stopped selling these several years ago – the product page from the Valve store has vanished entirely, while the ThinkGeek product page has both bottles listed as “no longer available”.
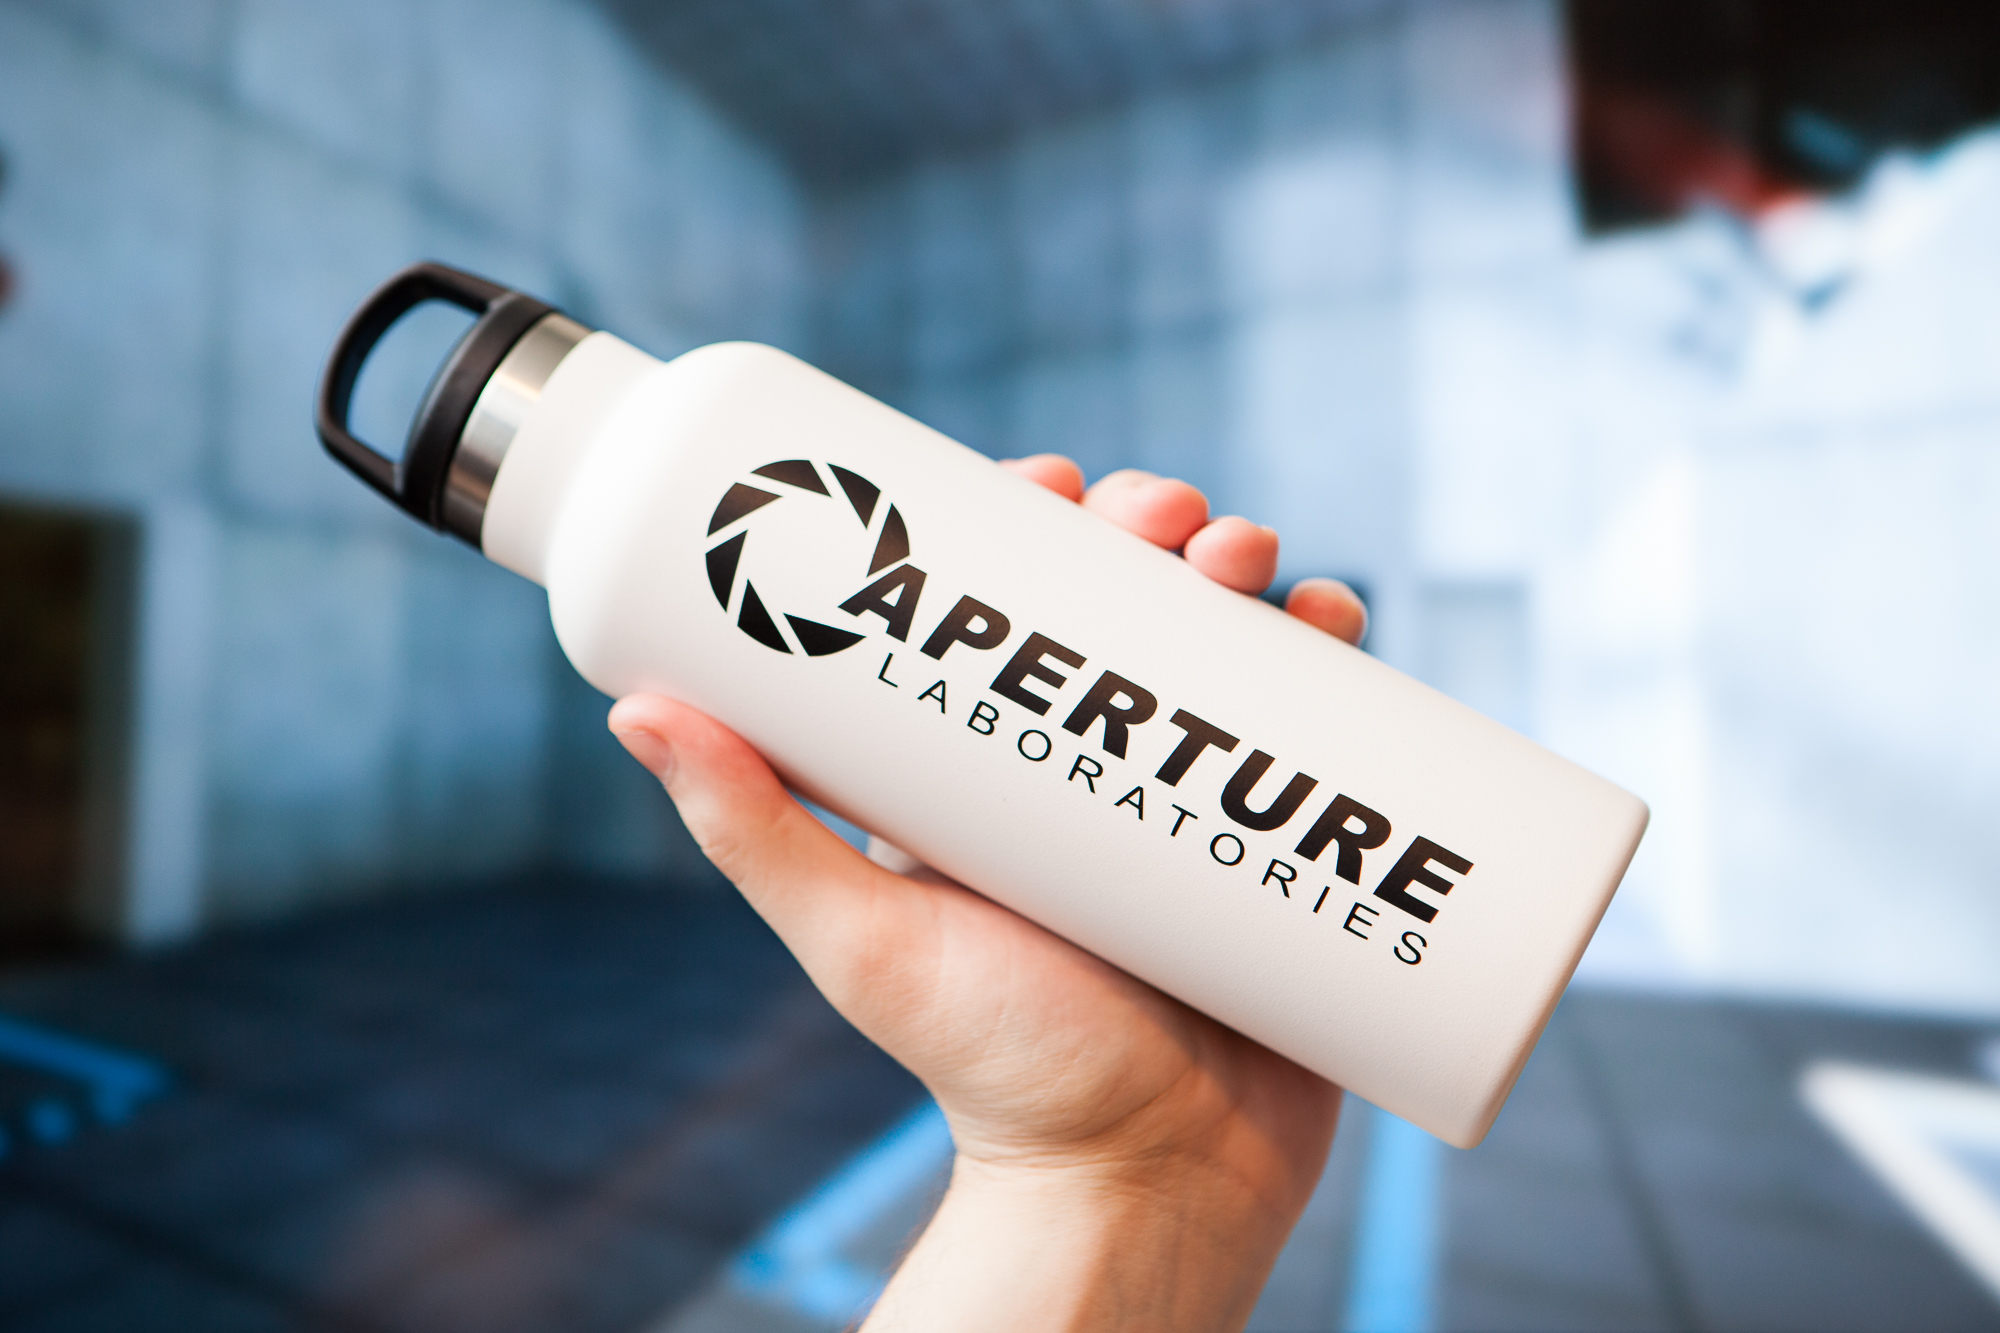
I’m not so easily deterred, so I spent this past weekend building my own “Aperture Science Dihydrogen Monoxide Containment Unit” using a stainless steel water bottle and some custom made vinyl decals.
Selecting a Bottle
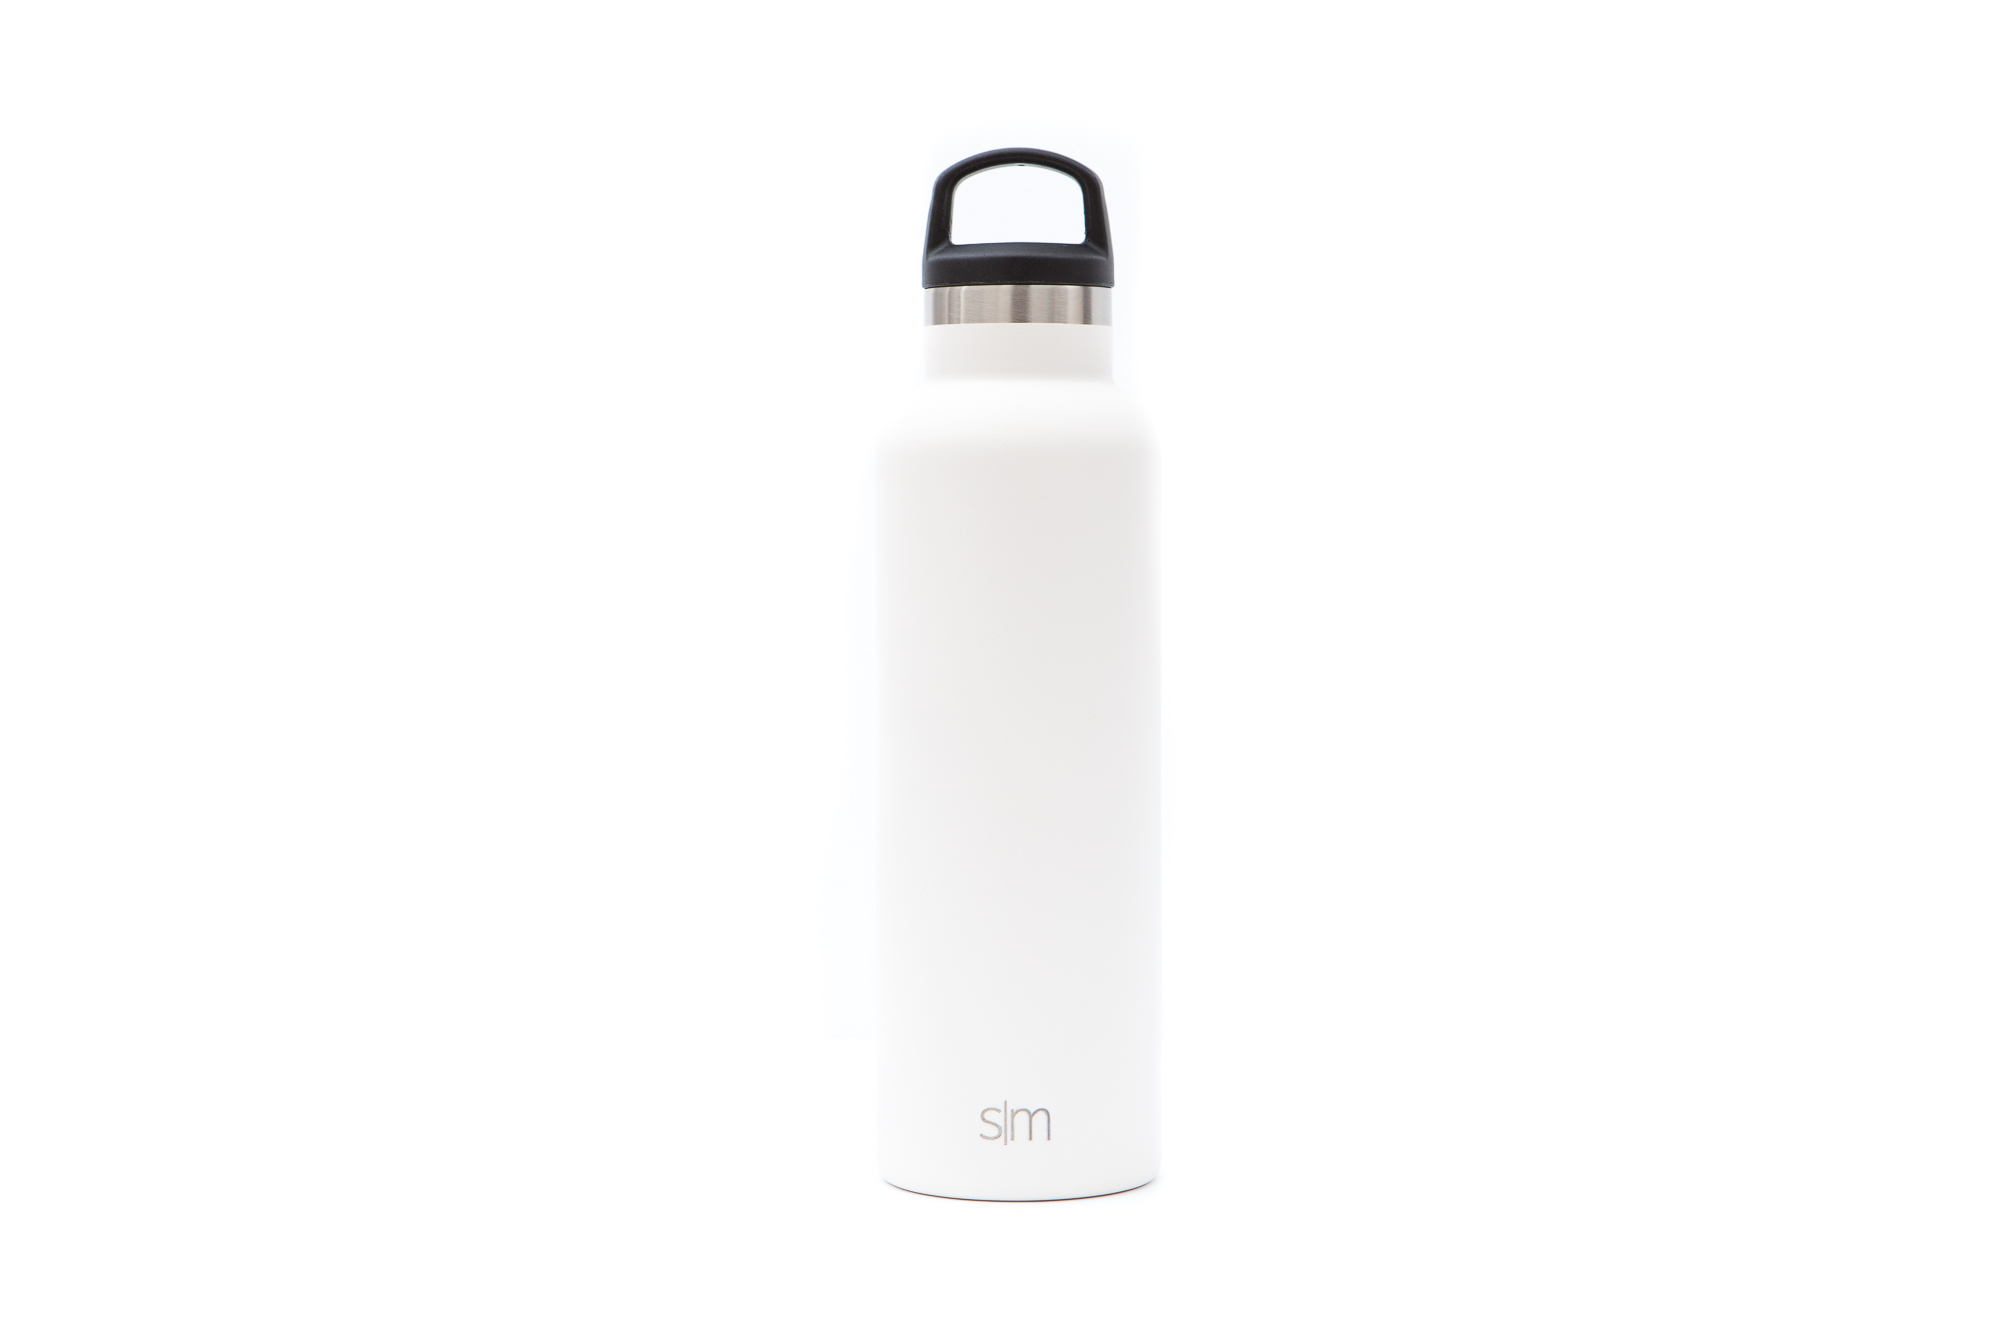
The bottle I’m using is a Simple Metal Ascent stainless steel 20 oz bottle in winter white. This checked all of the boxes: it has a modern look, a nice aspect ratio (skinny but not too tall), no major logos, and was not too expensive (< $20 US). Most importantly it looks like a container rather than a bottle, which I think is important for selling the “dihydrogen monoxide” moniker. If not for the “S|M” logo on one side I think it could easily pass off as a purpose built Aperture Science Handheld Dihydrogen Monoxide Containment Unit. Thankfully that logo should be easy enough to work around.
Creating Decals
To make it a proper “Aperture Science” device, the bottle requires two decals: an Aperture Laboratories logo and a “dihydrogen monoxide” warning.
Aperture Science
![]()
The “Aperture Laboratories” logo I found online, hosted at Wikimedia Commons. This is an SVG, so it will work perfectly for the vinyl cutter without any changes other than resizing.
Dihydrogen Monoxide

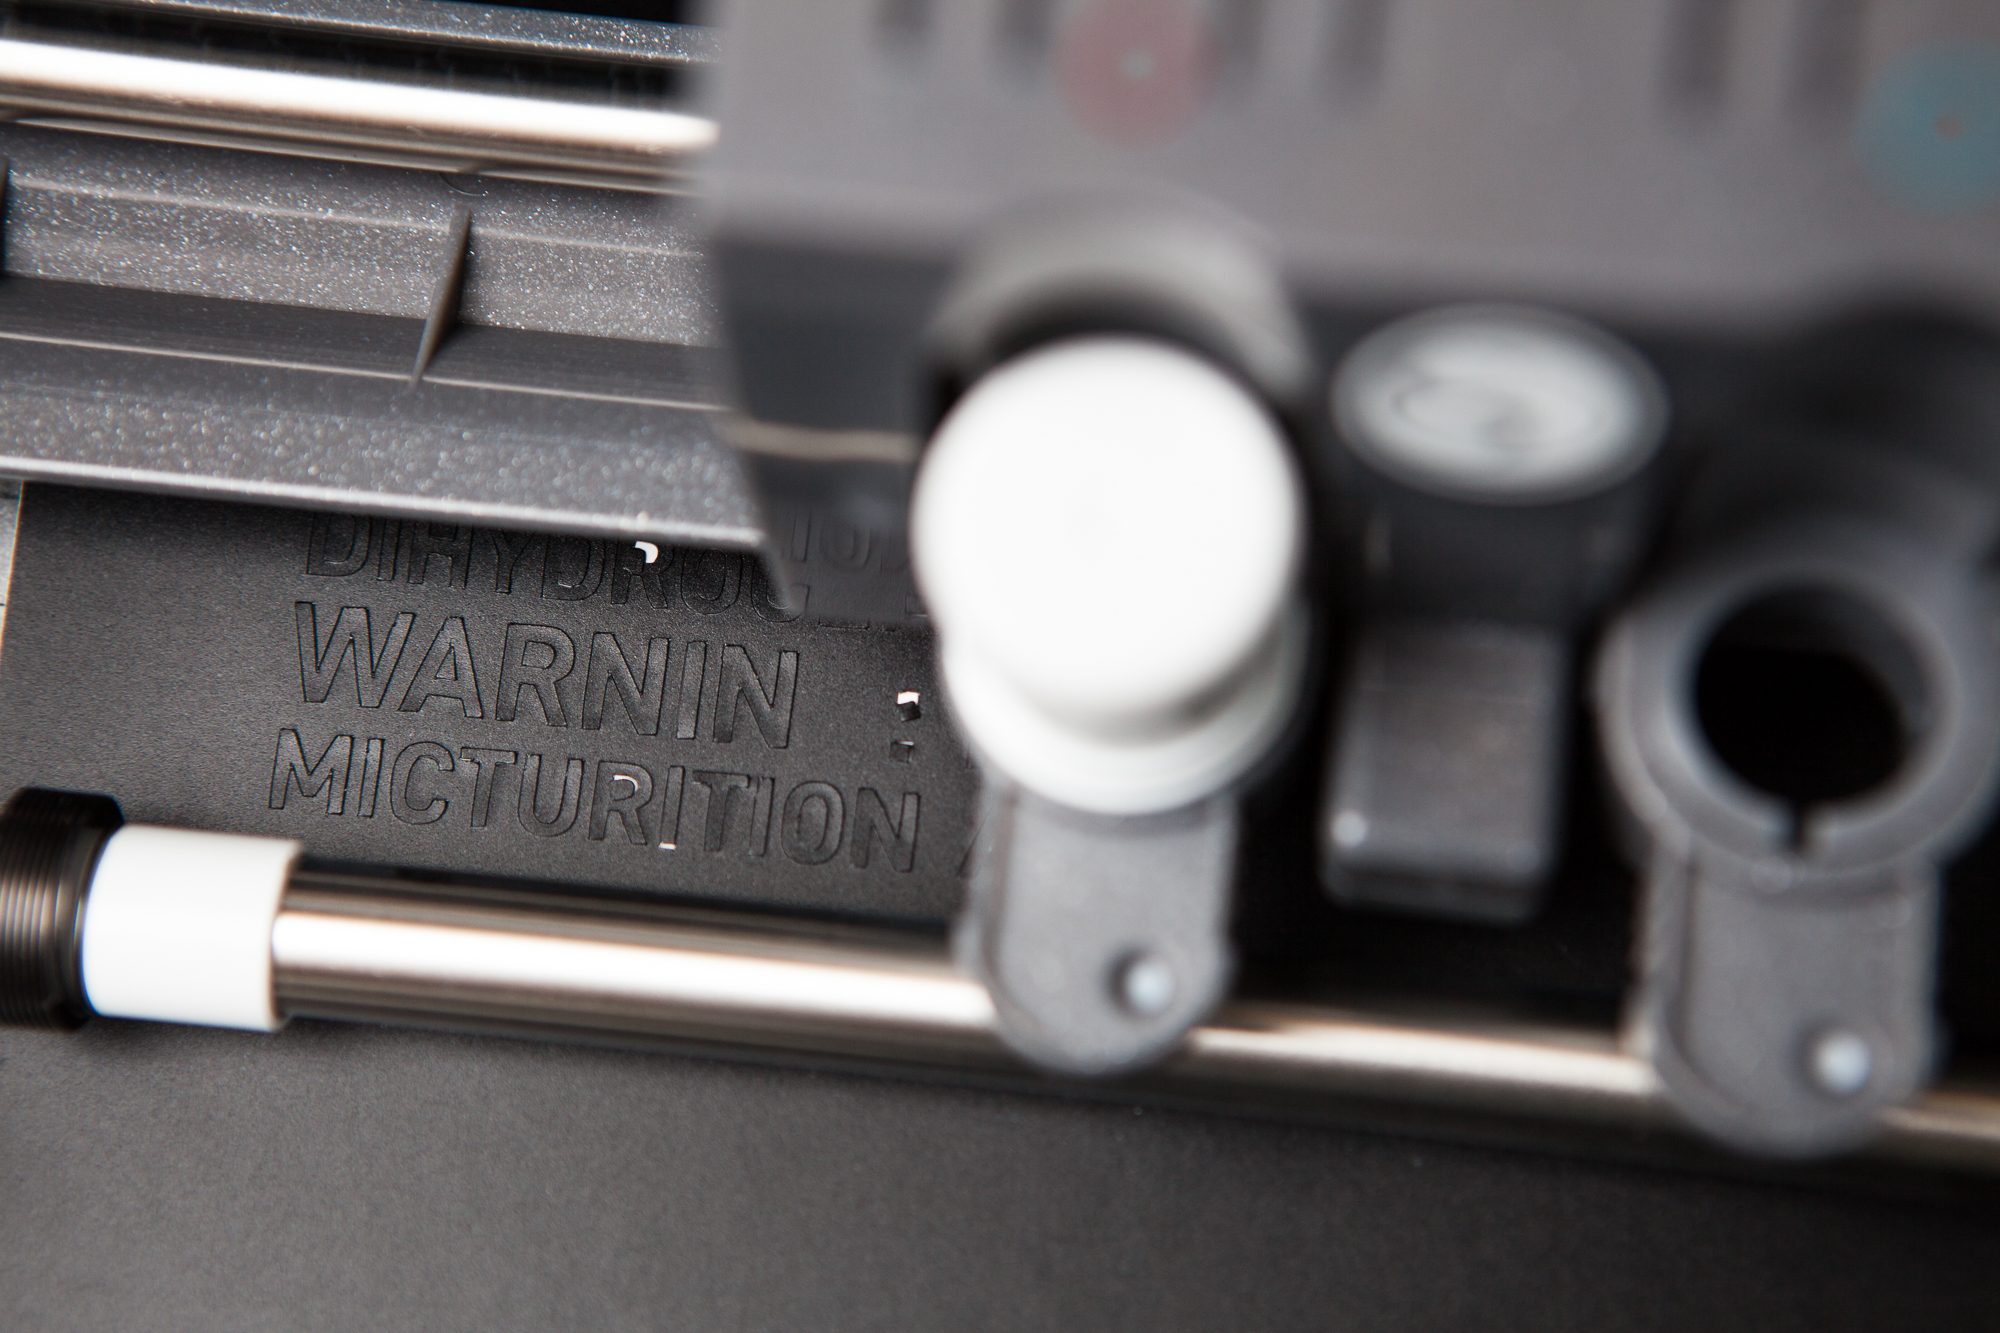
The “dihydrogen monoxide” warning label was a bit trickier. I pulled the text directly from the ThinkGeek product images:
DIHYDROGEN MONOXIDE CONTAINMENT UNIT
WARNING: MAY CAUSE DIAPHORESIS
MICTURITION AND ACUTE TISSUE HYDRATION
Translated, this means “H₂O (water) bottle. Warning: may cause sweating, urination, and add water to your body”. Seems pretty accurate for a science-y container.
My first step was to track down a suitable font. I searched “Portal 2 Font” on Google which led me to this page, that said that the font used for the cover art was likely “FF Din Bold” – a commercial font which I could purchase from various reputable sites for approximately $65 USD. Luckily I found a similar free version in “D-Din 1451”, which according to Wikipedia is the standardized German font that FF Din was based off of. A version of D-Din 1451 is free to download from FontSquirrel.com.
I created a new document in Adobe Illustrator and added the text using the D-Din “Bold” style, fully justified. The font size for the center line is around 25% larger to accommodate for its shorter length.
Size to Fit


Once I had both decals in hand I measured the bottle to find the final sizes. The wide portion of the bottle is approximately 2 ⅞” in diameter, and 7 ¼” tall before it starts to taper towards the neck. Because the design for both of these decals was based on existing art I needed to keep the aspect ratio constant, so I only worried about the width. I scaled both decals to be 6″ wide and then printed out a quick test piece on a printer for a mockup. This looked pretty good, so I went ahead and exported the final decal vectors and moved onto making the vinyl versions.
Cutting Vinyl
I imported the finished decal vectors into Silhouette Studio and cut them out of Oracal matte black 631 vinyl on my Cameo Silhouette 3. This is “semi-permanent” vinyl that I had plenty extra of after using it for my DJ Hero Lucio controller. If I was buying vinyl specifically for this project I probably would have bought something with stronger adhesive, like Oracal 651. Although so far the ‘removable’ vinyl has been holding up great.
The smaller text was just at the limits of what the machine can cut from that vinyl. I had to re-cut the “S” in “Laboratories” and two of the “U”s from the disclaimer because they got pulled over by the blade.
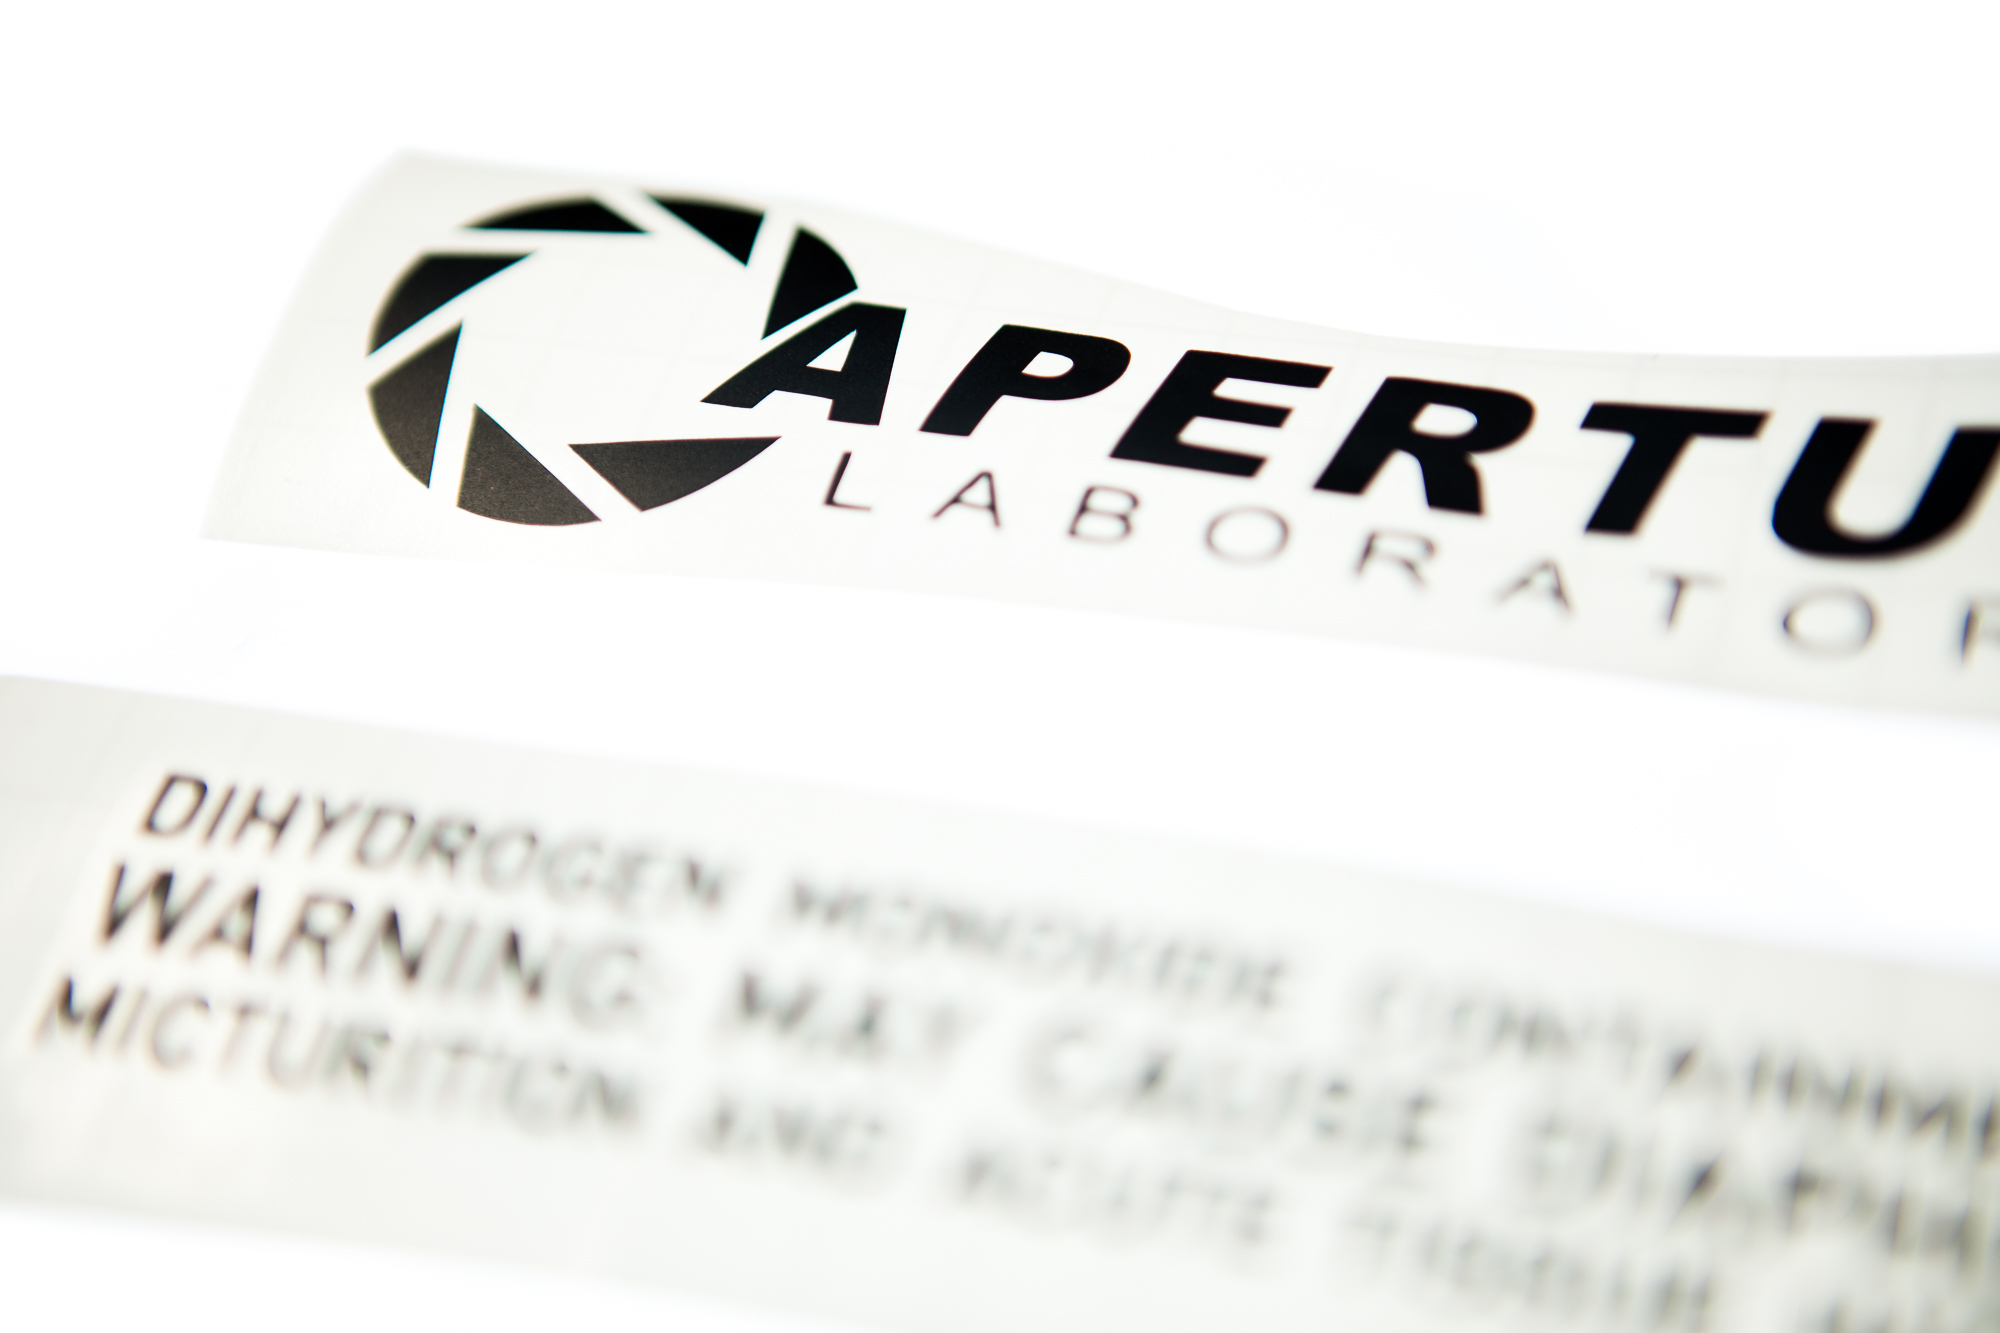
Completed decals, before transfer paper application.
The next hour and a half was dedicated to everyone’s favorite activity: weeding! The vast majority of that time was spent on cleaning up the disclaimer text. Because the text was near the limit of what the machine can do, it didn’t like to cleanly separate from the ‘background’ vinyl, and most letters had to be held down with my weeding tool while I pulled the background away. I ended up using a craft knife to cut the background into multiple segments to make the job easier, but it still took well over an hour to clean up the full text.
Once both decals were weeded to my satisfaction, I put some transfer paper on top and squeegeed them together. For the ‘disclaimer’ decal I also stuck the final transfer paper and vinyl sandwich between the pages of a heavy book for an hour so that the small letters were thoroughly attached.
Transfer
![]()
The final step was to transfer the completed vinyl decals to the bottle. I wanted to try to avoid the laser-etched “S|M” logo, so I used some making tape to mark its position on the bottle. From there I placed another masking tape line on the bottom at 90° to the “S|M” one in order to mark the center positions of the decals on either side of the bottle. I ended up pushing each decal slightly away from the S|M logo so that I could see a full ‘side’ image of each without the bottle company’s logo interfering.
For the transfer itself, I just pulled off the backing from the transfer paper, placed the decals onto the bottle, and then used a squeegee to make sure the adhesive securely bonded to the bottle surface. Then I pulled the transfer paper off, revealing the finished decal on the bottle surface!
Note: Huge Success!
Done and dusted! The final product looks exactly as I wanted it too. Since this is just going to live as a prop on my shelf I can’t speak to how well the vinyl will hold up to the wear and tear from carrying the bottle around, but so far it seems solid.
This was a fun weekend project to throw together, and hopefully I’ll find the time to do more of these simpler one-off projects in the future!
Parts List:
As per usual I’ve linked the various parts and supplies throughout the post as they’re used. If you’d like to make your own, here are all of the part links in one place:
Supplies:
- Simple Metal Ascent Stainless Steel 20 oz Bottle (Winter White)
- Oracal Matte Black 631 Vinyl (what I used) or Oracal Matte Black 651 Vinyl (what I recommend)
- Aperture Science Decal (download)
- Dihydrogen Monoxide Decal (download)
Tools:
Note that most of the above are Amazon referral links which help support the content on this site. Thank you!

2 Comments
Matthew · February 15, 2022 at 6:43 am
Wow this is amazing! I have the original bottle but all the white is coming off and it looks ugly. I was looking for a stencil so I could spray it but this might work instead. Don’t suppose you have the leftover stencil around do you?
Dave · February 15, 2022 at 8:53 am
Thanks! The images in the post are SVG format and can be used as a stencil.