Before we can start making patterns with our shiny new NeoPixel prototyping board, we must first understand how to structure color information in a format the Arduino can interpret.
This starts with an understanding of basic color models. If you’re an artist or designer this should be second nature, but for most people the last time they heard about primary colors was in grade school art class. You may have been taught that the primary colors are blue, red, and yellow. These three colors are approximations for cyan, magenta, and yellow (still yellow!) or CMY, the subtractive primary colors. Mixing these colors in varying amounts can create any other color, and mixing them all in equal amounts will make black. These are used for anything involving ink or pigment, including your home inkjet printer.
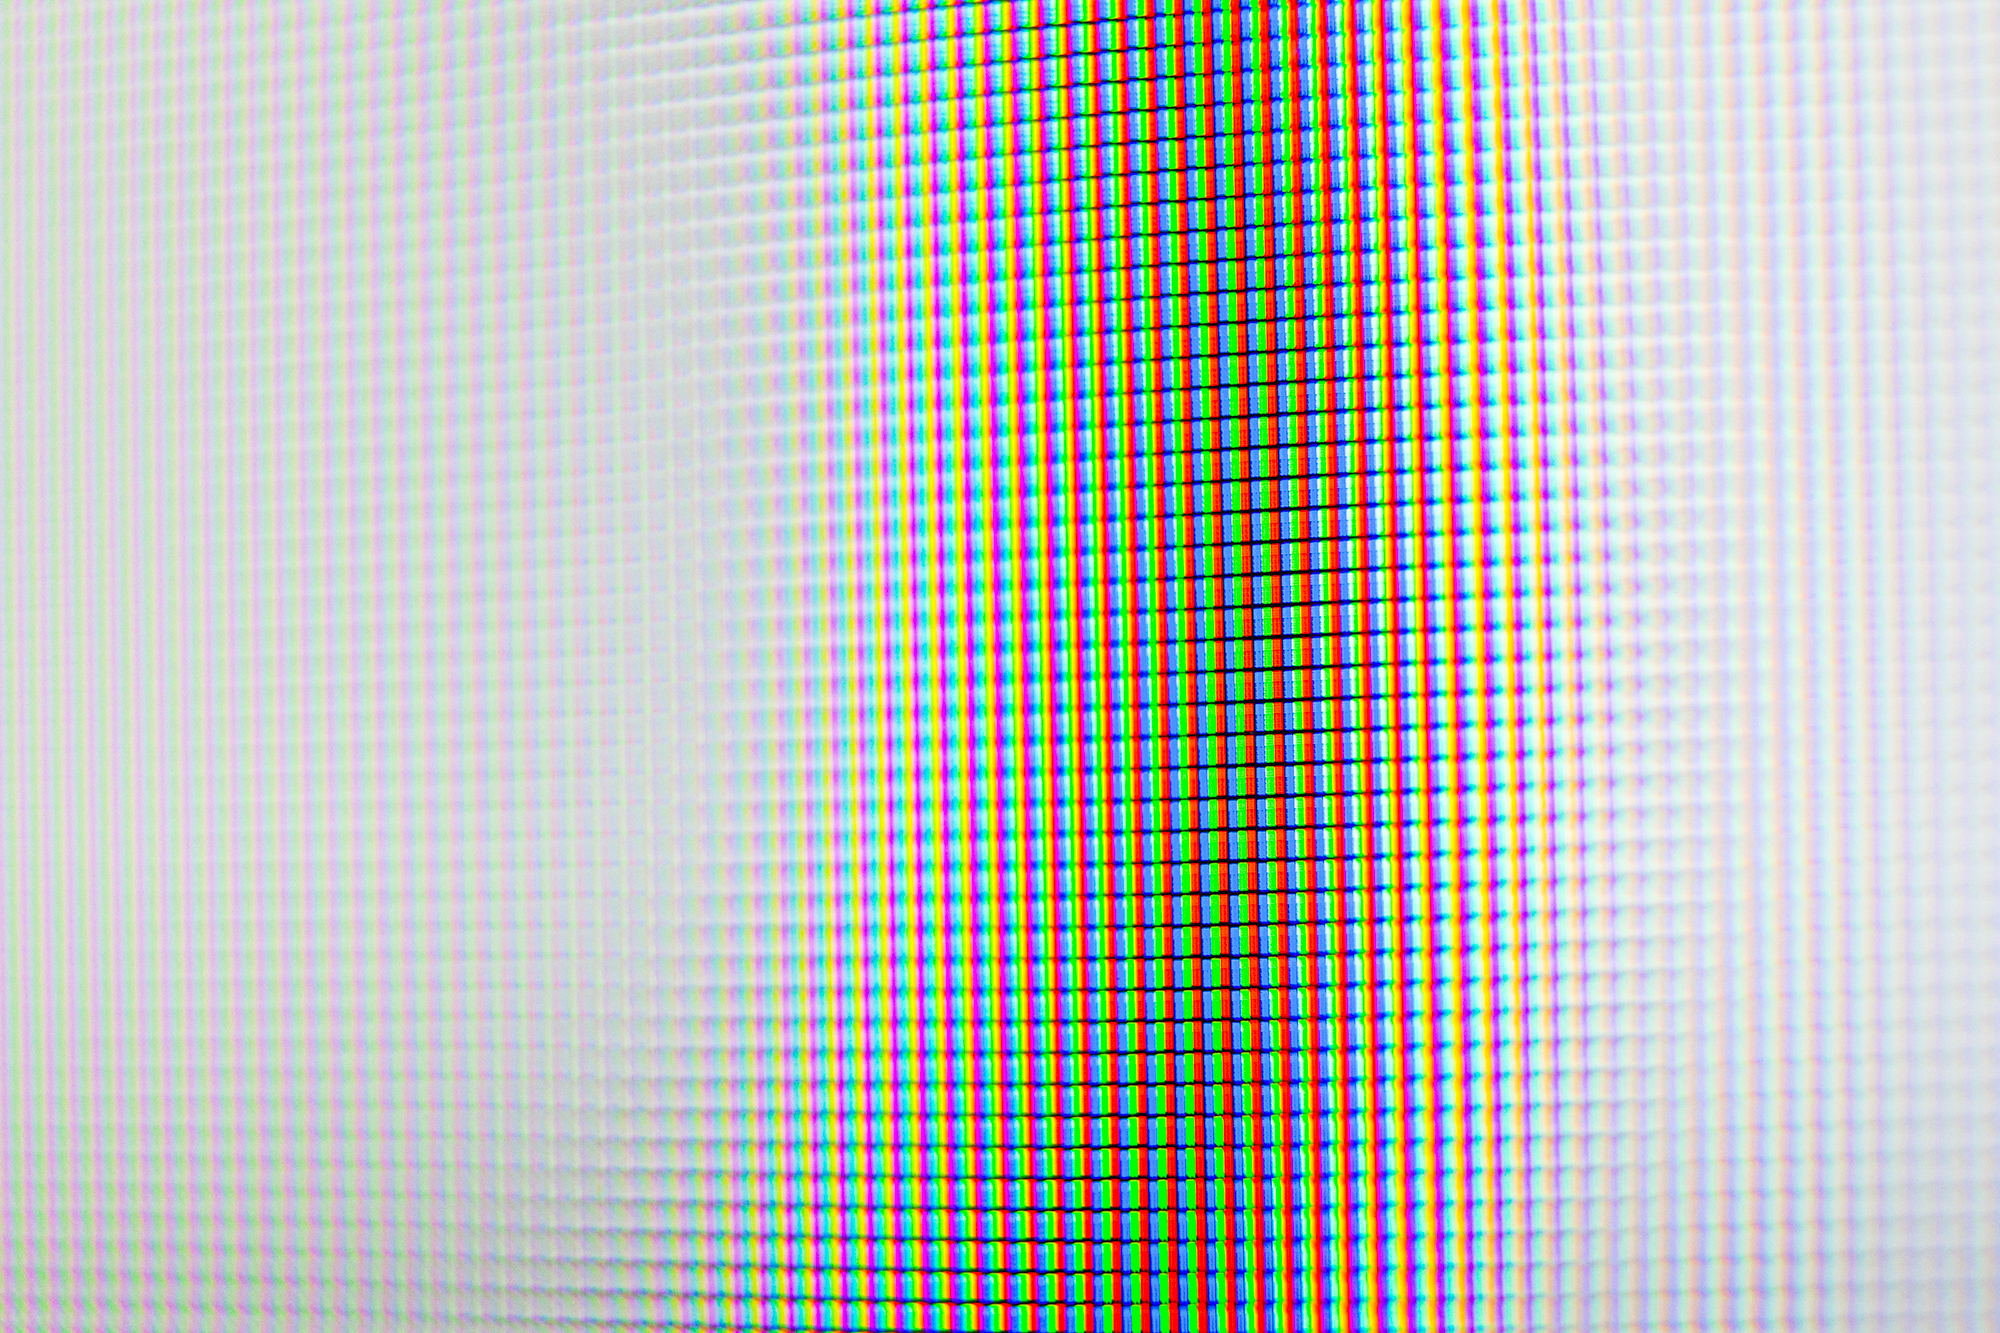
When working with light we are adding lightness rather than taking it away, so we use the additive model where the primary colors are red, green, and blue (RGB). As with the subtractive model, mixing these colors in varying amounts allows you to make any other color, though mixing them in equal parts will make white instead of black. The most common example of RGB mixing is an LCD screen, where each individual pixel is made up of distinct red, green, and blue elements. The featured image for this post is a close-up photo of an LCD TV, whose pixels are larger and easier to photograph than computer or cell phone displays.
The most common way to represent the additive color spectrum digitally is with three bytes, one for each primary color. A byte is composed of 8 binary bits, each able to represent either a 0 or a 1. Two states per bit means that we have 28 values per byte, or 0-255. This is called 24 bit color depth (8 bits per channel * 3 channels, red green and blue). With just three bytes we can represent 255 * 255 * 255 = 16 million colors.
Keeping track of three separate numbers for each color can be cumbersome, so we can simplify this by representing the entire color as one hexadecimal number. The decimal number system is base 10 (0-9), binary is base 2 (0-1), and hexadecimal is base 16 (0-9, and then A-F). This is useful because a single hexadecimal digit can represent 4 bits, and two digits can represent a single byte. This means our three separate numbers/bytes, a total of 24 bits, can be represented by just six hexadecimal digits.
Let’s list out some colors as an example. We’ll start with the extremes – red, green, blue, white, and black. Red, green, and blue are represented using the maximum values of their respective channels. White is created using the maximum values of all three channels, and black is the minimum value of all three. Here they are with an HTML color swatch, the RGB notation, and the hexidecimal notation (prefixed by #).
             R:    G:    B:
 White       255 | 255 | 255  #ffffff
 Red         255 | 0   | 0    #ff0000
 Green       0   | 255 | 0    #00ff00
 Blue        0   | 0   | 255  #0000ff
 Black       0   | 0   | 0    #000000
By combining RGB channels we can also make colors that are mixtures of the various components. For example, the subtractive primary colors:
 Cyan        0   | 255 | 255  #00ffff
 Magenta     255 | 0   | 255  #ff00ff
 Yellow      255 | 255 | 0    #ffff00
Or any other color!
 Pink        255 | 182 | 193  #ffb6c1
 Dark Green  47  | 79  | 79   #2f4f4f
 Goldenrod   218 | 165 | 32   #daa520
 Indigo      75  | 0   | 130  #4b0082
One of the key advantages of the RGB model for computers is that it allows you to send color information directly to a display or an RGB LED without doing any transformations on the data. It’s also an efficient system for storing color information, requiring just three bytes per pixel.
Despite its advantages the RGB color model is not particularly intuitive. It can sometimes be beneficial to work in a model called HSV, short for Hue, Saturation, and Value (i.e. “brightness”). In this model, hue is represented by angle around an axis (0-360°), while the other two values are percentages from 0-100%.
Here are the same RGB color swatches from above, though this time the values have been converted to HSV.
            Hue:  Sat:  Val:
 White       x    | 0%   | 100%  #ffffff
 Red         0°   | 100% | 100%  #ff0000
 Green       120° | 100% | 100%  #00ff00
 Blue        240° | 100% | 100%  #0000ff
 Black       x    | x    | 0%    #000000
 Cyan        180° | 100% | 100%  #00ffff
 Magenta     300° | 100% | 100%  #ff00ff
 Yellow      60°  | 100% | 100%  #ffff00
 Pink        351° | 29%  | 100%  #ffb6c1
 Dark Green  180° | 41%  | 31%   #2f4f4f
 Goldenrod   43°  | 85%  | 85%   #daa520
 Indigo      275° | 100% | 51%   #4b0082
Notice that white can exist at any hue so long as saturation is 0% and value is 100% (i.e. no color and full brightness), and black can exist at any hue or saturation as long as value is 0% (i.e. any color, though no brightness). You might also notice that the hex values didn’t change – that’s because hex values always refer to RGB, and not HSV. HSV can easily be converted to RGB, which makes it quite useful when designing color patterns.
I hope this has provided a good overview of basic digital color representations. The above information should be more than enough for most projects involving RGB LEDs, though if you want to go further down the rabbit hole of digital color I would recommend reading up on things like gamut and color space.


