McCree Hammershot
McCree Hammershot Controller: Programming
The hardware is done and the Nerf gun is assembled, so all that’s left is to write the code to drive the controller!
The hardware is done and the Nerf gun is assembled, so all that’s left is to write the code to drive the controller!
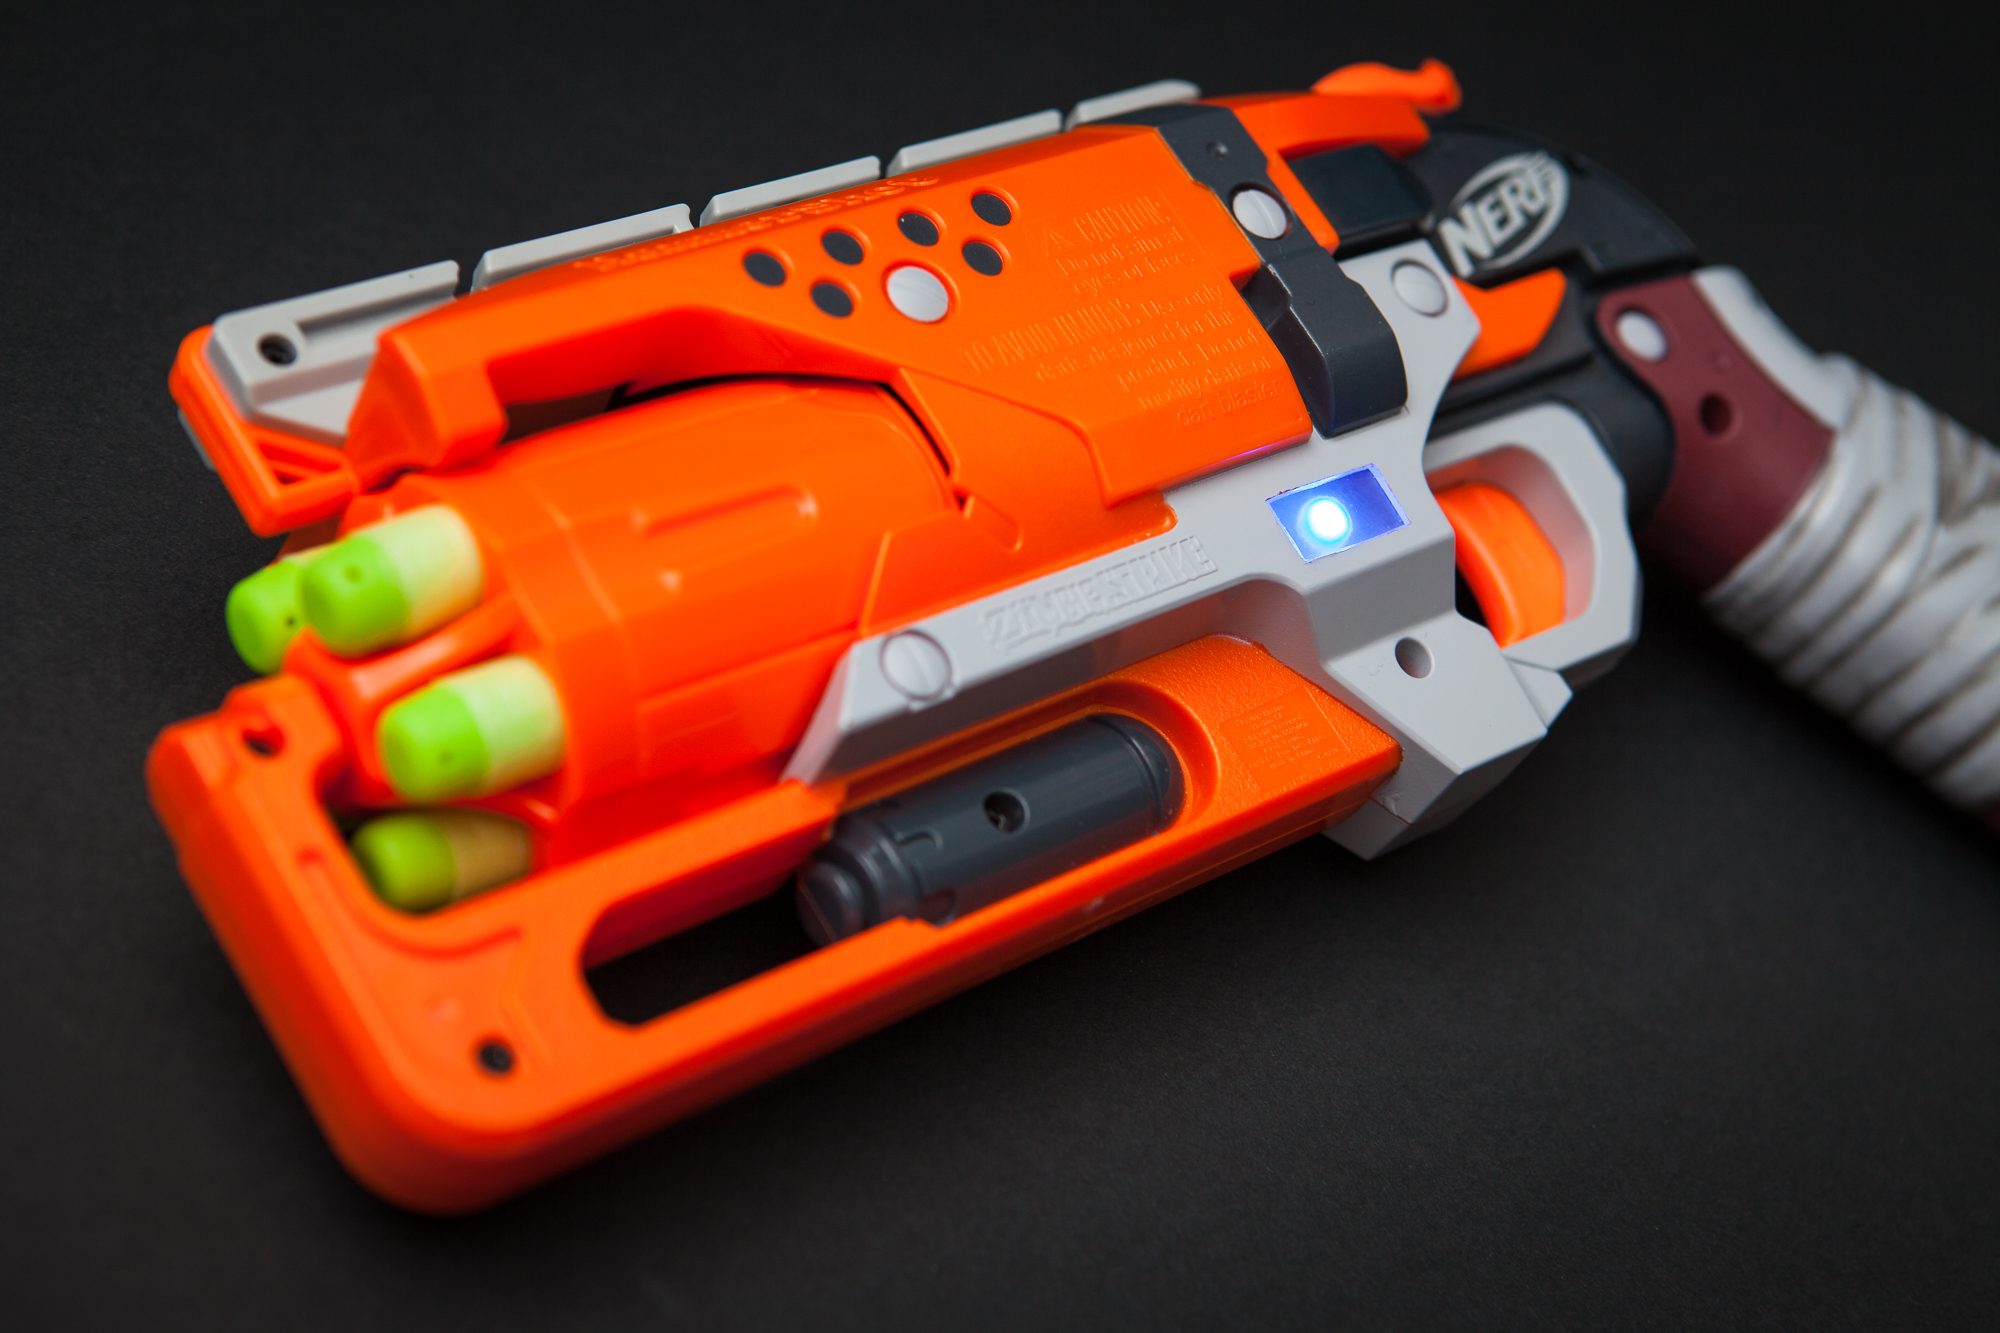
Using a Nerf Hammershot and an Arduino, I built my own custom video game controller for the character of McCree in Overwatch. Overview The Arduino inside of the Nerf gun acts as a mouse and keyboard, sending HID commands over USB to the computer. The trigger and hammer are wired to Read more
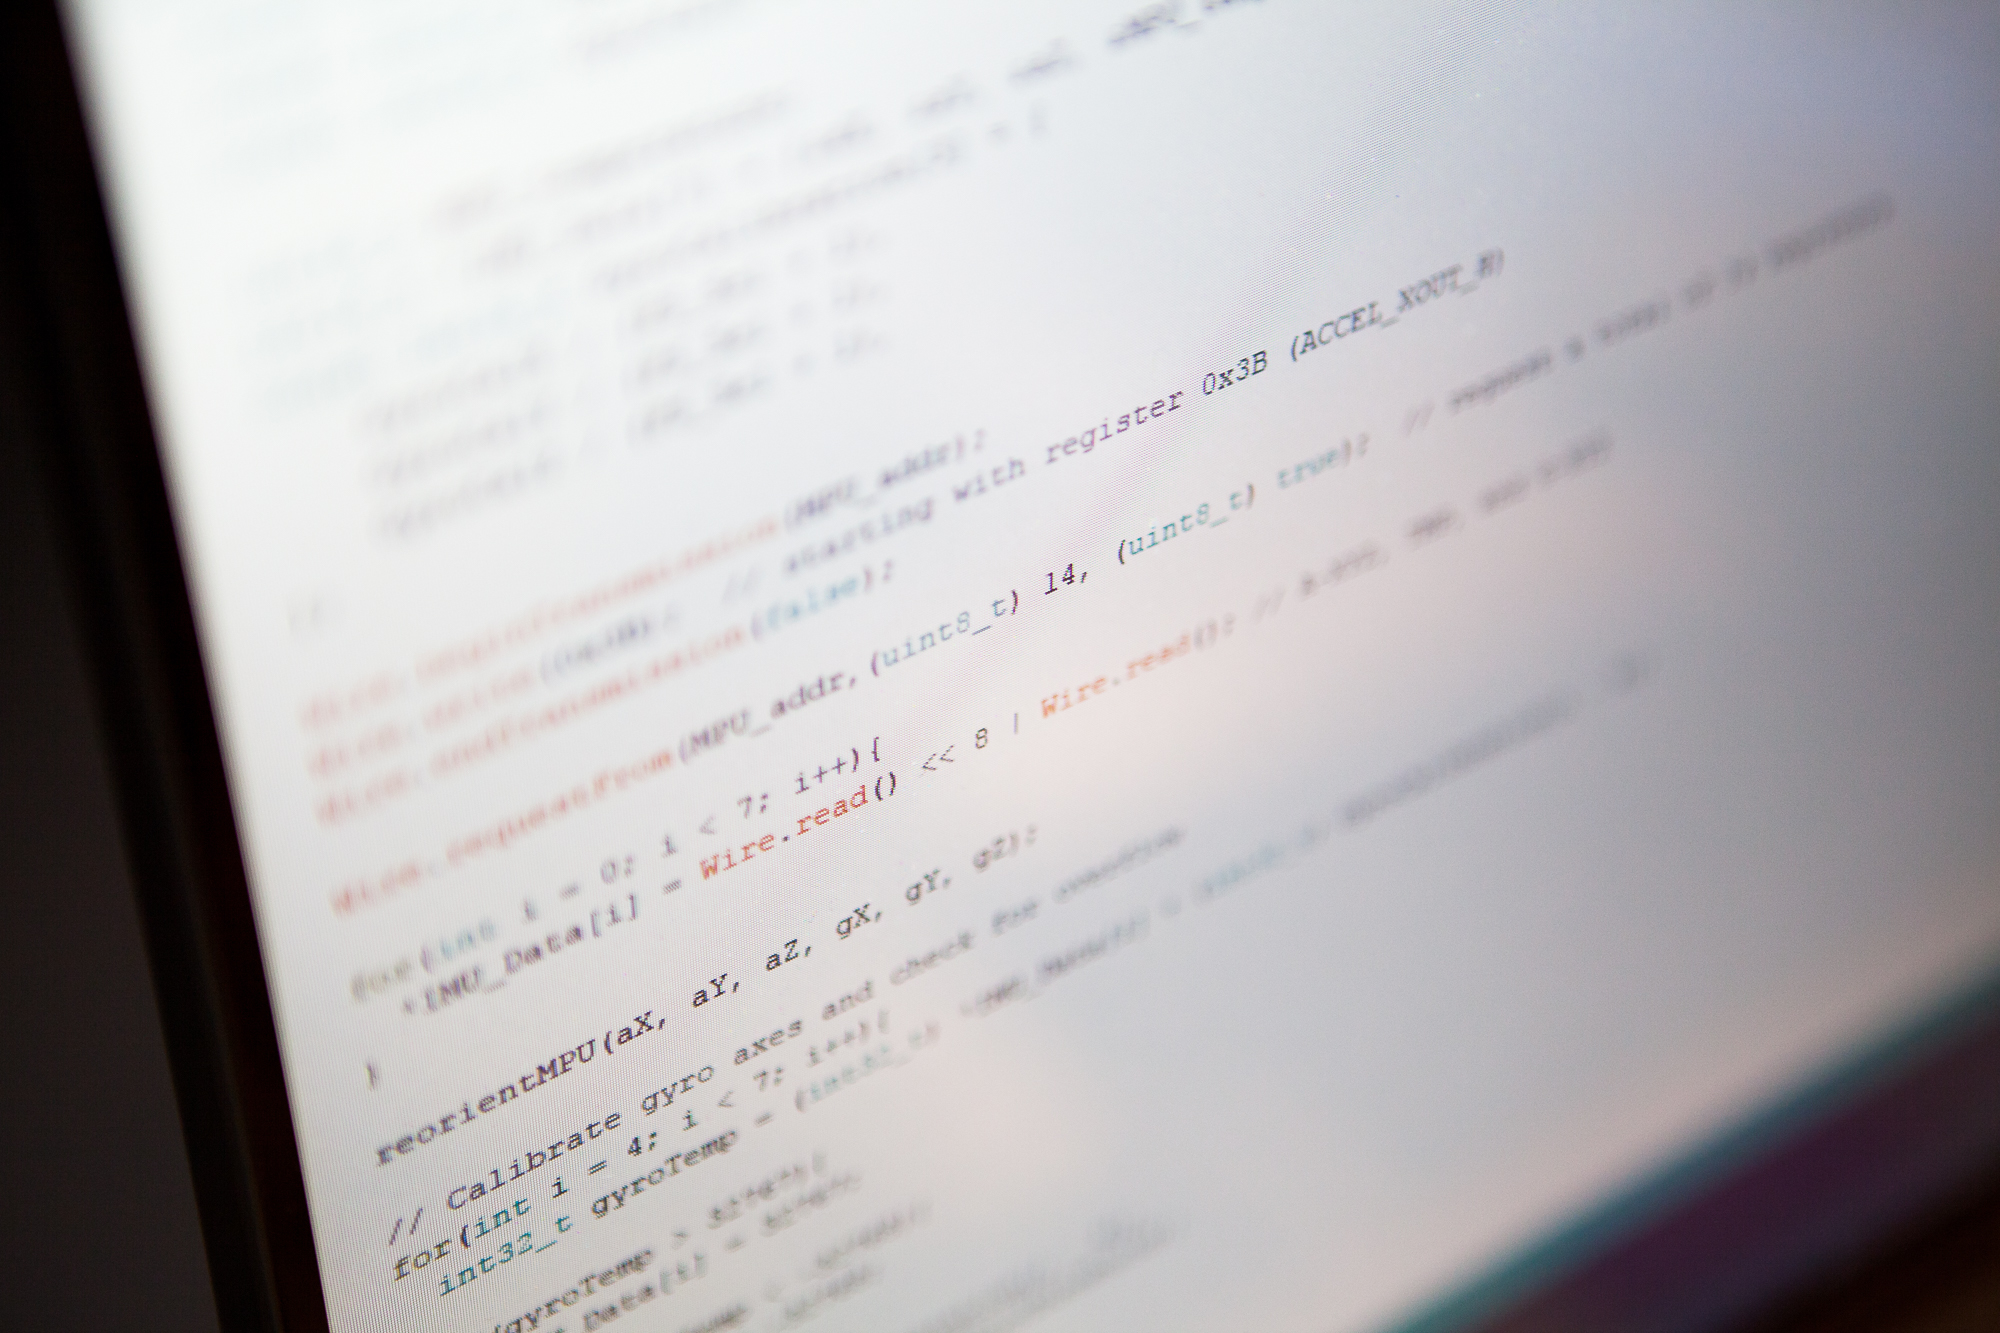
With the LED characters in-hand, the next step is to write an embedded program to display integers and strings on the time circuit displays. The goal is to be able to set the characters for each display group based on simple variables, so doing something like displaying the time returned from a real-time clock (RTC) becomes trivial.
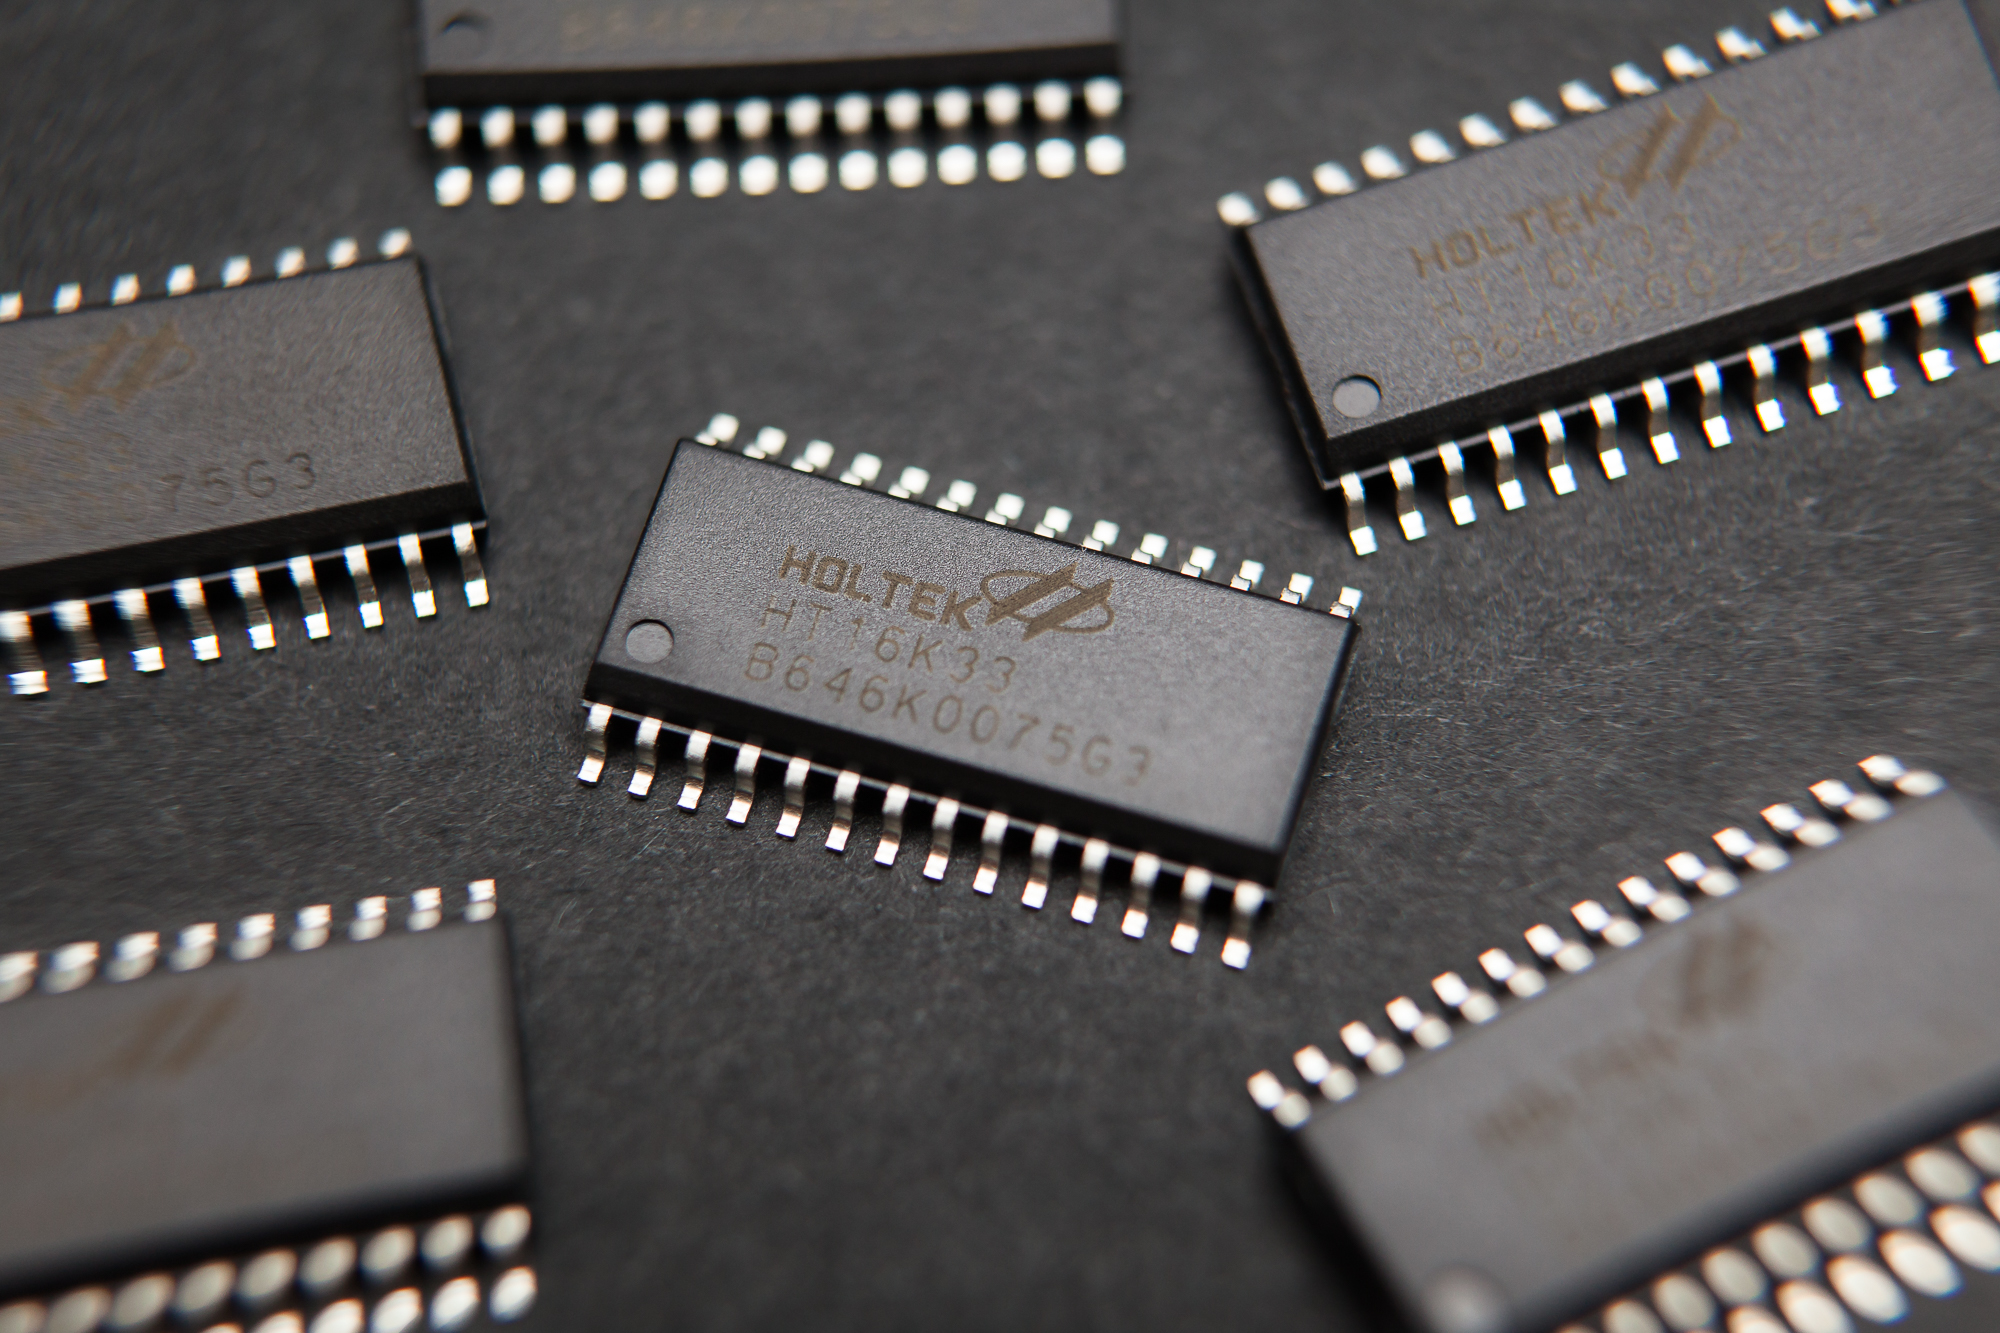
Now that all of the time circuit display electronics are in the mail it’s time to talk about programming the display. This starts with learning how to control LEDs with the Holtek HT16K33 integrated circuit (IC), which I’m using as the display’s matrix driver.
(more…)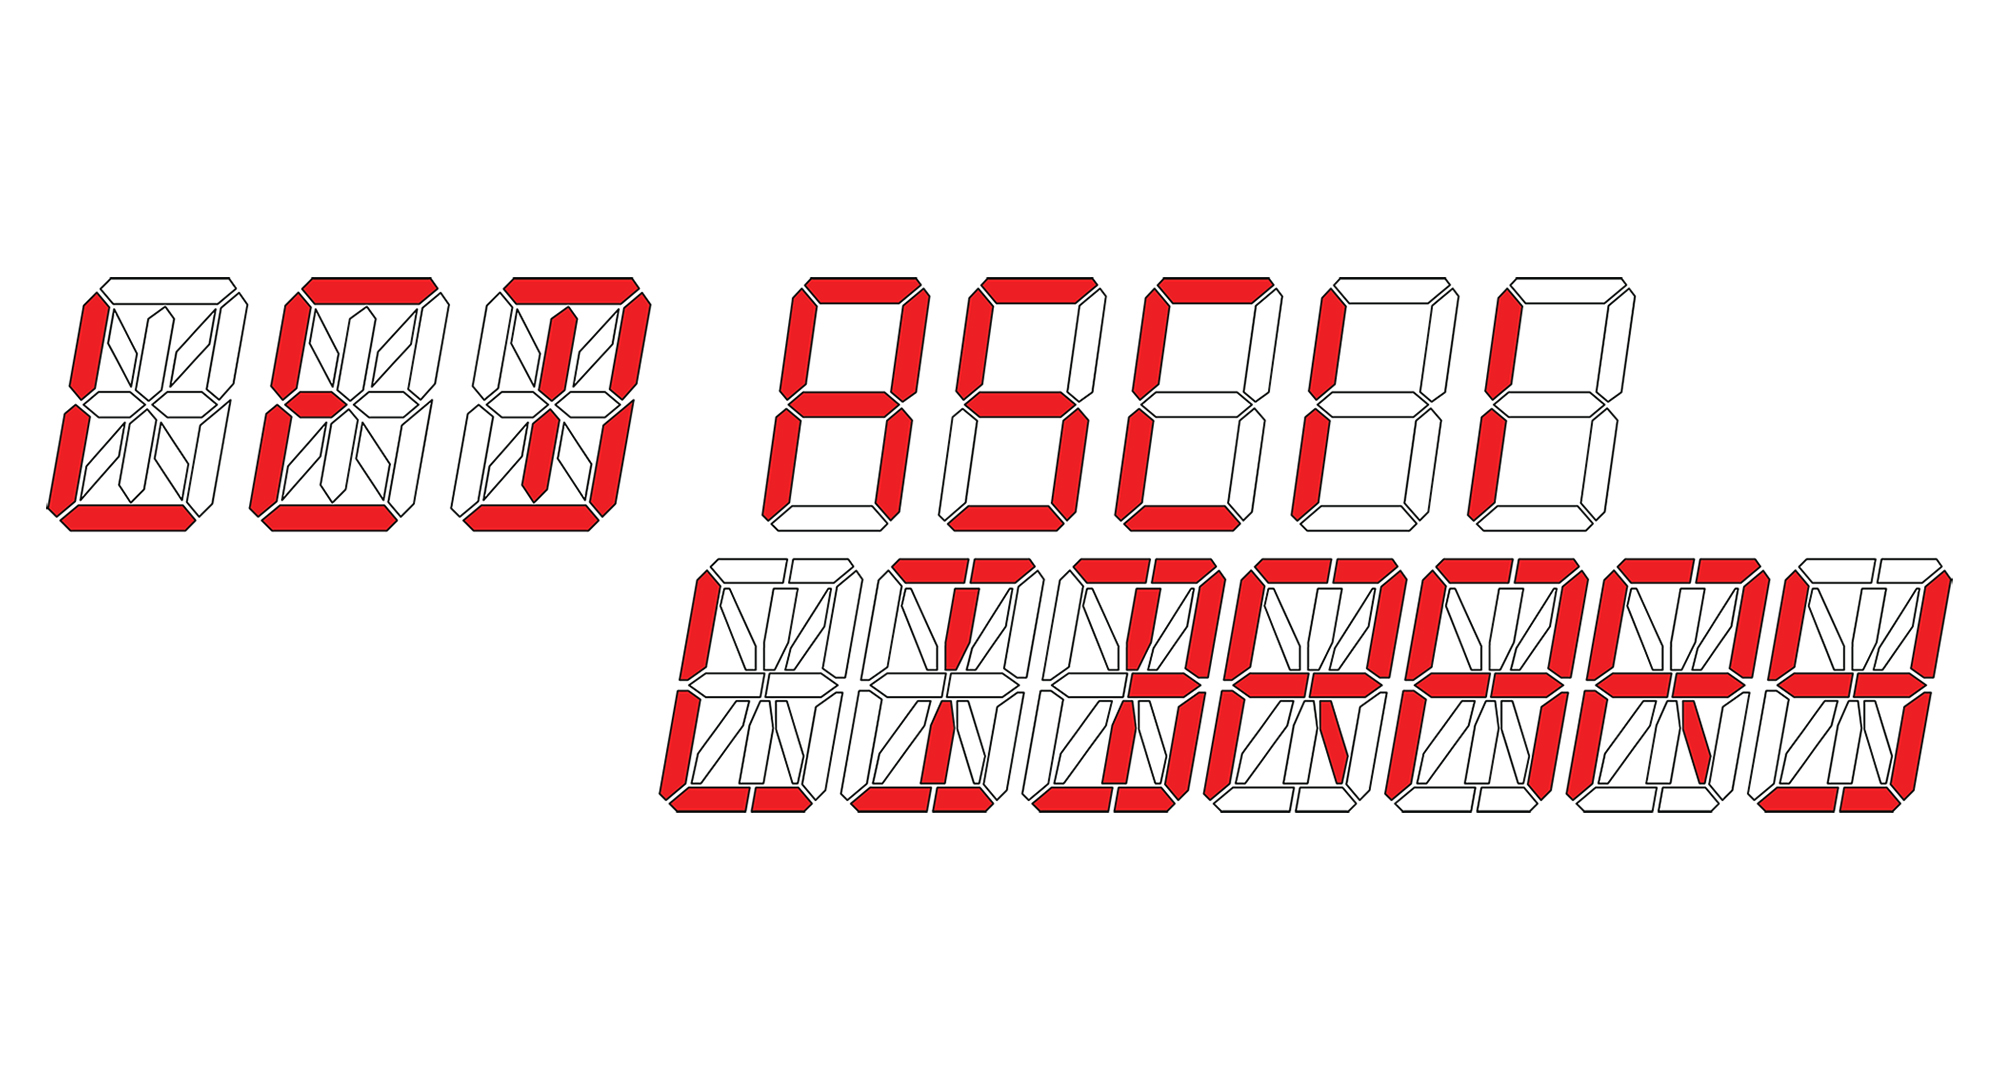
When it came time to start the programming for my time circuit displays, I needed a library of characters for segmented LED displays so that I could not only show the time, but also display strings of text. Maybe I wasn’t looking hard enough or I was looking in the wrong place, but much to my dismay I couldn’t find a readily-accessible library to use. So I’ve made my own and I want to share it so others don’t run into this same problem.
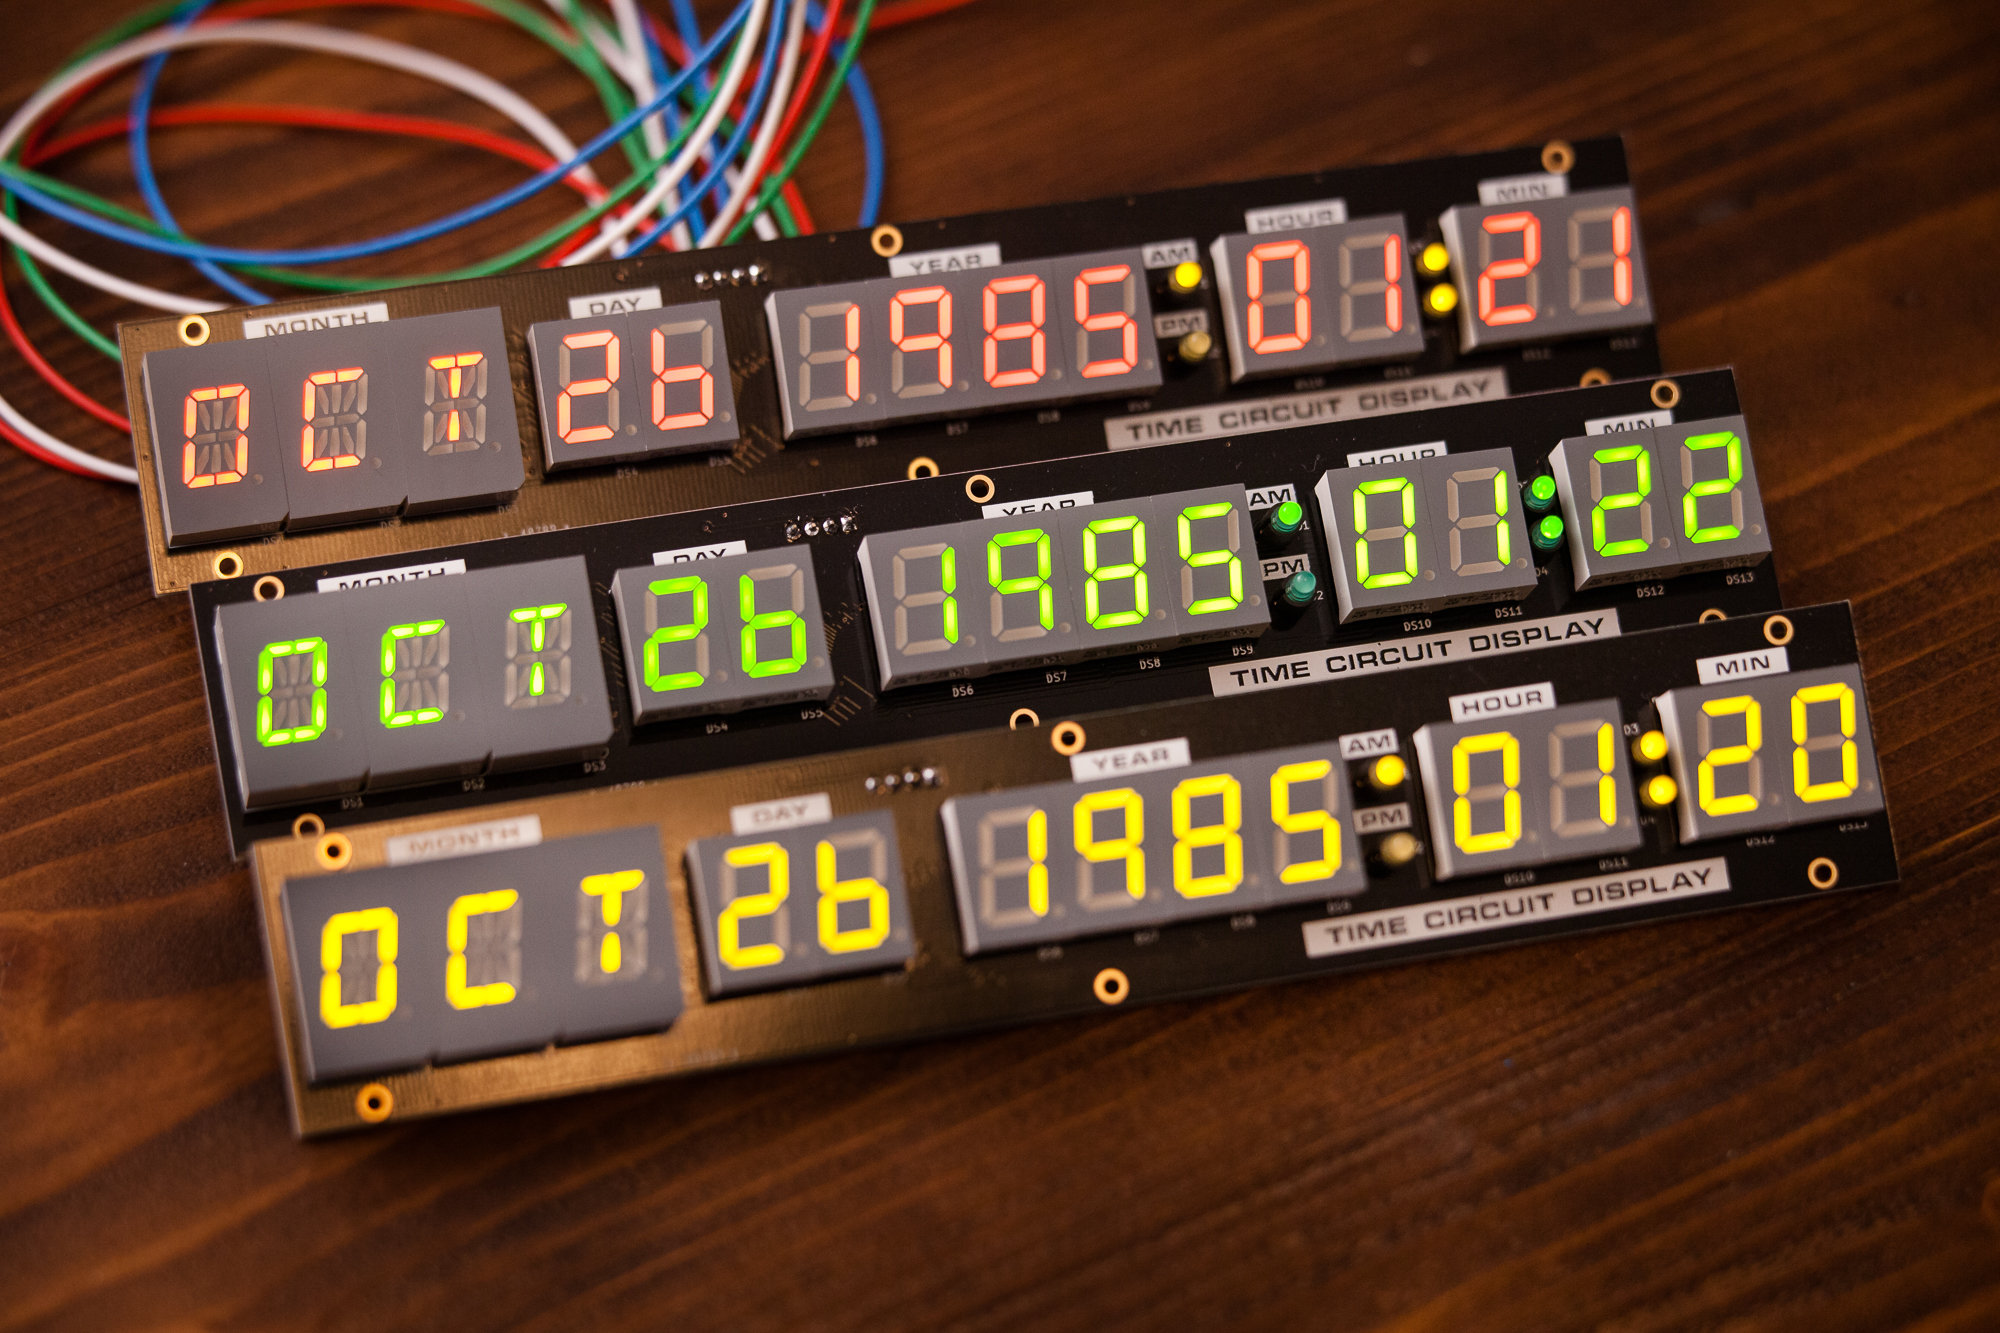
The goal of this project is to build my own personal replica of the DeLorean’s “Time Circuits”, as featured in the Back to the Future movie trilogy. I’ll need to build custom time circuit displays, a custom keypad for changing the date, and screen-accurate enclosures. To make everything function, I’ll need to design and program some embedded circuits to control it all.
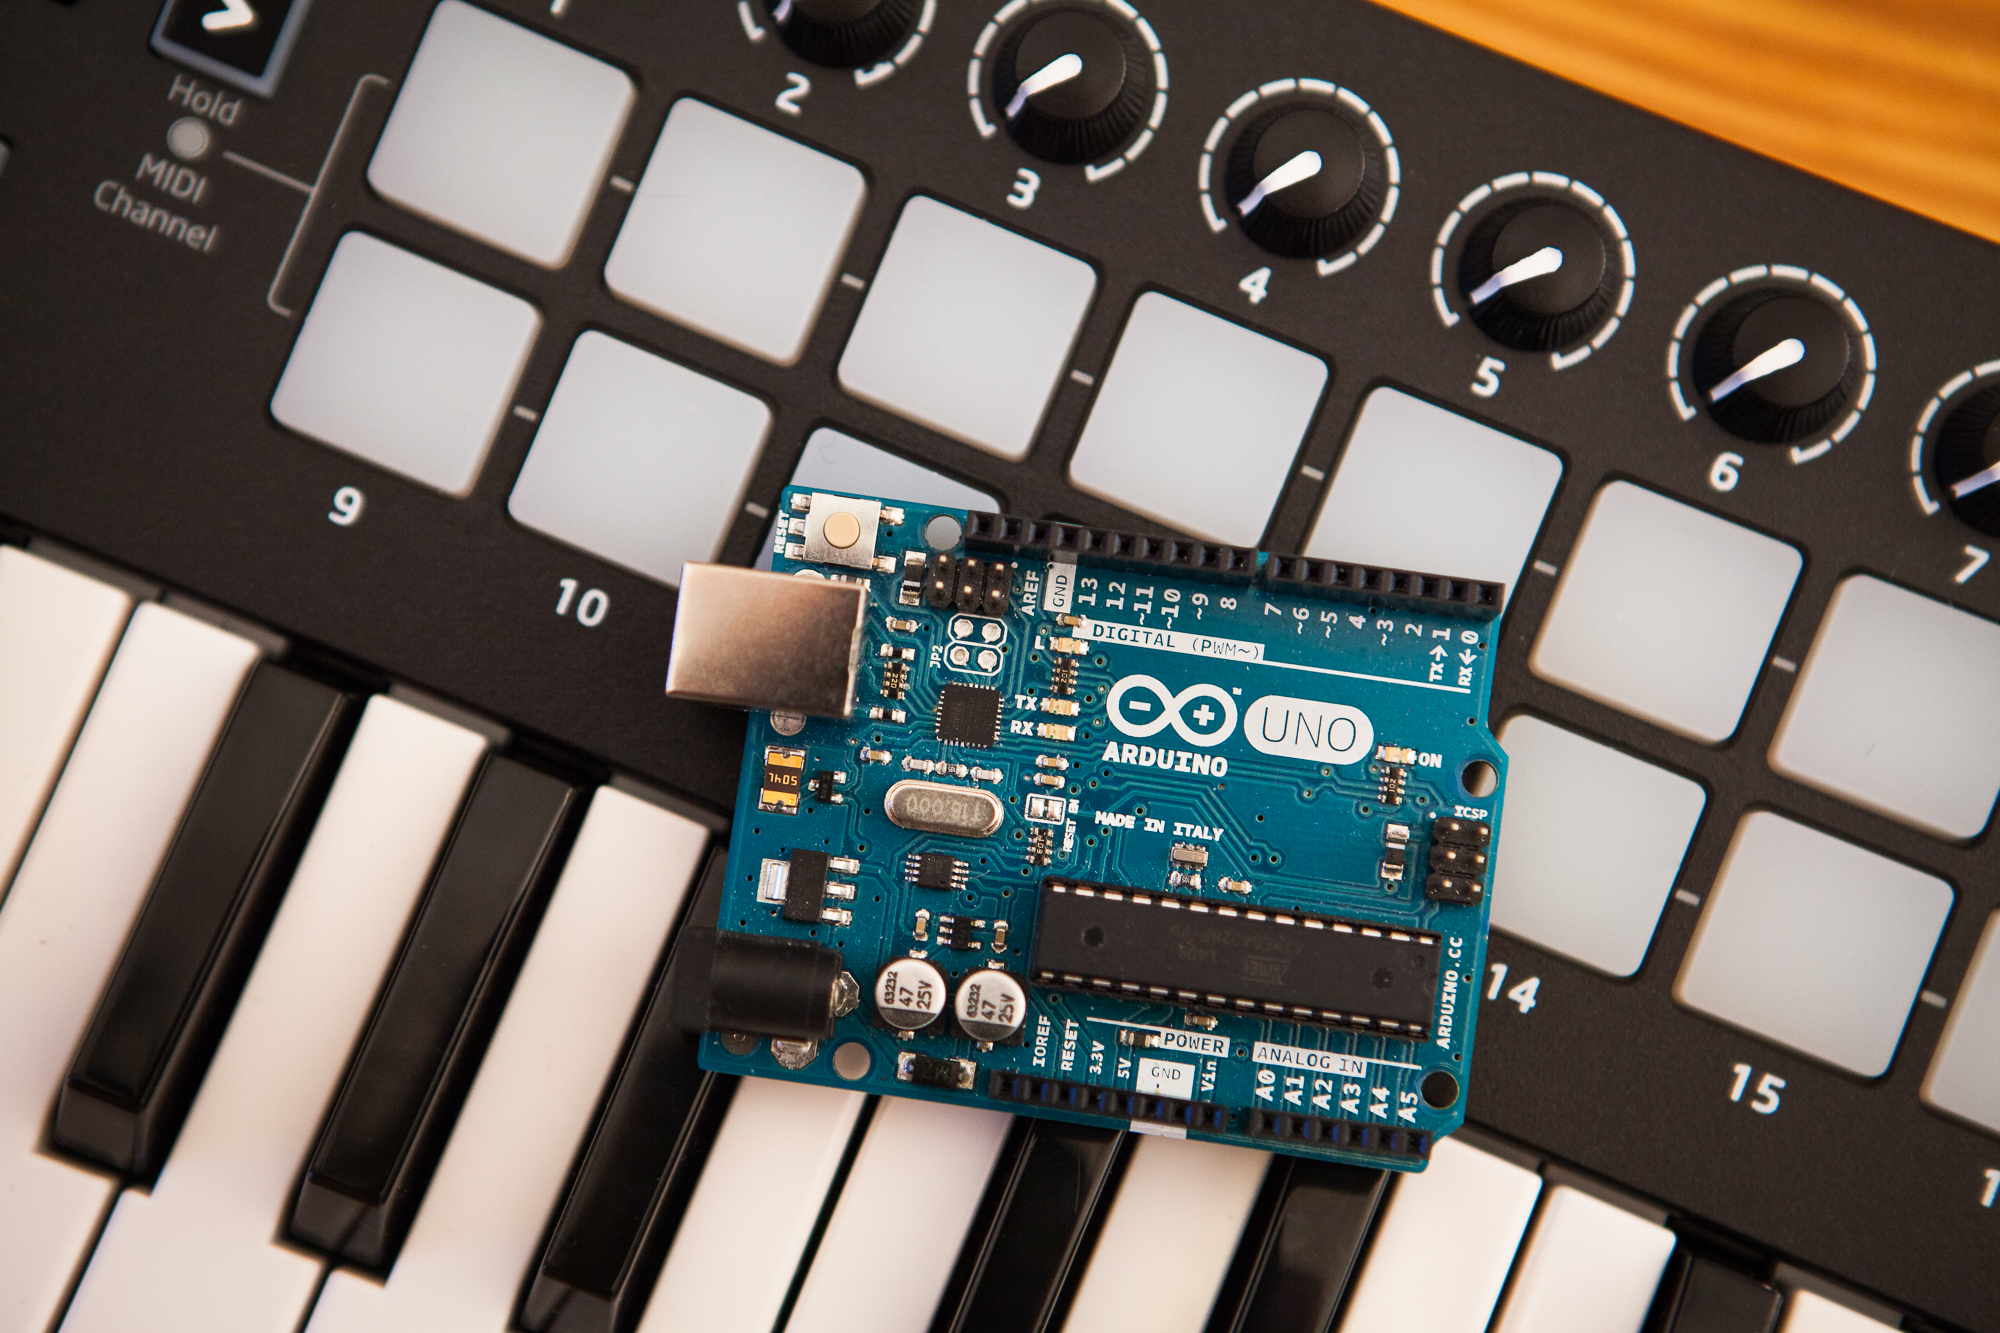
I’ve been messing around with MIDI for my musical floppy drive project, and it was surprisingly difficult to find detailed information on how to get started with Arduino’s MIDI library. So in this post I’m going to show you, in detail, how to use this library to control anything on an Arduino using MIDI.
(more…)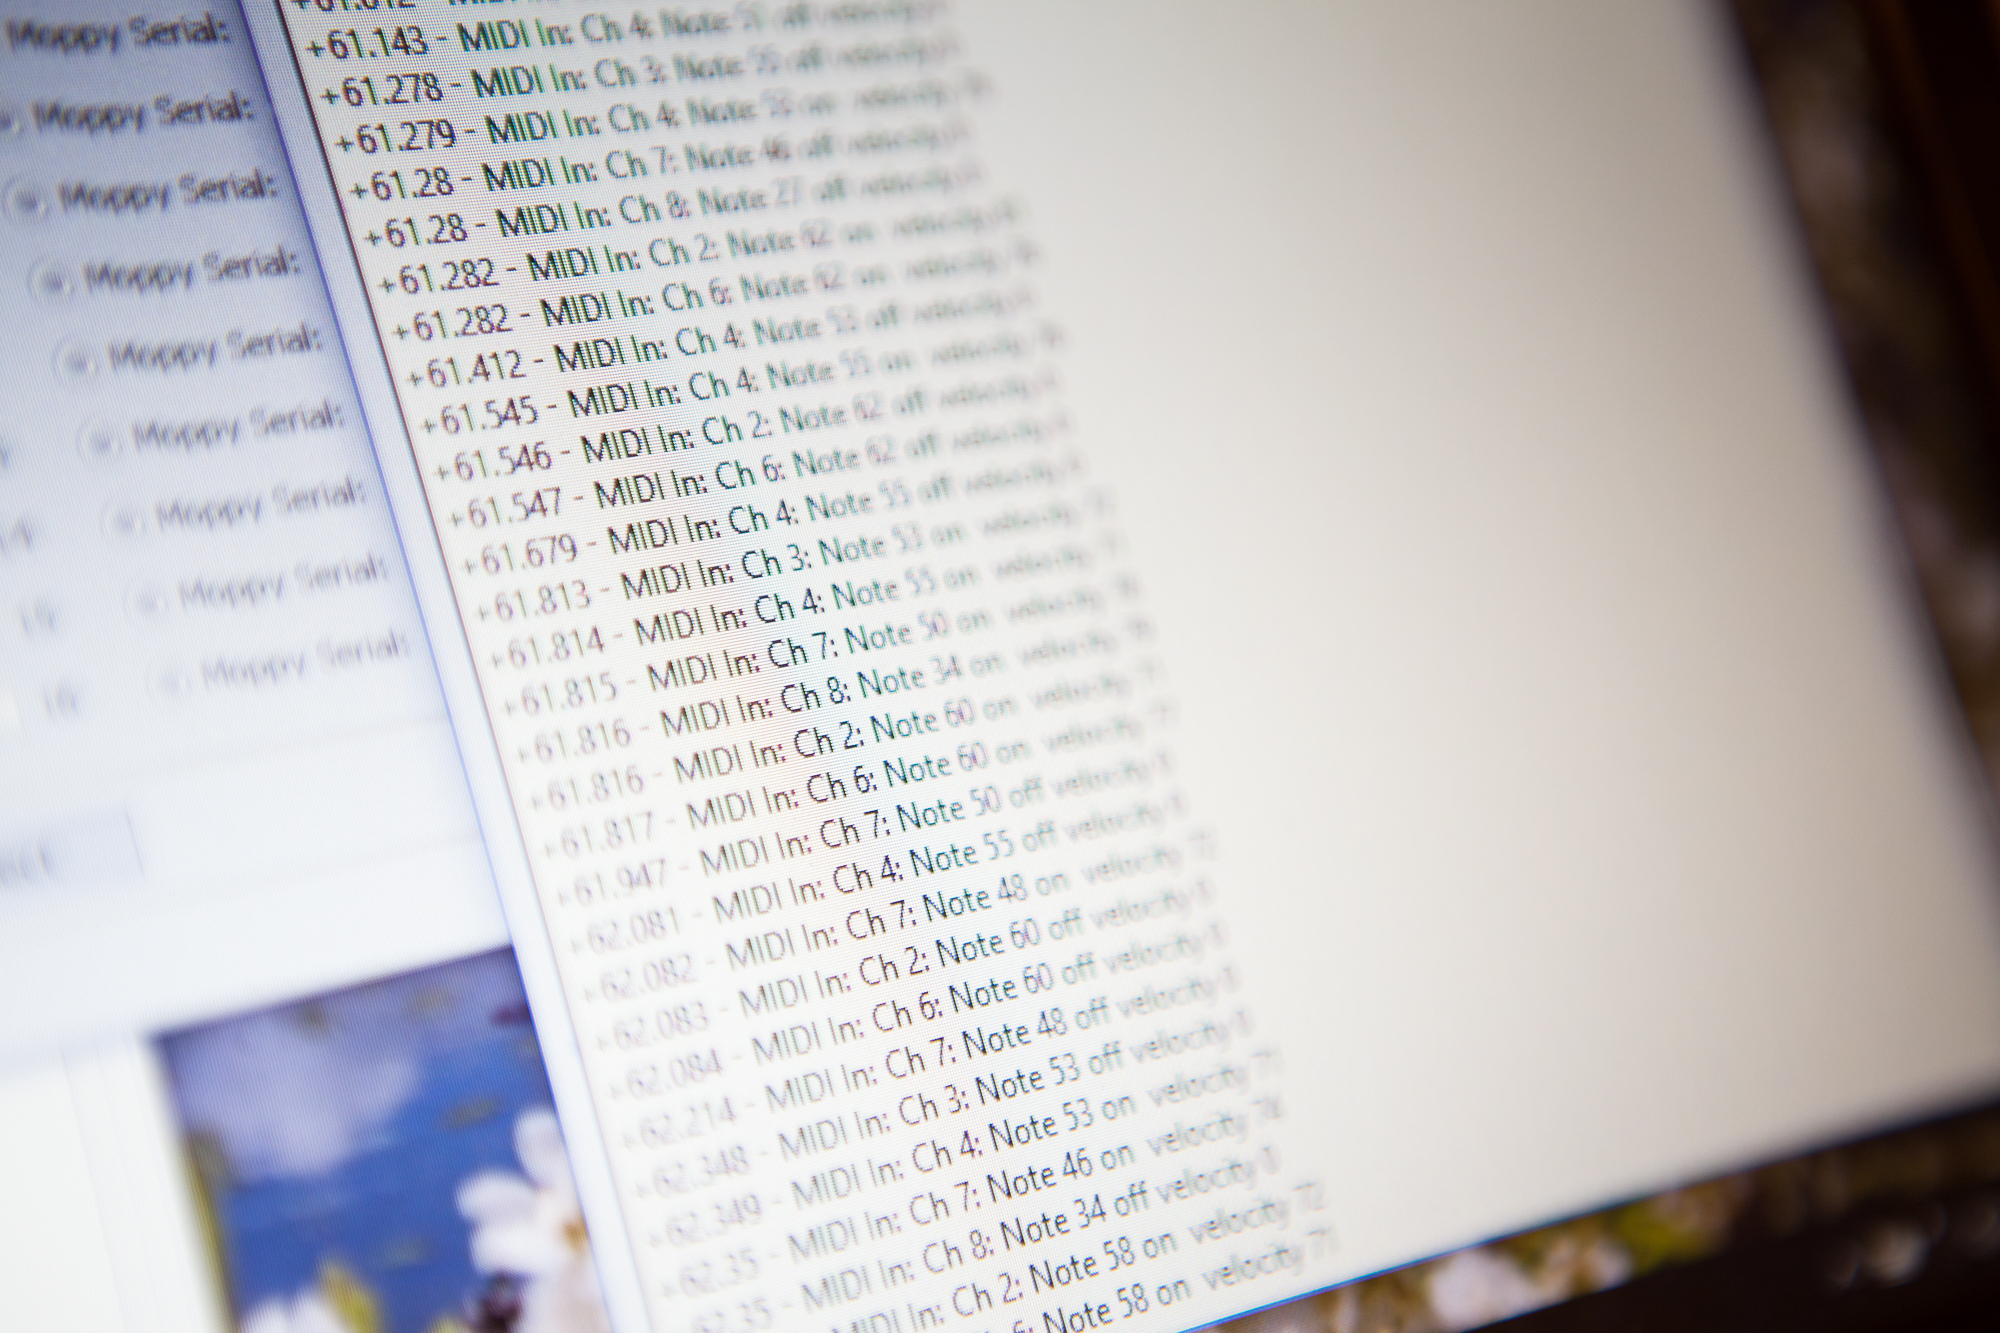
One of my first thoughts on how to improve Moppy was to drive it directly via MIDI. At the moment, the format of serial messages sent to the drive controller is proprietary and requires using the “MoppyDesk” application on your PC to convert MIDI notes into playable pins and wave periods.
What if we can skip the PC altogether and simply plug a MIDI cable into the floppy drive controller? The goal of this experiment is just to see if this is feasible.
(more…)