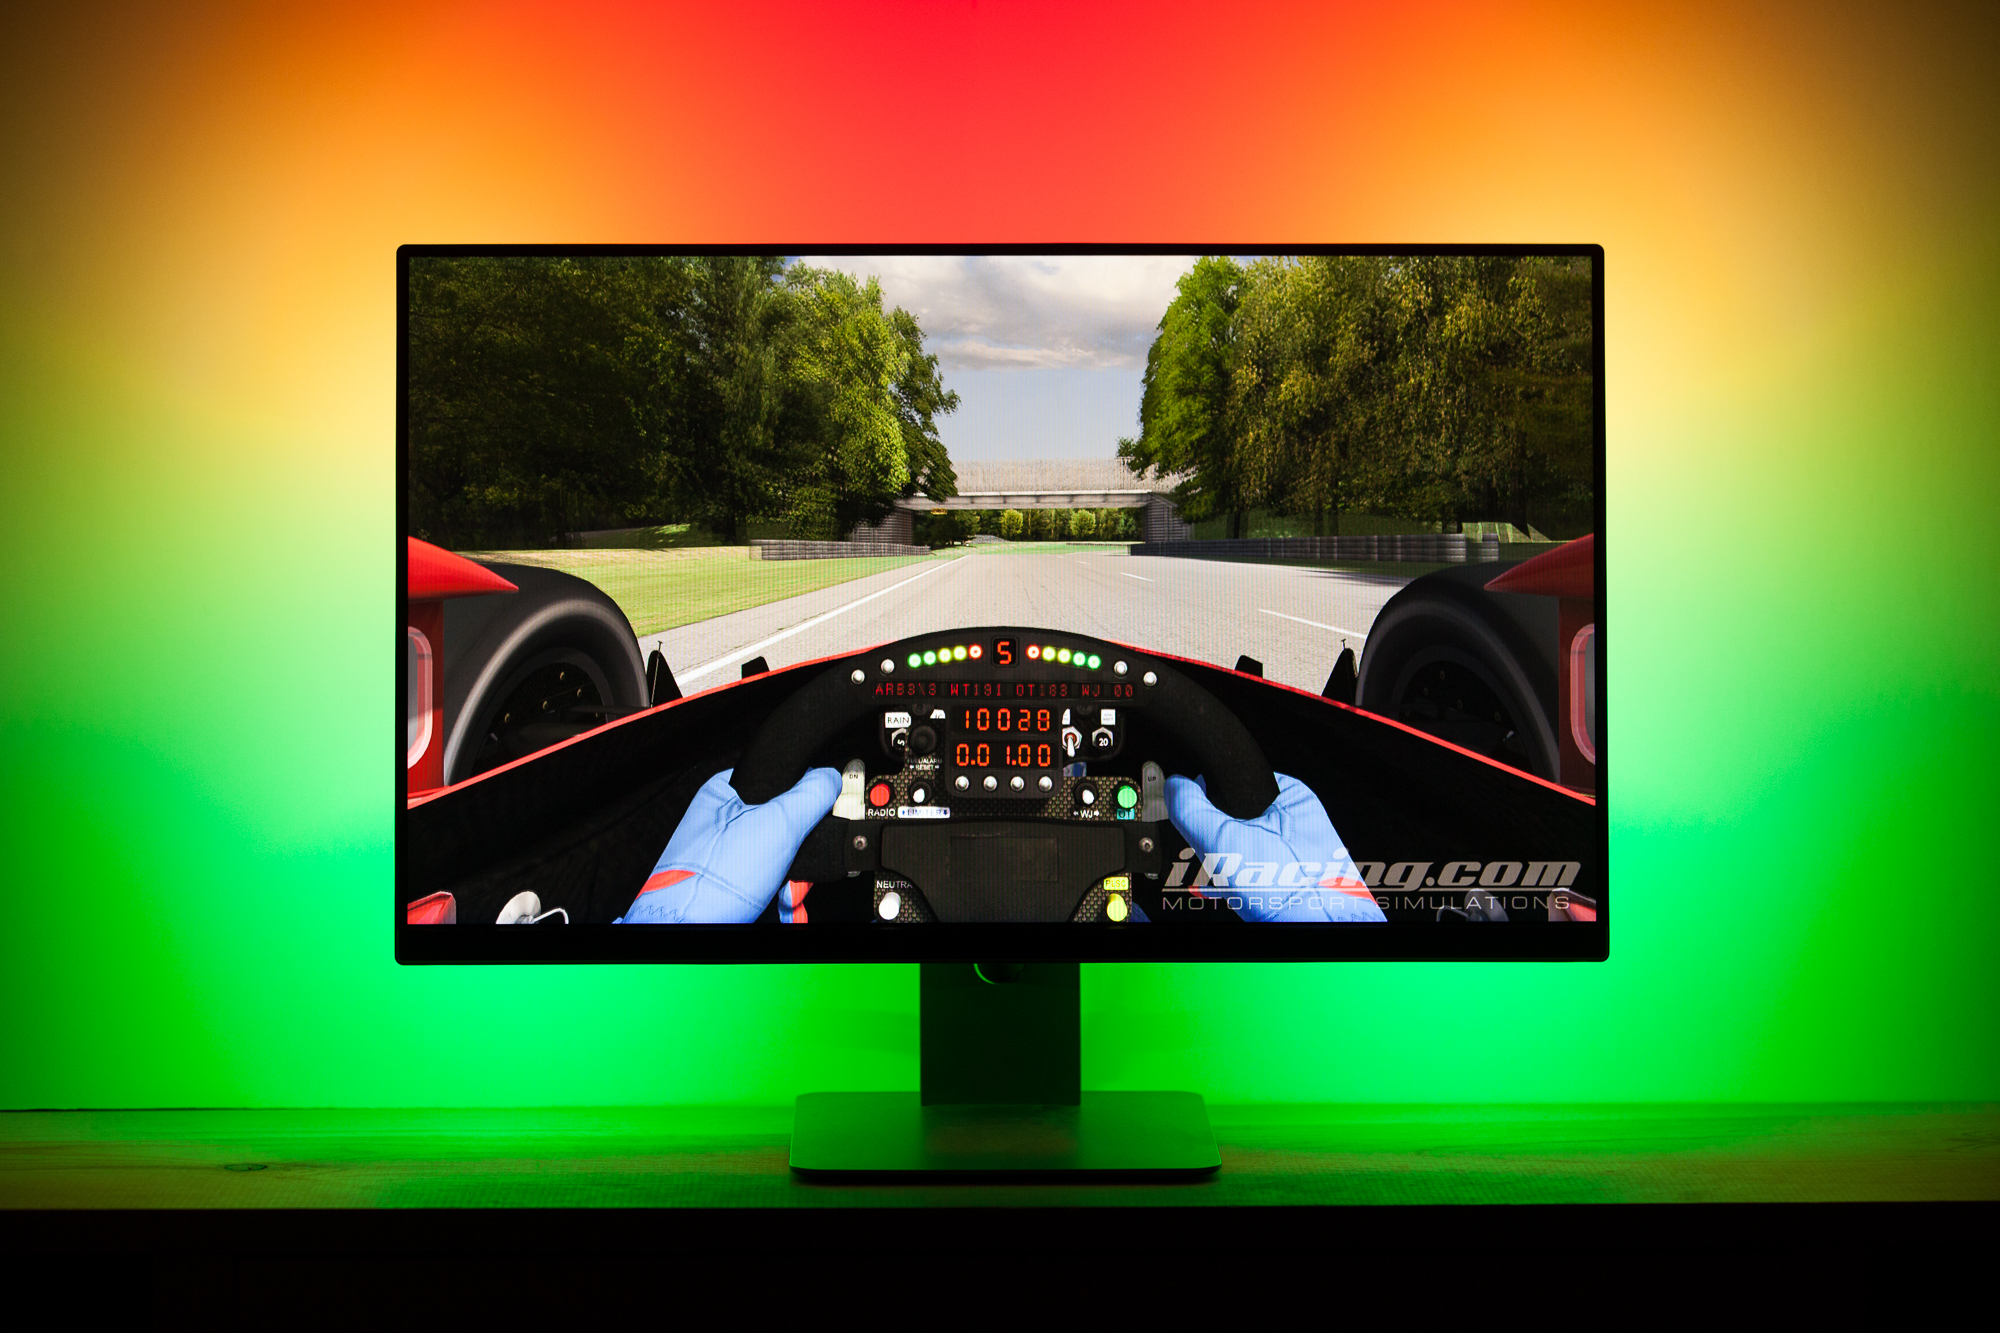
As cool as I think ambilights are, using Adalight with my DIY setup has one major limitation: framerate.
Video technology works on a principle caused persistence of vision, which means that our brains still “see” an image briefly after it’s taken away. If you replace the images quickly enough, our brains interpolate the differences between them and we get an illusion of motion.
This post is part of a series on creating a DIY ambilight using Adalight and WS2812B LEDs. Check out the project page here.
What is ‘quick enough’ depends on both the technology and the audience. Feature films are typically projected at 24 frames per second (fps), TV at 30 fps, and most computer monitors at 60 fps. Professional video game players run monitors that update even faster, often at 144 or 240 fps. Those are numbers for full-color, highly detailed moving images though. A small LCD in your car that only shows a clock may update much more slowly.
My current setup uses an Arduino Nano running at 16 MHz and an 80 LED string of WS2812Bs. With this exact setup, the highest framerate I was originally able to achieve with Prismatik was approximately 33 frames per second. This is significantly lower than the 60 hz monitor the ambilight is running on.
Is this an issue?
So before we get into the nitty-gritty here’s the fundamental question: Is Adalight’s low framerate a problem that needs to be fixed?
For my setup: not really. But it wouldn’t hurt.
An ambilight is just that: ambiance. It’s something that you’re never looking at directly, that complements a monitor providing the image and is never the sole focus. To that extent, lower framerate is less of an issue.
Lower framerate is most noticable in moving gradients and fast motion, and if you’re paying attention you’ll definitely be able to pick up on it. Otherwise, edge colors don’t change as dramatically as colors towards the center of the screen, and it’s unlikely that you’d see the difference between 30 and 60 fps (at least where an ambilight is concerned).
Not everyone is getting 30 fps on their setup, though. When I made the Adalight-FastLED repository, a few people messaged me saying that it didn’t work with their setup of 100, 120, even 135 LEDs (!!!). Although the bug causing those issues is now fixed, with those setups your framerate is significantly lower and might be a serious problem.
But even if I’m satisfied with 30 fps, that doesn’t mean increasing it isn’t worthwhile. Smoother gradients are always better, more responsive fast motion is always better, and higher framerate is, generally, always better. So let’s see if we can do something about it!
Measuring Methodology
Other than my initial measurements, most of this post is theory and conjecture. But I wanted to write a brief explanation for some of the data graph photos.
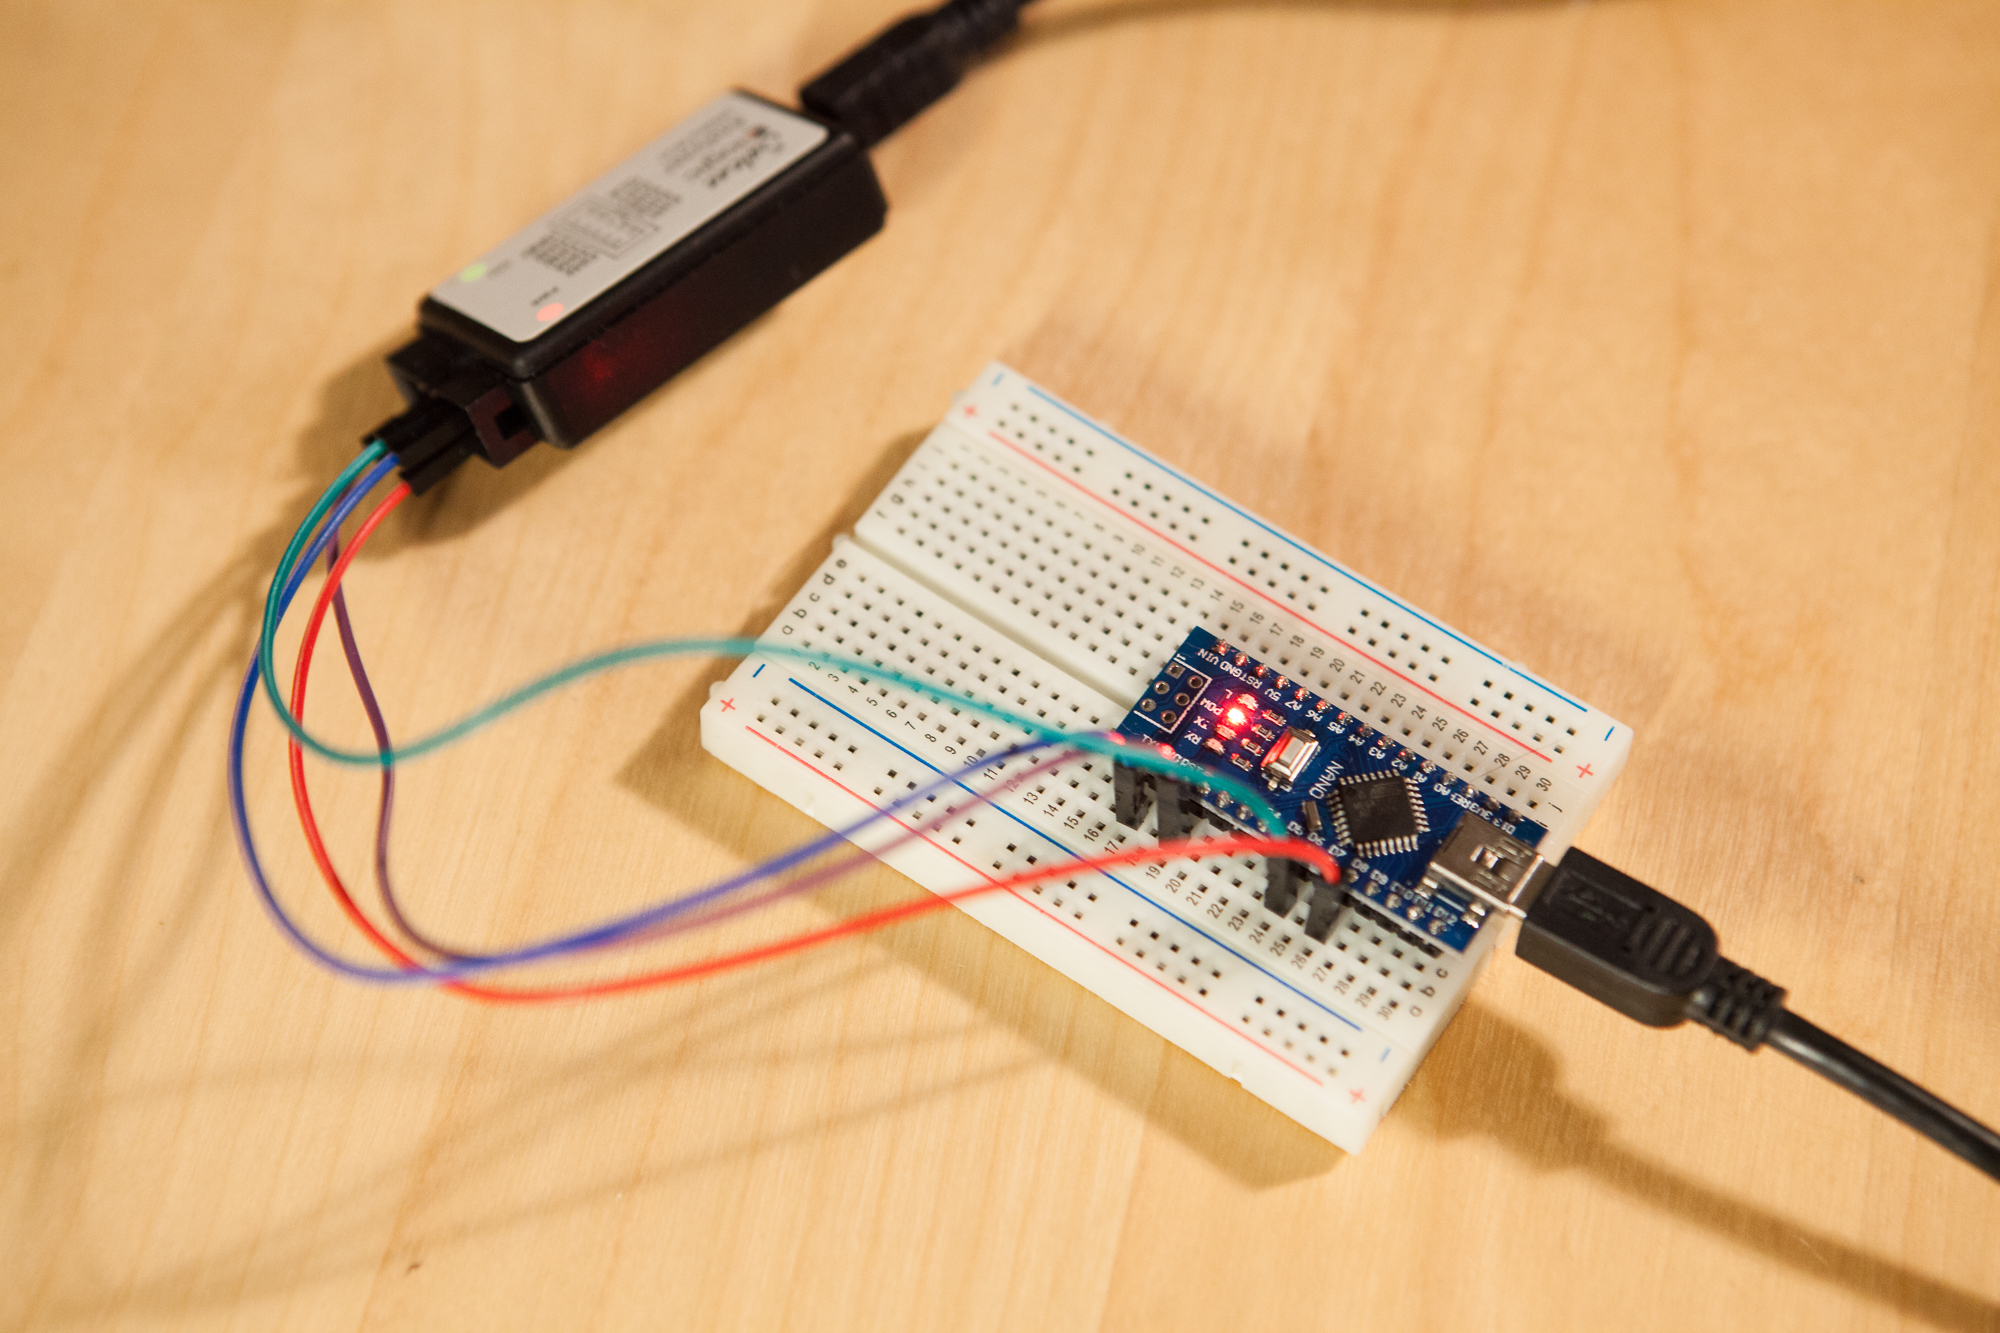
For timing and efficiency measurements I’m using a 3rd party logic analyzer that works with the Saleae Logic software. The logic analyzer is connected to:
Pin #0: Serial RX
Pin #6: LED data
Pin #8: FPS latch
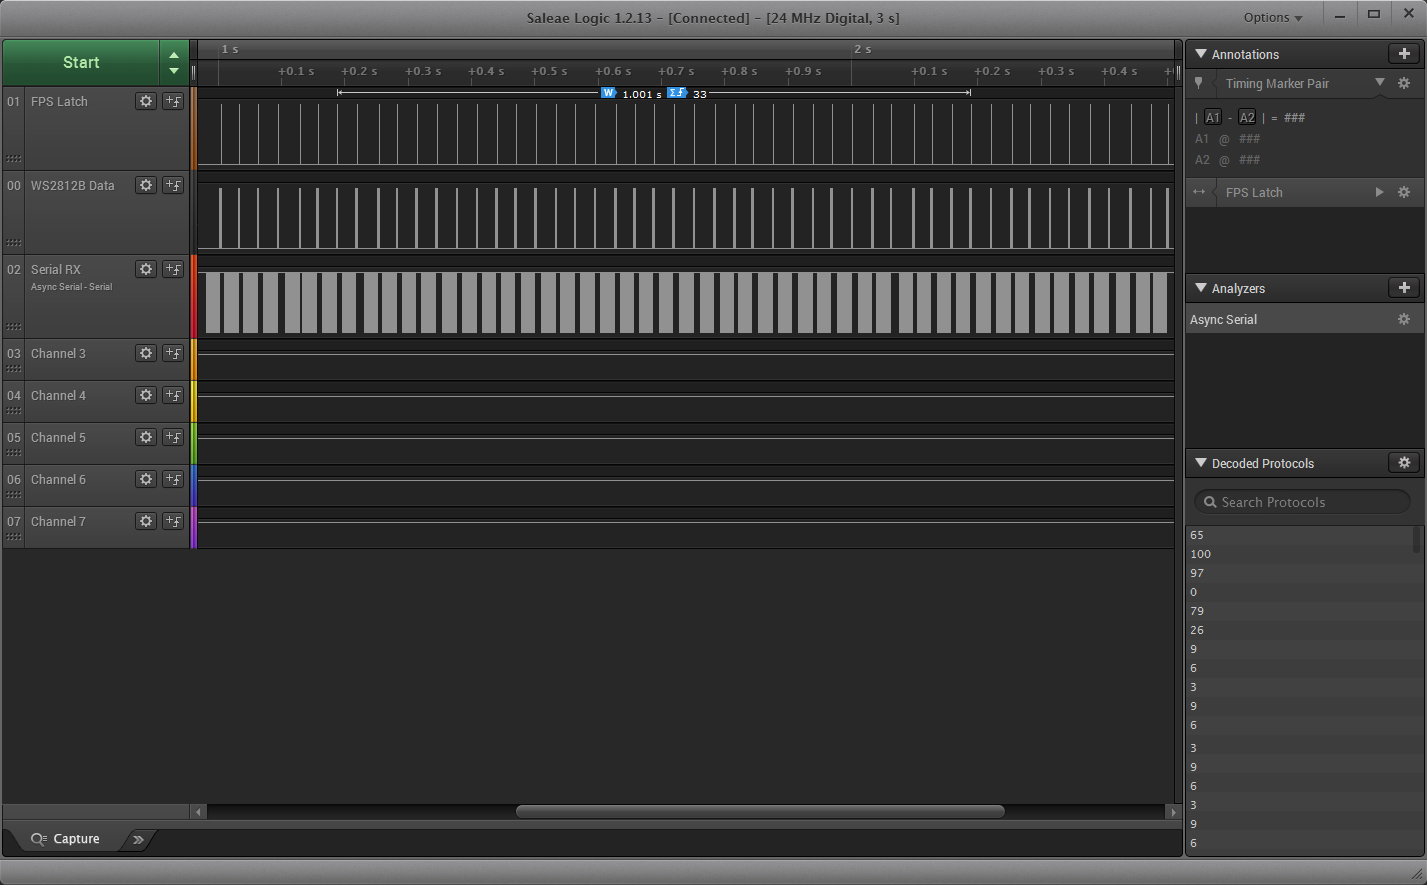
The first two should be self-explanatory. Pin #8 is set to pulse on the LED latch, and measuring the number of rising or falling edges in Logic over a 1 second period gives us the framerate.
Meet The Contestants
In the Adalight code, there are three major factors that influence framerate:
- Execution speed
- LED speed
- Serial speed
Let’s talk about each one in turn.
Execution Speed
This is the simplest and easiest to understand. Because the Adalight code is running on an embedded microcontroller, the first potential source of low framerate is how fast the controller can process the incoming data.
The Adalight-FastLED code is pretty good in regards to this. Serial data is processed immediately, and header mismatches instantly reset rather than recheck the entire header from a new index point (see the original Adalight code). Data types are kept to minimum possible sizes, and the “timeout” functions are only checked if there is no new serial data available.
Of course, running the code on a faster processor wouldn’t hurt. Although ubiquitous, the Arduino family is relatively slow for a modern microcontroller. For the Adalight code however, it is plenty fast. It’s only at faster framerates that the execution speed will start to come into effect.
While execution speed is generally important, the current code has a relatively small effect on the framerate. Our framerate issues are in another castle.
LED Speed
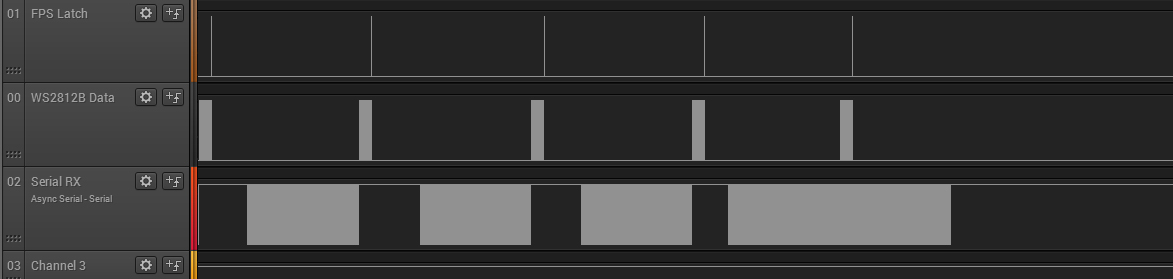
A dropped frame. Note the continuous block of serial data during the LED latch, and the lack of LED data following it.
The second source of low framerate is in how quickly the microcontroller can send data to the LEDs.
After receiving a matching header and all of the color data for the LEDs, the microcontroller needs to push the data to the LED strip itself. For this project I used WS2812B LEDs, which while popular are notoriously slow.
WS2812B LEDs use a bitbang protocol for data input that requires approximately 30 µs per RGB LED. For my 80 LED setup, that is 2.4 ms per frame that is just the LEDs receiving data and latching. That delay limits our theoretical framerate to ~410, which while slow is still well above the target framerate of 60.
But the time it takes to send the data doesn’t tell the whole story. These strict timing requirements mean that the microcontroller can’t be doing anything else, otherwise the timing may be off and the data to the LEDs corrupted. To accomplish this, the FastLED library disables all interrupts, which has the effect of breaking protocols like I2C and serial.
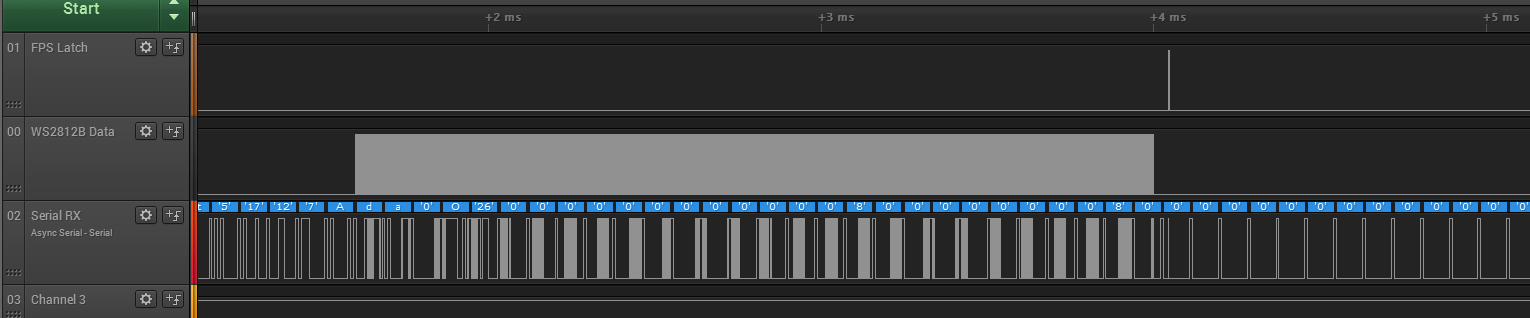
Serial data lost during LED latch. You can see the ASCII text for the header (‘A’ ‘d’ ‘a’)
Because the LEDs will latch immediately when all data is received, when the serial line is saturated this blocking will cut off the first few bytes of the next frame – i.e. the header information. Without the header information, this results in a dropped frame and the color information is discarded as it is parsed. This is another downside of using the WS2812B chipset with Adalight, and reduces framerate even further.
Note that if no serial data is sent during LED latching, this is not an issue. At a 20 ms “Grab Rate” in Prismatik, there is a ~10 ms gap between serial frames for my 80 LED setup. This is a perfect amount of time for the LEDs to latch and the microcontroller to prepare for the next frame. Any lower and the serial line saturates, causing dropped frames occur much more frequently.
These issues can be mitigated by either not having the PC send data when the LEDs are latching, or by using LEDs which don’t require disabling interrupts.
An Aside: Fortuitous Headers
It is possible, although unlikely, that within the color data of a dropped frame there exists a matching header (magic word “Ada” plus a correct 3-byte checksum). If this happens, misaligned color data and a portion of the following frame will be pushed to the LEDs. Assuming that the successive frame following the completed color data does not contain another matching header in its color data, the LEDs will go back into sync on the next complete frame.
Serial speed

The start of a serial data frame for Adalight (‘A’ ‘d’ ‘a’)
The third and most significant source of framerate issues with Adalight is the speed at which data is sent over serial.
For each frame, Adalight requires 3 bytes for the magic word, 3 bytes for the checksum, and 3 bytes of color information for each LED. Using my 80 LED setup as an example, we need 246 bytes per every frame.
The fastest standard serial speed, and the fastest one available in Prismatik, is 115200 baud. Baud is a representation of “symbols per second”, and for the standard asynchronous serial that Arduino uses a serial “packet” is composed of 8 data bits, 1 stop bit, and 1 start bit. This gives up an easy equation of 10 baud = 1 byte, so by dividing the baud rate by 10 we get our bytes-per-second (Bps).
At 115200 baud, we have 11,520 bytes per second. At 246 bytes per frame, that gives us a theoretical max of 46.8 frames per second, which is significantly lower than our ideal of 60 or higher.
With the WS2812B’s I’m using, the serial line can’t be saturated else the LED latching will cause dropped frames, producing a lower framerate than serial data properly spaced around the LED latching.
Improving the Framerate
We have a few options to increase the framerate. Here are some of the possibilities:
Switch to a faster microcontroller
Framerate Effect: Small (< 1)
One of the obvious answers is to switch to a faster microcontroller than the Arduino Nano. But because the code is lightweight as-is, this will have a small and likely unnoticeable effect until we get into higher framerates.
Switch to a different LED chipset
Framerate Effect: Significant (10+)
Switching to an LED chipset that both receives data faster and does not block the serial line would produce a moderate framerate increase. It would free up ~30 µs per LED per frame (2.4 ms per frame for my 80 LED setup), plus it would stop dropped frames. This might be something to look into for my setup in the future.
Reduce number of LEDs
Framerate Effect: Significant (10+)
With the calculations above, the 80 LED setup gives a theoretical max of 46.8 frames per second, requiring 246 bytes per frame. The relationship between frame data and number of LEDs is linear – by cutting the number of LEDs in half (from 80 to 40), the amount of data required is only 126 bytes rather than 246.
This reduces our serial data bottleneck dramatically, from a theoretical max of 46.8 up to 91.4. That is well above our goal of 60, and pushes the bottleneck back towards the WS2812B chipset and the possibility of dropped frames.
The downside with this is that you drive fewer LEDs, which reduces the ambilight’s resolution and brightness.
Increase serial baud rate
Framerate Effect: Significant (10+)
This is probably the easiest to do, and with the fewest downsides. In the same way that reducing the number of LEDs will increase the theoretical framerate throughput over serial, increasing the serial baud rate will allow a greater number of the same frames through.
A simple switch from 115,200 baud to 230,400 baud would double the data throughput, increasing framerate without affecting resolution or color fidelity in any way.
The downsides are that not all hardware supports serial baud rates above 115200, and that increasing the data rate also increases the impact of noise, as pulse durations are shorter.
Wait for acknowledge before new frame
Framerate Effect: Moderate (5+)
This is a protocol change, but it would solve all of the frame dropping problems with WS2812B LEDs.
At the moment, Prismatik uses a delay to handle host-side framerate capture. If we were to modify this behavior, so the host would wait for an acknowledge string from the microcontroller before sending the next frame, we could eliminate both dropped frames and wasted processor cycles between frames.
This of course would require a modification to both the Adalight-FastLED code and the PC host software, and is not currently implemented.
Reduce LED color depth
Framerate Effect: Moderate (5+)
This one is out of left field, but due to the serial bottleneck it would be possible to increase framerate by reducing how much data is required per LED.
At the moment, the LEDs are working with 8-bit color depth. In other words, each LED requires a single byte per color channel (RGB) and can represent color values between 0 – 255 for each channel. If you reduce the color resolution to say 4-bit color (0 – 15), you would only need half as many bytes per LED.
The downside is that this would significantly reduce color accuracy and gradation, going from 16.8 million possible colors to 4096. 4-bit color is a bit extreme, but it demonstrates the concept. 7 bit color (0 – 127) would be more reasonable, although it would only reduce data by 3 bits per LED (~12.5%).
Lower bit depth would also require additional processing on the microcontroller to assign each portion of a byte to a full byte. It’s also a change to the Adalight protocol, and the host application would need to bit shift the color information before sending it to the microcontroller.
Reduce the number of color channels
Framerate Effect: Significant (10+)
Who needs color anyways, right?
In the same vein as reducing color depth, you can significantly reduce the number of bytes required per frame by reducing the number of color channels. Red / Green / Blue (RGB) makes 3 bytes per channel, but omitting one of them (e.g. Red / Green with no Blue) gives you a tint but requires only 2/3rds the number of bytes. Omitting two of them leaves you with monochromatic lights (black & white), but only requires 1/3rd the number of bytes as full color!
This has the same downsides that color depth does: reduced color fidelity, additional processing, and protocol changes. But if you’re only playing black & white movies with your ambilight, it might be a good solution.
Conclusion
I’ve been wanting to write this post for awhile now, and it probably would have been better to publish it before I called the project “complete”. But I’m glad I spent some time thinking about this, as it has me interested in improving framerate in the current implementation.
If I end up rebuilding this project in the future, I will definitely look into using a different LED chipset. WS2812B is inviting because it’s so popular, but it’s not the best choice for every project (including this one).
In the meantime, I’ll probably write some code for grouping the LEDs so I can get by with sending less data over serial, and I’ll also open an issue on the Prismatik fork to see if we can add faster serial rates.
Updated Results
For my own setup, I was able to improve the framerate to a solid 60+ by increasing the serial baud rate from 115,200 up to 250,000. Psieg’s Prismatik fork now supports faster serial baud rates in the setup wizard as of version 5.11.2.16 (June 18th, 2018), and increasing the serial baud rate above 115,200 should be your go-to method for increasing the output framerate. If you cannot increase the framerate enough by maxing out the baud rate, the next step is to reduce the number of LEDs you’re using.