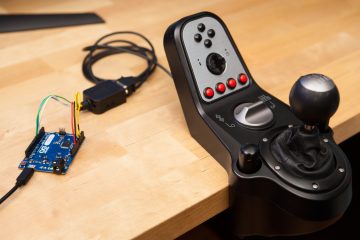
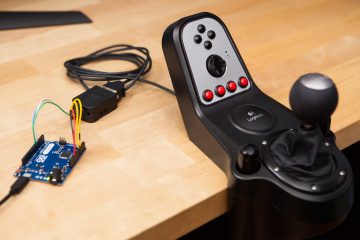
The Logitech Driving Force shifter is an awesome piece of kit. It’s small, stylish, robust, and inexpensive. But unfortunately it has one major drawback: it’s dumb! It has no “smart” electronics whatsoever, just a simple DB-9 connector that absolutely must be plugged into a Logitech wheel base unit in order to function. If you (like me) don’t happen to have a fancy Logitech racing wheel, you have to come up with some other way of connecting the shifter to your PC.

I’m going to show you you can how to build your own DIY adapter in under 15 minutes using only a handful of parts. This is an easy project and requires absolutely no soldering.

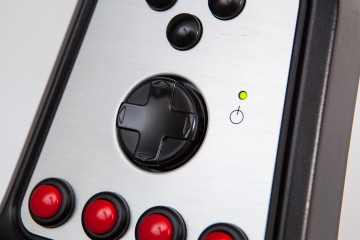
This guide is for the Logitech “Driving Force” shifter, compatible with the G923, G920, and G29 wheels. It has no buttons and no sequential shift mode.

If your shifter has buttons and a sequential shift mode knob, you should follow the G25 shifter tutorial. If your shifter has buttons but no sequential shift mode knob, you should follow the G27 shifter tutorial.

Before you begin, check that you’re following the right tutorial. The wiring and code is not interchangeable between the different shifter types.

Supplies

Here’s what you’re going to need to build this adapter:

(These are affiliate links. As an Amazon Affiliate I earn from qualifying purchases.)

Please note that you cannot use an Arduino Uno, Nano, or Mega. They are not capable of running the included USB joystick firmware. You can use an Arduino Micro or SparkFun Pro Micro, although those will require you to solder to the headers.

It is important that you use solid-core wire and not stranded wire. This will ensure that you can get a good connection between the wire and the terminals on both the connector and the Arduino.

If you have access to a wire stripper and/or a pair of flush cut pliers I would recommend using those in place of the needle-nose pliers, although they’re not necessary.

Step #1: Prep the Wires

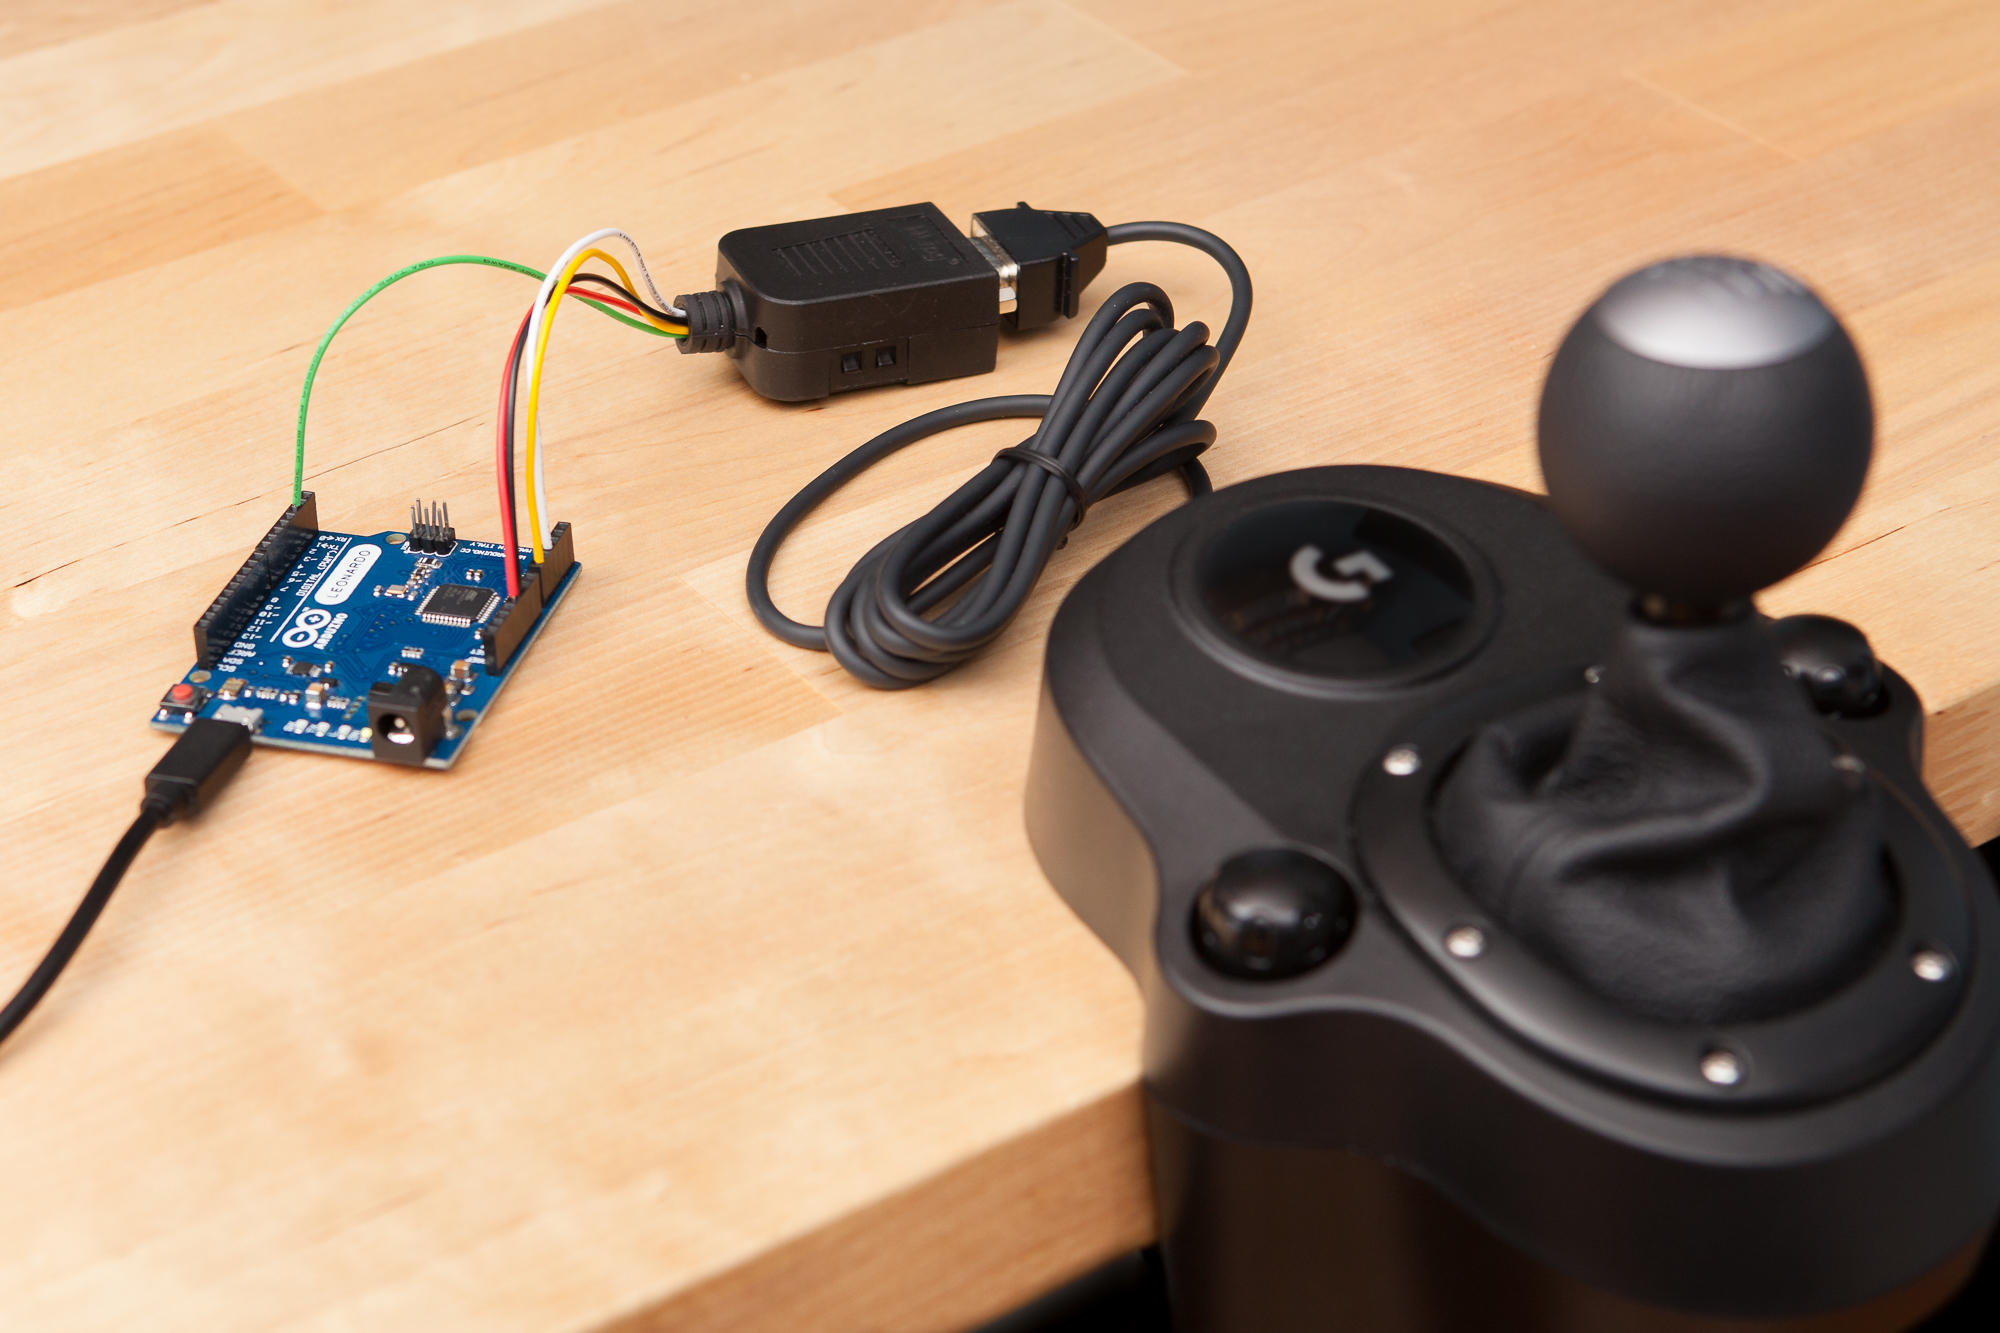
The first thing you’re going to do is cut the wires to length. We’re going to need 5 wires, each cut to about 7″ long. If you can, make each of these wires a different color. The colors I’m using are yellow, green, black, red, and white. Your wires don’t have to be color-coded, but it does make it much easier to assemble.

Using your pliers, strip off about 1/4″ from one end of each of the wires. Then grasp and bend the stripped portion until it’s at a right angle to the rest of the wire. Do not strip the other end of the wires just yet.

You’ll also need 1 short wire, about 2.5″ long. If you’re following my color scheme, it should be red. Strip and bend both ends of this wire.

Step #2: Wiring

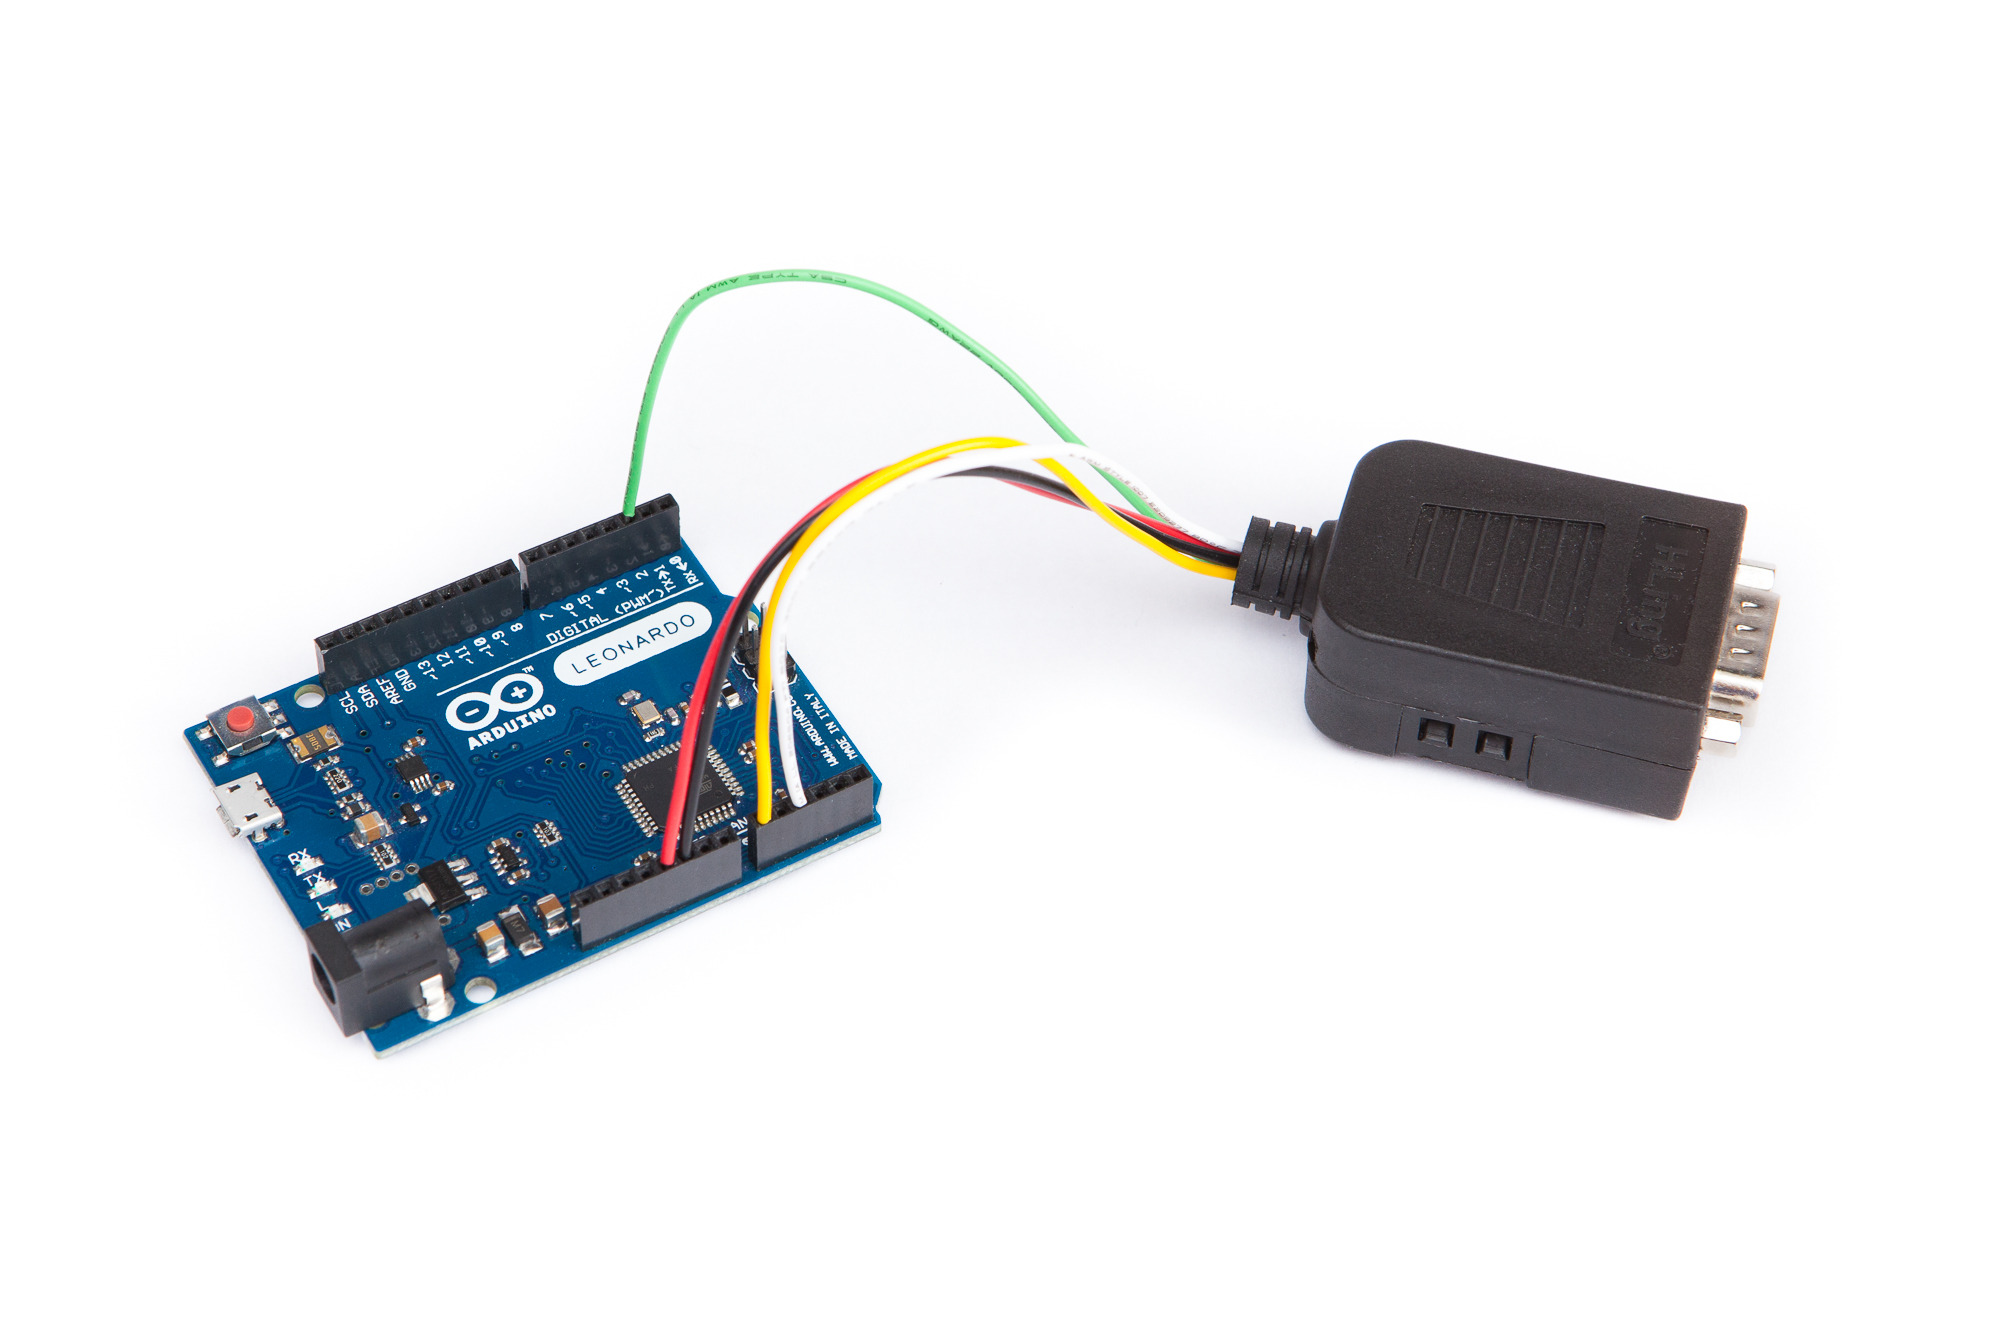
Remove the connector from its plastic casing. Using the included screwdriver, you’re going to loosen each terminal by turning counter-clockwise, insert a wire, then tighten the terminal by turning clockwise. The wires should be oriented away from the DB9 connector.

Here is the list of connections. Be sure to connect the wires one at a time in the same order as the table (top to bottom). This way, no wires will overlap the pins you’re trying to connect to.

Five of the wires connect to a single pin and go towards the Arduino. The sixth wire (the short one!) connects between two pins on the DB9 connector. Wire this connection around the back of the connector.

DB9 PinArduino PinColorFunction
4A0YellowX Axis
22GreenReverse
6GNDBlackGround
8A2WhiteY Axis
95VRedPower
3/7-RedPower

Double-check your connections, then slide the case’s rubber grommet onto the connected wires (with the flange facing towards the connector). Insert the connector back into its case, and then install the included screws and strain relief bracket. These will hold the wires securely so there will be less risk of the screw terminal connections coming loose. Close the connector’s case.

Now for the connections to the Arduino. Strip the other ends of the wires, again about a 1/4″. One at a time, insert the wires into Arduino following the table above. Unlike with the DB9 connector, the order in which you add the wires does not matter.

Once you have the adapter fully wired, double-check your connections before proceeding to the next step.

Step #3: Programming

Download and install the latest version of the Arduino IDE. You’ll also need two libraries:

Download both of these by clicking on the “Source Code .zip” links. In the IDE, we can install them by going to:

Sketch > Include Library > Add .ZIP Library

Add both libraries to the IDE. If you get stuck, take a look at the official libraries installation tutorial.

Once the libraries are installed, we’re going to load the Sim Racing Library example called LogitechShifter_Joystick. In the menu, go to:

File > Examples > Sim Racing Library > Shifter > LogitechShifter > LogitechShifter_Joystick

A new window should open with the example program. Back up in the menu, we need to set the board to the Leonardo:

Tools > Boards > Arduino Leonardo

While you’re there, look at the list of serial ports (Tools > Ports). Mentally note if there are any ports present, then close out of the menu. Plug in your Arduino and then open the ports menu once again, you should see a new port listed for your Leonardo. Select that port.

Now click the “Upload” button with the arrow icon in the upper left of the window. If all is well, the Arduino IDE will compile and upload the program to your Leonardo. Look for the “Done uploading” status in the window once it’s done.

Step 4: Play!

The adapter is complete! Plug in your shifter and take a look at your system’s joystick control panel. You should see the Leonardo as a controller, with joystick buttons 1-7 corresponding to gears 1-6 and reverse (in that order). Load up your favorite racing game, assign the buttons to gears, and enjoy!

Looking for something more permanent? I designed a “shield” for the SparkFun Pro Micro that makes all of these connections out of the box. You can find that project here.

Have you built one of these adapters? Do you have advice for new builders, or suggestions for this article? Leave a comment below!


29 Comments

İlker · August 27, 2023 at 9:51 am

Hello Mr. Dave, I followed your directions and it’s work perfectly. I will add 2 buttons your project how can I do ? I did try but didin’t work because system need x and y position. How can I do without x and y position. Thank you for video and information.

Marf · October 11, 2023 at 4:48 pm

Hi dave, This is so awesome. I already build one for my self and now one for my boyfriend. it works wonderfully!
we did not wanted to buy the expensive Trustmaster shifter as we both have trustmaster wheels and not a logitech one.

Thank you for your guide! 😀

Benamar Anas · November 21, 2023 at 6:47 am

Hello Dave, i wanted to know if this adapter work with Logitech G25 Shifter as you know the G25 have 2 mods in shifter switch the sequentiel and manual H6+reverse also theres 12 more buttons

    Dave · November 21, 2023 at 11:26 am

    Hi Benamar. I don’t have a G25 shifter myself, so the library was only programmed for the G29 shifter. The shifter itself should work with the library but none of the buttons will.

      Benamar Anas · November 21, 2023 at 7:43 pm

      How can i make the buttons works

Fahad Samer · May 9, 2024 at 5:02 pm

Really dumb question, but does AWG matter? Or can I just use any wire, also can I use a Arduino pro micro? It seems to have the same internals as a Leonardo, just cheaper, sorry if I look ignorant, I’m not a expert at soldering or wiring

    Dave · May 9, 2024 at 8:50 pm

    The female headers on the Leonardo will only work with certain wire gauges. If you aren’t using the headers then it doesn’t make much of a difference.

    You can use the Pro Micro, but you will have to solder to the pins. The Leonardo doesn’t require any soldering.

      Fahad Samer · May 10, 2024 at 11:39 am

      Ah, I have no problem with soldering, but wire gauges also do not matter in the pro micro however they matter on the Leonardo, does the gauge stand for voltage or just size?
      God I look so dumb here, excuse me

        Fahad Samer · May 10, 2024 at 12:10 pm

        Absolutely disregard this reply, I’ve done further digging and found out AWG is a size meter, not a electricity meter, I’ll be using stranded wires tinned for both connections on a pro micro.
        Cheers-
        Fahad

Linh · May 19, 2025 at 4:46 am

Hi Dave,
Can you provide additional information for the DB9 pins. Because I could not buy the same your DB9 connector.
I checked already and I thought that:
pin 4 – yellow cable – DTR
pin 2 – green cable – RXD
pin 6 – black cable – GROUND
pin 8 – white cable – CTS
pin 9 – red cable – RI
short pin 7 and pin 3: short TXD and RTS

Can you check and correct ?
Thank you so much.

    Dave · May 19, 2025 at 5:20 am

    Hi Linh. Those labels are for RS232. Although it uses the same connector, the shifter is not an RS232 device and an RS232 adapter will not work. I don’t think I’ve ever seen a DB9 breakout board with only the RS232 labels and not pin numbers, so I’d exercise caution. If your connector board has any electronics it won’t work for this project.

Martin · December 31, 2025 at 2:23 am

Hello Mr. Dave! I’m leaving this message because i recently got one of this second hand for 25 bucks! And now i was wondering if it would be possible to use a raspberry pi Pico that i already have laying around. I’m not very well versed on the theorical part for this but i am in the practical side so no problem with soldering or others. Also. is there an absolute need to get the male port? wouldn’t it be possible to just introduce the cables into the shifter cable holes? If you had any idea or resource that I could get a guide or an idea on how to do this with things that i already have at home it’d be great!! Thanks and this is an awesome project.

    Dave · January 1, 2026 at 11:25 am

    Hi Martin! The Raspberry Pi Pico has the right hardware but I’m not sure if the code will work out of the box. You can always try it and raise an issue on the GitHub library repo if you run into problems. The male DB9 port is must – jumper wires won’t stay securely in the connector. If you don’t care about the shifter you can always cut the cable and solder directly to the wires, but I wouldn’t recommend it. Good luck!

David · January 1, 2026 at 2:30 pm

My position 5 and 6 are not working. I checked all the wiring and even re-programmed on a different computer. What might you suggest?

    Dave · January 2, 2026 at 12:07 pm

    Hi David, I’m sorry to hear that. Not being able to get into gears 5/6 is a sign that the X-axis potentiometer voltage is lower than expected, or the reverse gear signal is stuck on. That can be caused by using an incorrect power pin (e.g. 3V3 instead of 5V on a 5V board), using a microcontroller with a different voltage level (e.g. Pi Pico instead of Leonardo), a wiring mistake, or following the wrong tutorial for your specific shifter.

    If you are certain that none of those apply, then it is possible that the library’s default calibration does not work with your shifter. You can load the “LogitechShifter_Print.ino” example, open the serial monitor, and send some data to walk through a conversational calibration. At the end of that you will get a line of code which you can insert into the joystick example to calibrate it for your shifter.

    If that calibration works for you, please report back and share it so that I can improve the library.

      David · January 30, 2026 at 7:51 pm

      I triple (well, even more) checked my wiring. I am using a Leonardo and am definitely using 5v (I have a volt meter).

      I started a new post that has more detail for the serial console.

David · January 30, 2026 at 7:49 pm

Hi Dave,
Thank you SOOO much for responding.

Sorry it took me so long….lots of school work.

Anyway, I opened the serial monitor with the print example and this is the code that came out.
I was in neutral, went to 1st, 2nd, 3rd, 4th, 5th, 6th, reverse and then neutral.
What I see in real time is that 5th gear gives no serial output, 6th gives reverse, and reverse gives reverse.

I’m not sure what to do after this though…

19:37:46.878 -> Starting…
19:37:46.879 -> Currently in neutral
19:37:48.391 -> Currently in neutral
19:37:49.875 -> Currently in neutral
19:37:51.294 -> Shifted into 1st [1] – XY: (343, 708)
19:37:52.777 -> Currently in 1st
19:37:52.971 -> Shifted into neutral [0] – XY: (336, 631)
19:37:53.036 -> Shifted into 2nd [2] – XY: (328, 187)
19:37:54.422 -> Shifted into neutral [0] – XY: (379, 260)
19:37:54.550 -> Shifted into 3rd [3] – XY: (598, 979)
19:37:56.035 -> Currently in 3rd
19:37:56.035 -> Shifted into neutral [0] – XY: (556, 630)
19:37:56.130 -> Shifted into 4th [4] – XY: (563, 186)
19:37:57.615 -> Currently in 4th
19:37:58.615 -> Shifted into neutral [0] – XY: (625, 260)
19:38:00.132 -> Currently in neutral
19:38:01.391 -> Shifted into reverse [-1] – XY: (800, 187)
19:38:02.904 -> Currently in reverse
19:38:04.386 -> Currently in reverse
19:38:04.580 -> Shifted into neutral [0] – XY: (766, 260)
19:38:05.836 -> Shifted into 3rd [3] – XY: (550, 708)
19:38:06.287 -> Shifted into neutral [0] – XY: (807, 631)
19:38:06.352 -> Shifted into reverse [-1] – XY: (808, 186)
19:38:07.867 -> Currently in reverse
19:38:09.383 -> Currently in reverse
19:38:10.414 -> Shifted into neutral [0] – XY: (762, 260)
19:38:11.931 -> Currently in neutral
19:38:13.414 -> Currently in neutral
19:38:14.931 -> Currently in neutral
19:38:16.414 -> Currently in neutral

    Dave · January 30, 2026 at 9:00 pm

    Hi David. It sounds like the reverse gear signal isn’t working. A few follow-up troubleshooting steps:

    1. Does your shifter have any buttons on it? Some models have a flange with more inputs. These models are wired differently, and there should be links to the other tutorials at the bottom of the page. If your shifter doesn’t have any buttons on it, continue with the other steps.

    2. Check the the voltage on DB9 pin 3, it should be a constant 5V. If it’s not 5V, try connecting directly to the 5V pin instead of through the DB9 connector. You will need a connector of some sort to bridge the 3 connections.

    3. Using your multimeter, measure the voltage on DB9 pin 2. With the shifter in neutral, push down on the shaft like you are going to put it into reverse (towards the table) but don’t move it into gear. It should read 0V when the shifter is in neutral, and 5V when the shifter is pushed down.

      David · January 31, 2026 at 1:29 pm

      So, probably a dumb question, but how does pin 3/7 get power? 3 and 7 are connected to each other, but nothing else is connected to either. I did check continuity, and the jumper works.

      My shifter is the g29 and there are no other buttons.

        Dave · January 31, 2026 at 10:50 pm

        Pins 9 and 7 are connected internally inside of the shifter’s DB9 connector so that the wheel can detect when the shifter is connected. We borrow that connection so that pin 3 can receive indirect power from pin 9 because the Arduino only has one 5V power pin. If that connection isn’t working for whatever reason you can splice the 5V pin coming off of the Arduino and connect to that instead.

          David · February 1, 2026 at 11:01 am

          Ok, I think we are getting somewhere. If I measure the voltage across the GND pin on the bottom of the DB9 (pin GND) to pin 3, it says 3v. If I compare pin 9 (black wire) to pin 3 (bridged to pin 7), then I get 5v.

          Dave · February 2, 2026 at 10:20 am

          I know I sound like a broken record, but I would again urge you to check your connections. You should not be using the “GND” connection on the DB9 connector, and the black wire from the Arduino’s ground should go to pin 6.

          Your next step would be to check the output voltage from pin 2. It should read 0V when the shifter is in neutral and 5V when the shifter is pushed down. If it doesn’t vary and you are certain your connections are correct, then there may be damage to the shifter’s internals. You would have to disassemble the shifter to diagnose it further.

          David · February 2, 2026 at 10:29 am

          Sorry if I didn’t clarify my testing. I disconnected the USB cable and shifter. So, I just had the leonardo and the db9 adapter. I used the continuity to check the underside of the leonardo, thorugh what may be a bad connection with the jumpers, through to the DB9 and once gain, to the underside of the db9 connector. So, it passed through everything on every single pin that was being used.

          I also have it in a 3d printed case to keep it held together tightly to avoid a loose connection.

          So, I believe, I have good connections.

          As far as using the GND point, I only did that as extra information. Nothing is plugged into the GND connection on the DB9 adapter. I suspected the USB connector and shifter grounded it…similar to what you mentioned on the pin 3 to 7 jumper. Again, it just added it as more info, but it probably caused confusion.

          I’ll do the pin 2 connection measurement tonight or maybe tomorrow.

          Again, Dave, thanks so much for helping!

Mert · February 3, 2026 at 3:42 pm

Hi Dave. I’ll be using an Arduino Pro Micro. Do I absolutely need to solder? The Pro Micro doesn’t have a 5V input; should I connect it to the VCC pin instead? If you selected Leonardo in your Arduino IDE, should I select Micro?

    Dave · February 3, 2026 at 6:07 pm

    Hi Mert! Yes, if you are using a Pro Micro you absolutely need to solder, there’s no way around it. And yes, you should use the VCC pin instead of 5V pin for power. As for programming: you can program it as a Leonardo and it will work fine; the two boards have the same microcontroller, bootloader, and pinout. If you want to do it properly, you need to install the SparkFun Arduino boards package. Just make sure you select the “5V” board option.

    You can also use the boards package from the “Shields” project if you’d like, which will identify the adapter as a “Sim Racing Shifter”. There’s a link to that at the bottom of the article. Don’t use that firmware though, it requires more components than the bare wire version.

David · February 2, 2026 at 5:58 pm

I checked continuity from leonardo pin to DB9 pin (from the underside, the soldered points) to make sure all connections through the wires were correct.

I checked pin 2. 0 volts when in neutral. 5 V when the shifter is pressed down.

Dave · February 3, 2026 at 5:55 pm

I’m afraid I’m out of ideas. As far as the code is concerned, reverse and 6th gear are positionally identical. If the reverse gear signal is working properly then there should be no reason it won’t go into gear.

Building a simple USB adapter for the Logitech Driving Force Shifter with Arduino | Arduino Blog · June 29, 2022 at 7:52 pm

[…] to work. So as a way to circumvent this annoying problem, Parts Not Included’s Dave Madison created his own custom adapter, which translates the signals from the shifter into commands over a USB port on the host […]

Leave a Reply

Avatar placeholder

Your email address will not be published. Required fields are marked *

This site uses Akismet to reduce spam. Learn how your comment data is processed.

Would you like to know more?