I picked up a Novation Launchkey Mini II controller last year when I was working with those musical floppy drives, and recently I fell down the rabbit hole of Launchpad LED performance videos. That got me thinking: is it possible to control the LEDs on a Launchkey Mini like you can on a Launchpad?
There’s surprisingly little information about this. Novation’s user guide for the Launchkey Mini has no mention of how to control the LEDs. There is some information available in a “programmer’s reference” manual for the Launchkey II (not the “Mini” version), but sadly the LED components don’t function the same way.
It required a bit of reverse engineering and the result isn’t quite as pretty, but I’ve figured out how to do it.
Basic Setup
The Launchkey Mini is a class compliant MIDI device, meaning that it’s possible to talk to it just by sending standardized MIDI messages without needing a custom driver. But before controlling the LEDs, you have to be connected to the right MIDI port and have the device configured for InControl mode.
USB Endpoints
The Launchkey Mini presents itself as a generic USB-MIDI device with two I/O endpoints. The first endpoint is the MIDI port for the control surface data; this is what you connect to for reading the keyboard, drum pads, and potentiometers. The second endpoint is what Novation refers to as the “InControl” port. This is how Ableton sends commands to the device without disrupting the main MIDI stream.
To control the LEDs, you need to connect to this second port. For me this is listed as “Launchkey Mini (Port 2)” in Ableton, and as “MIDIOUT2 (Launchkey Mini) 2” in other software such as Python (mido) and Hairless. If you’re using Ableton, the port must also be set as an output device and enabled for track output in your MIDI preferences.
InControl
The key to this all is the “InControl” mode. Within Ableton, switching to this mode lets you control your currently playing tracks and navigate the interface. More importantly, when the controller is in this mode Ableton is put in control of the LEDs underneath the drum pads.
If you’re controlling the LEDs from Ableton, just press the InControl button on the Launchkey Mini once until it glows red.
If you’re not controlling the LEDs via Ableton, you need to send a message to the Launchkey Mini to switch it to “InControl” mode. The magic message is a “note on” message on channel 1 (0x90) for note 12 (0x0C) at velocity 127 (0x7F). The same message at velocity 0 (0x00) will switch “InControl” mode off. These messages will be mirrored back on the InControl MIDI port to the computer once they are received by the device.
LED Command
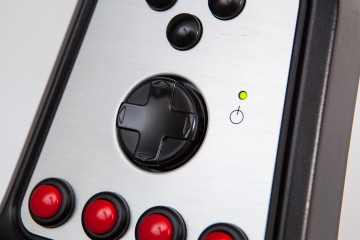
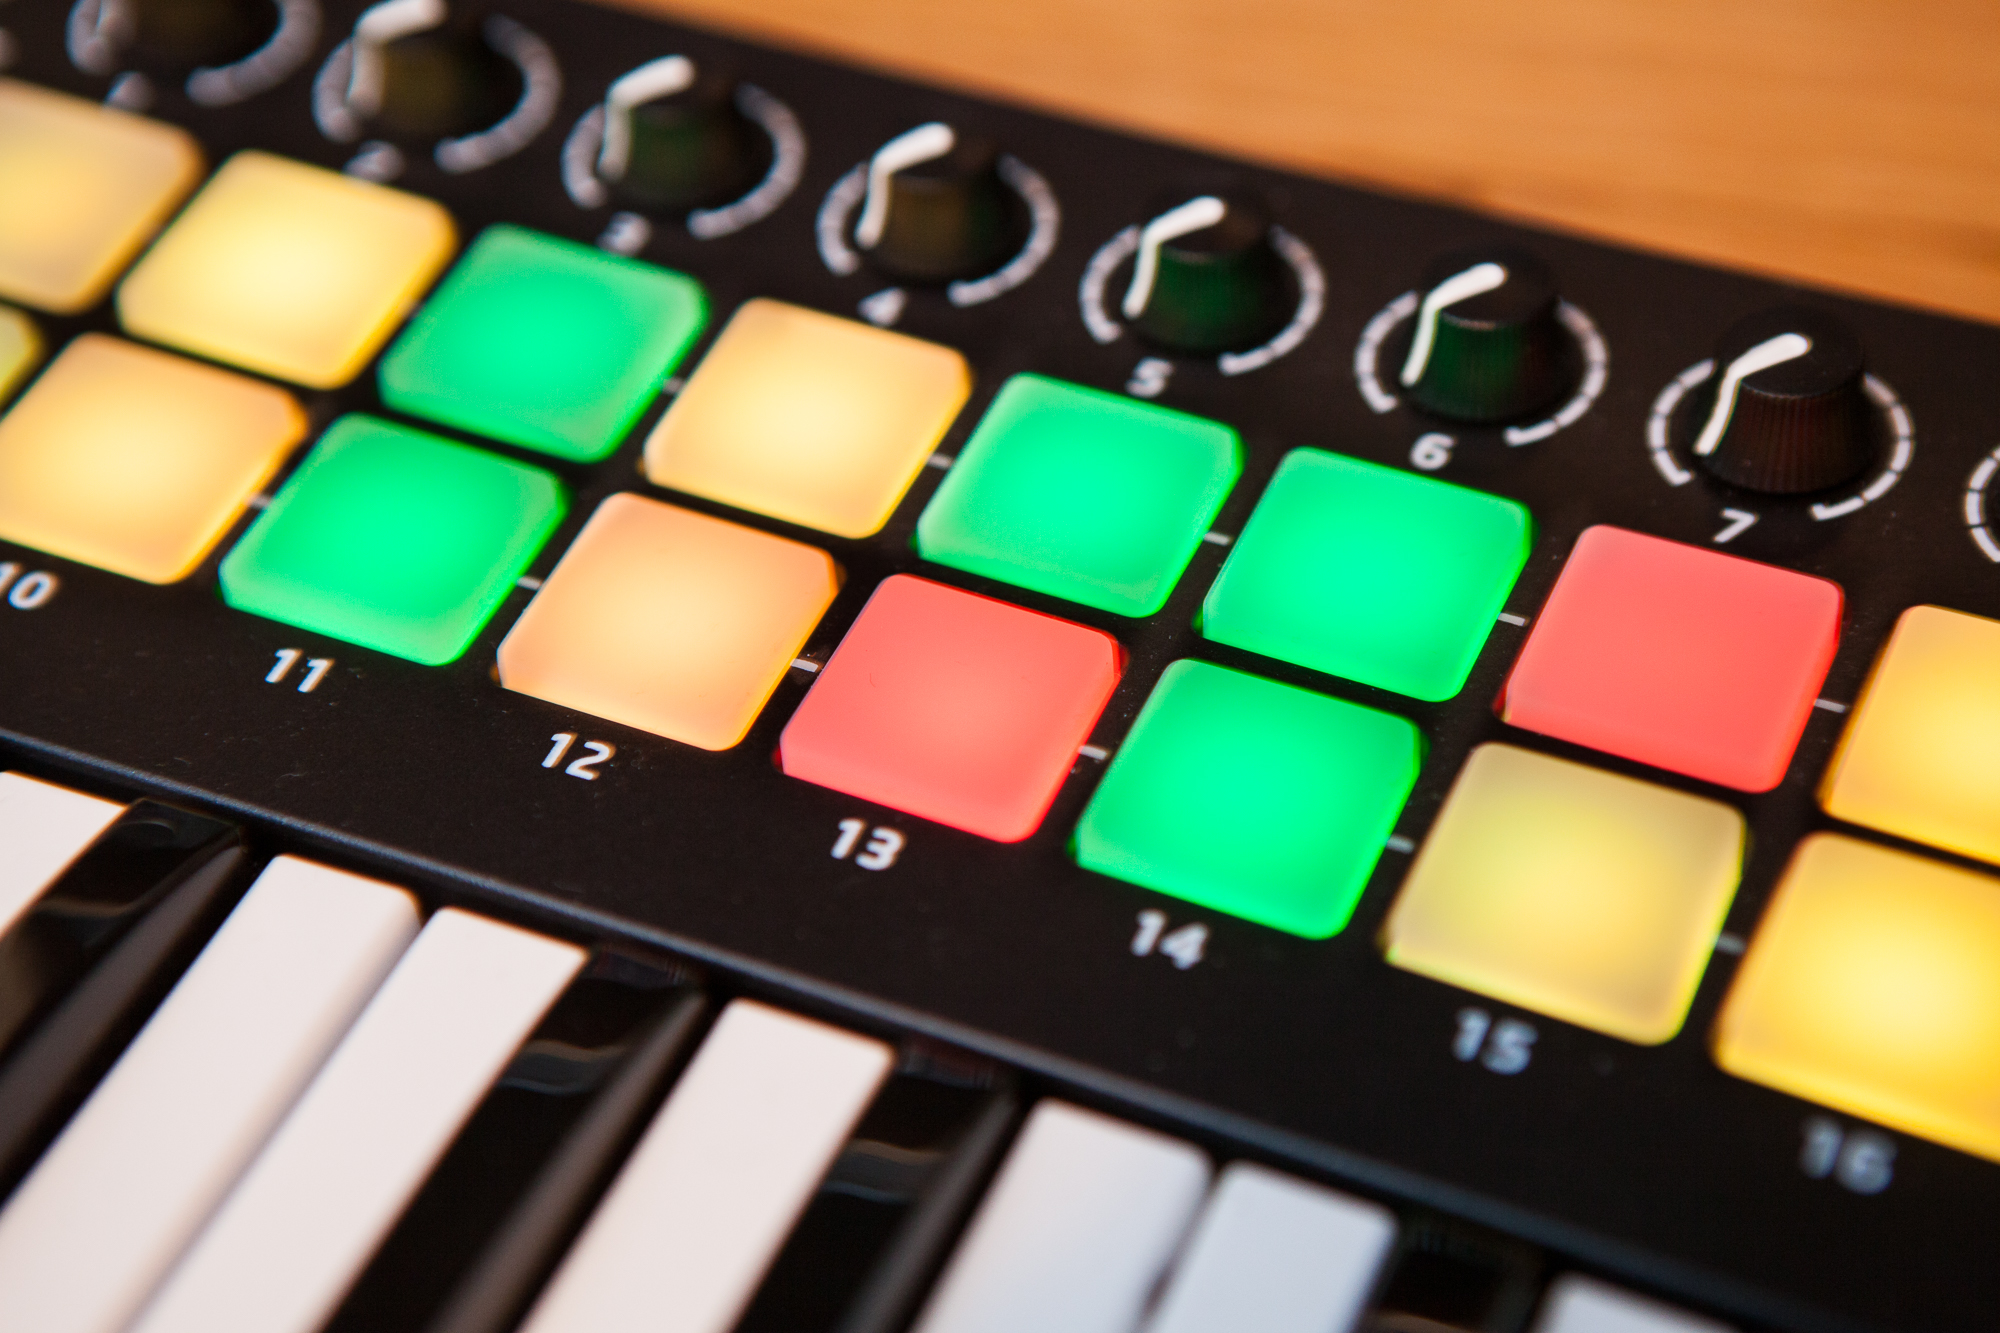
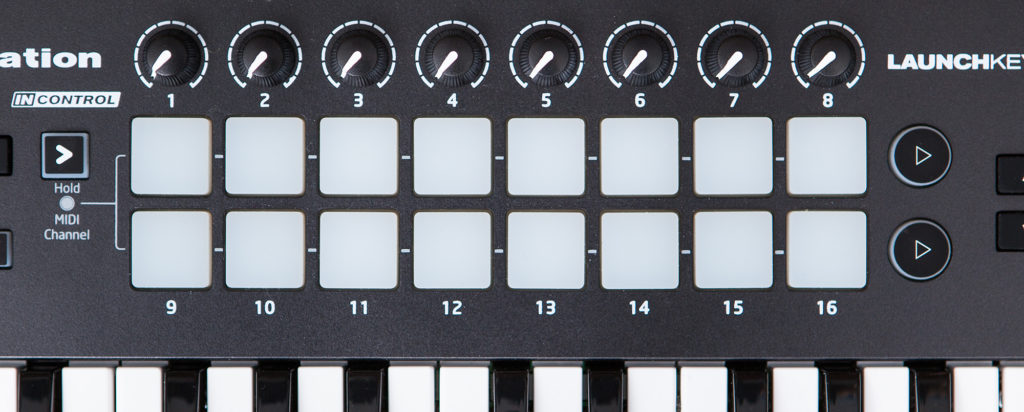
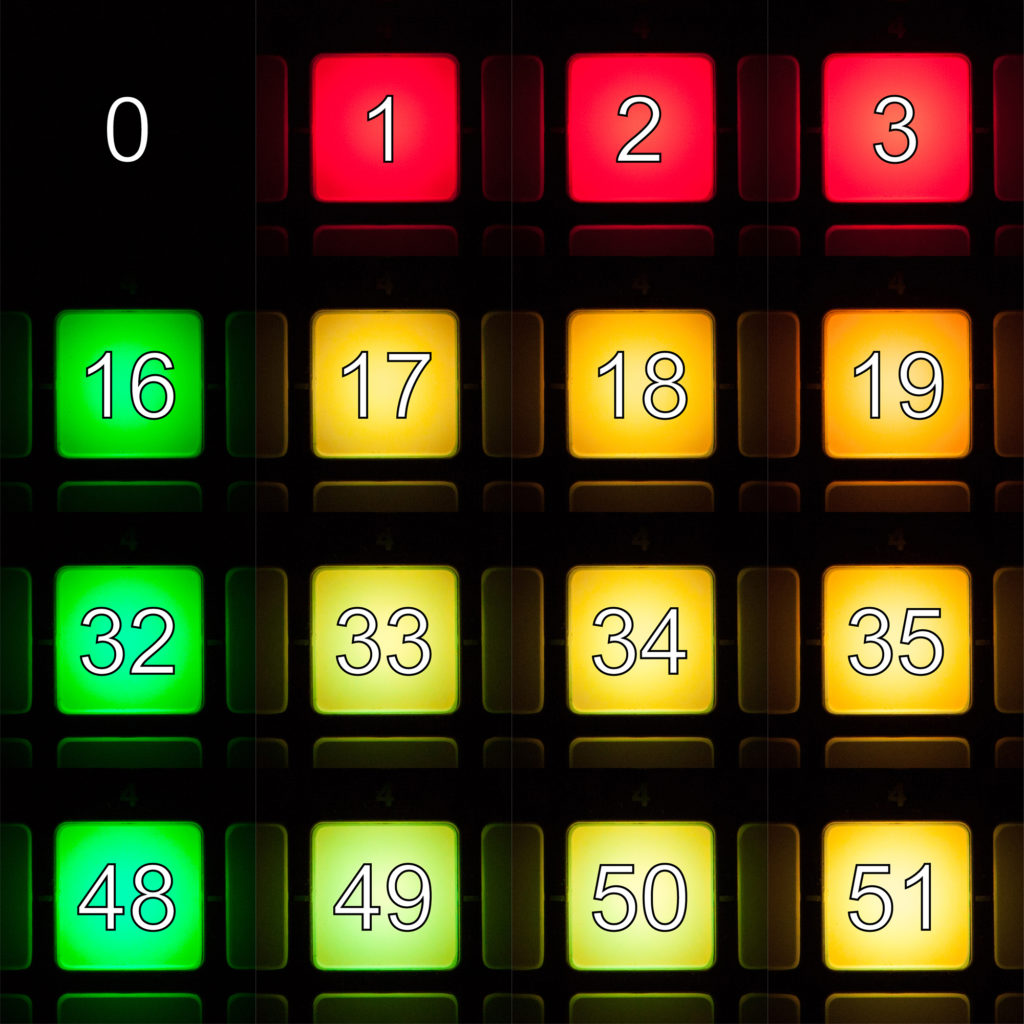
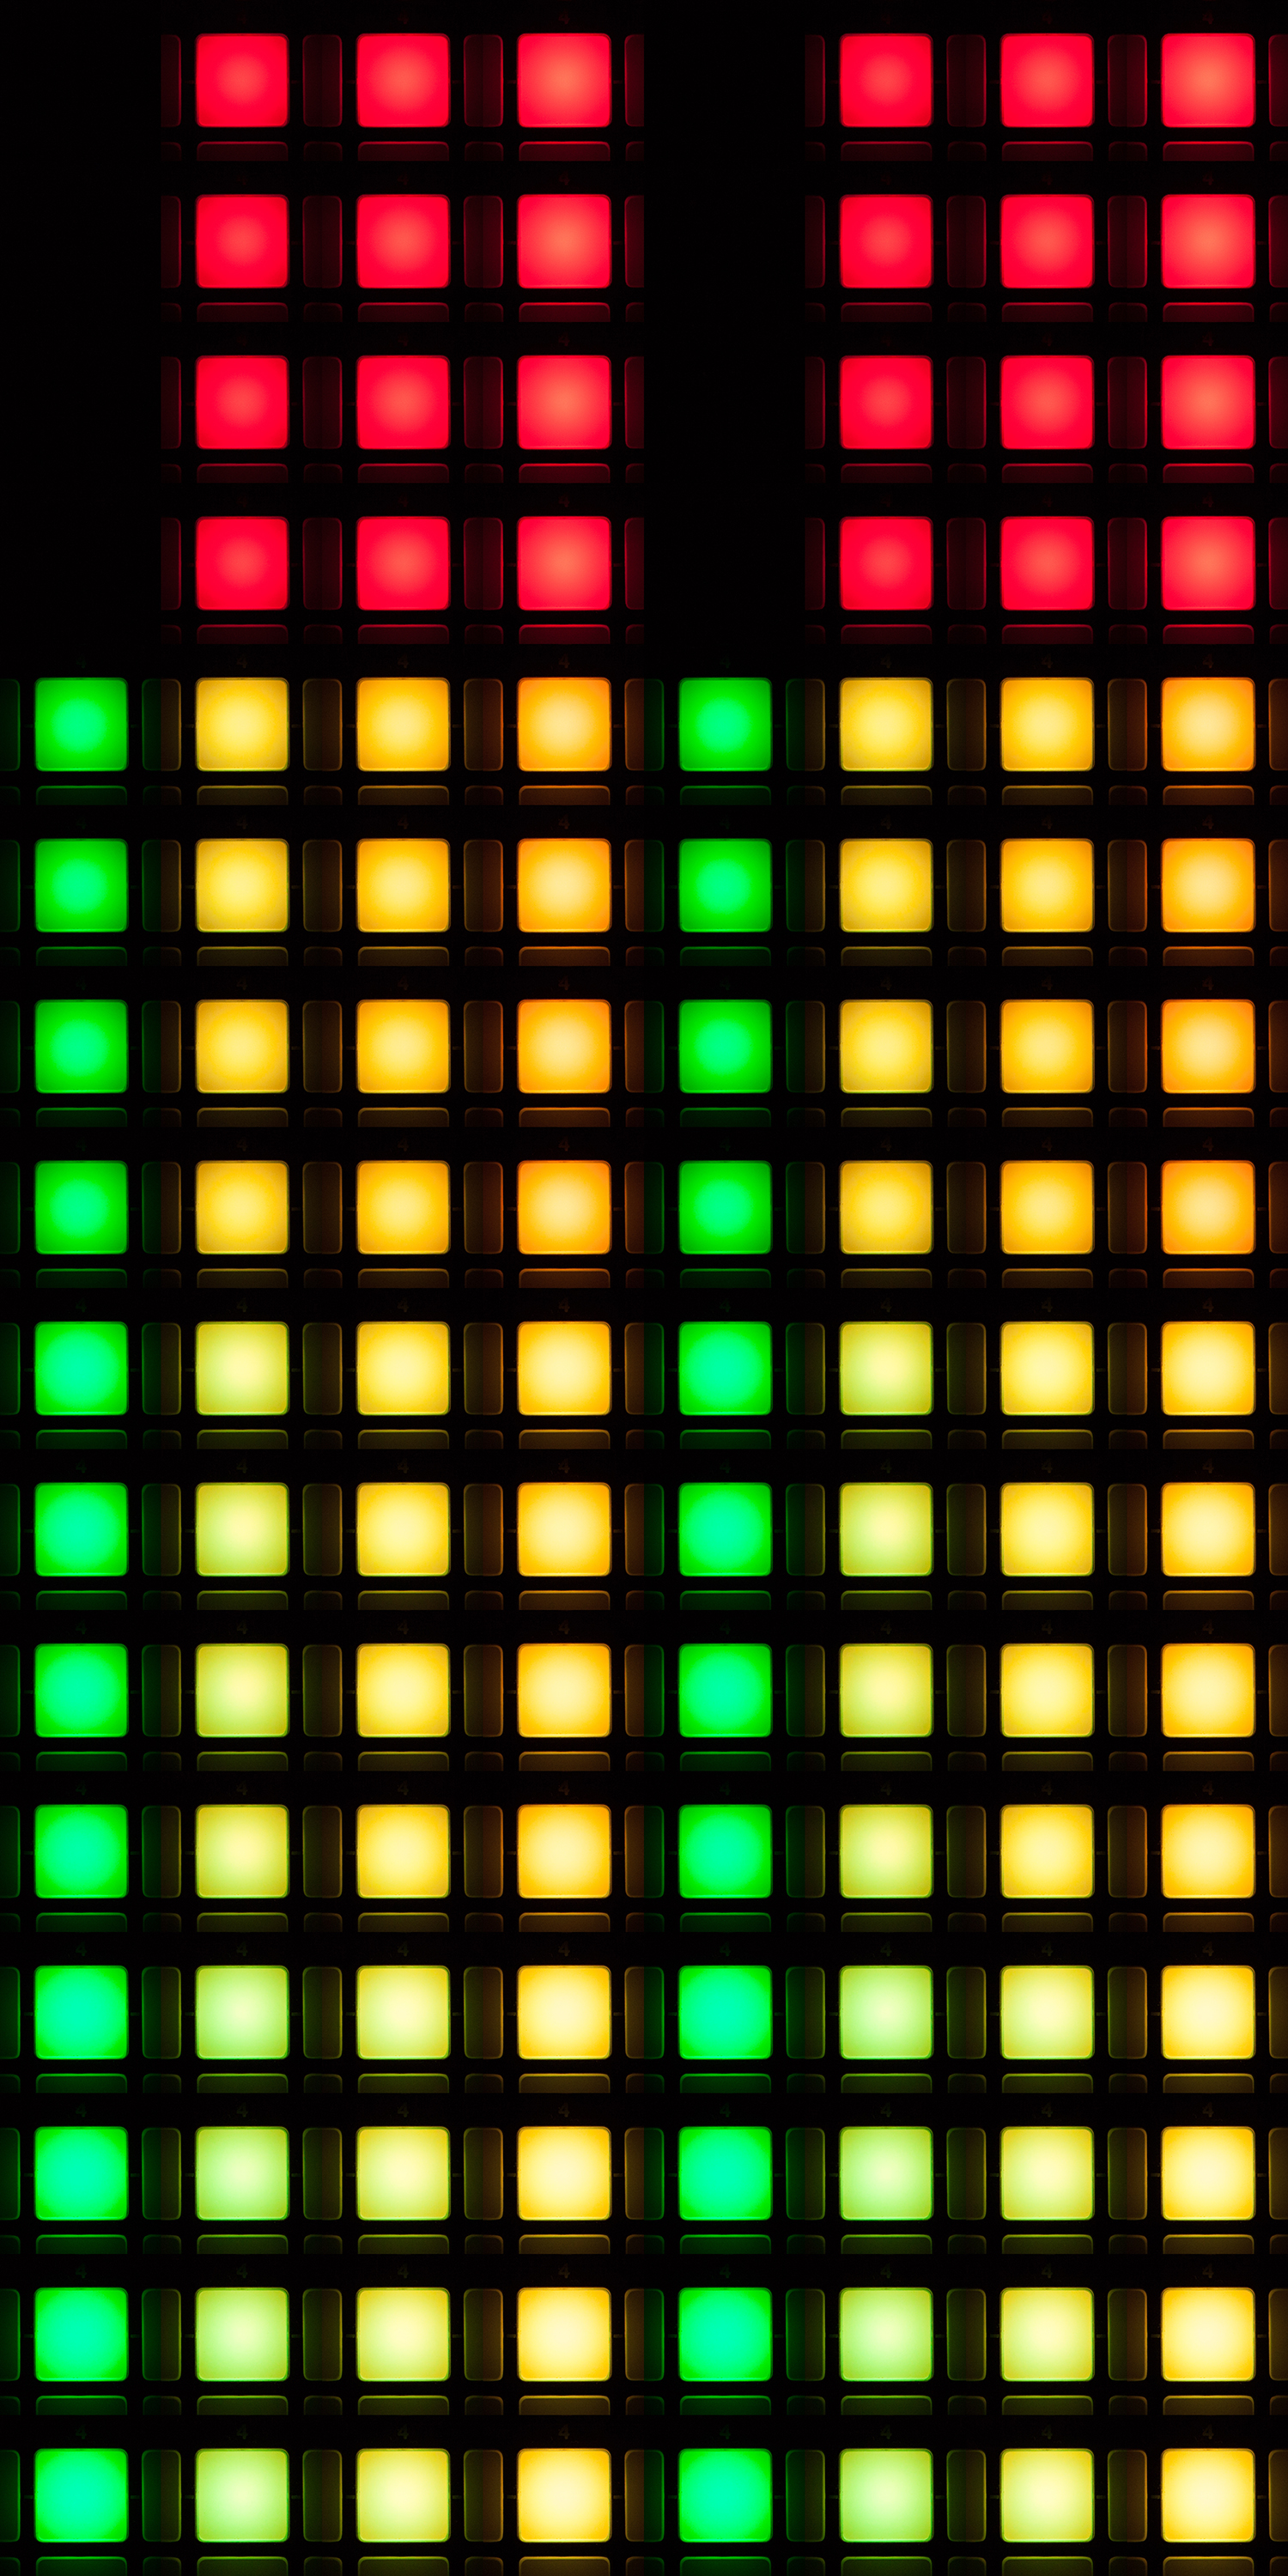
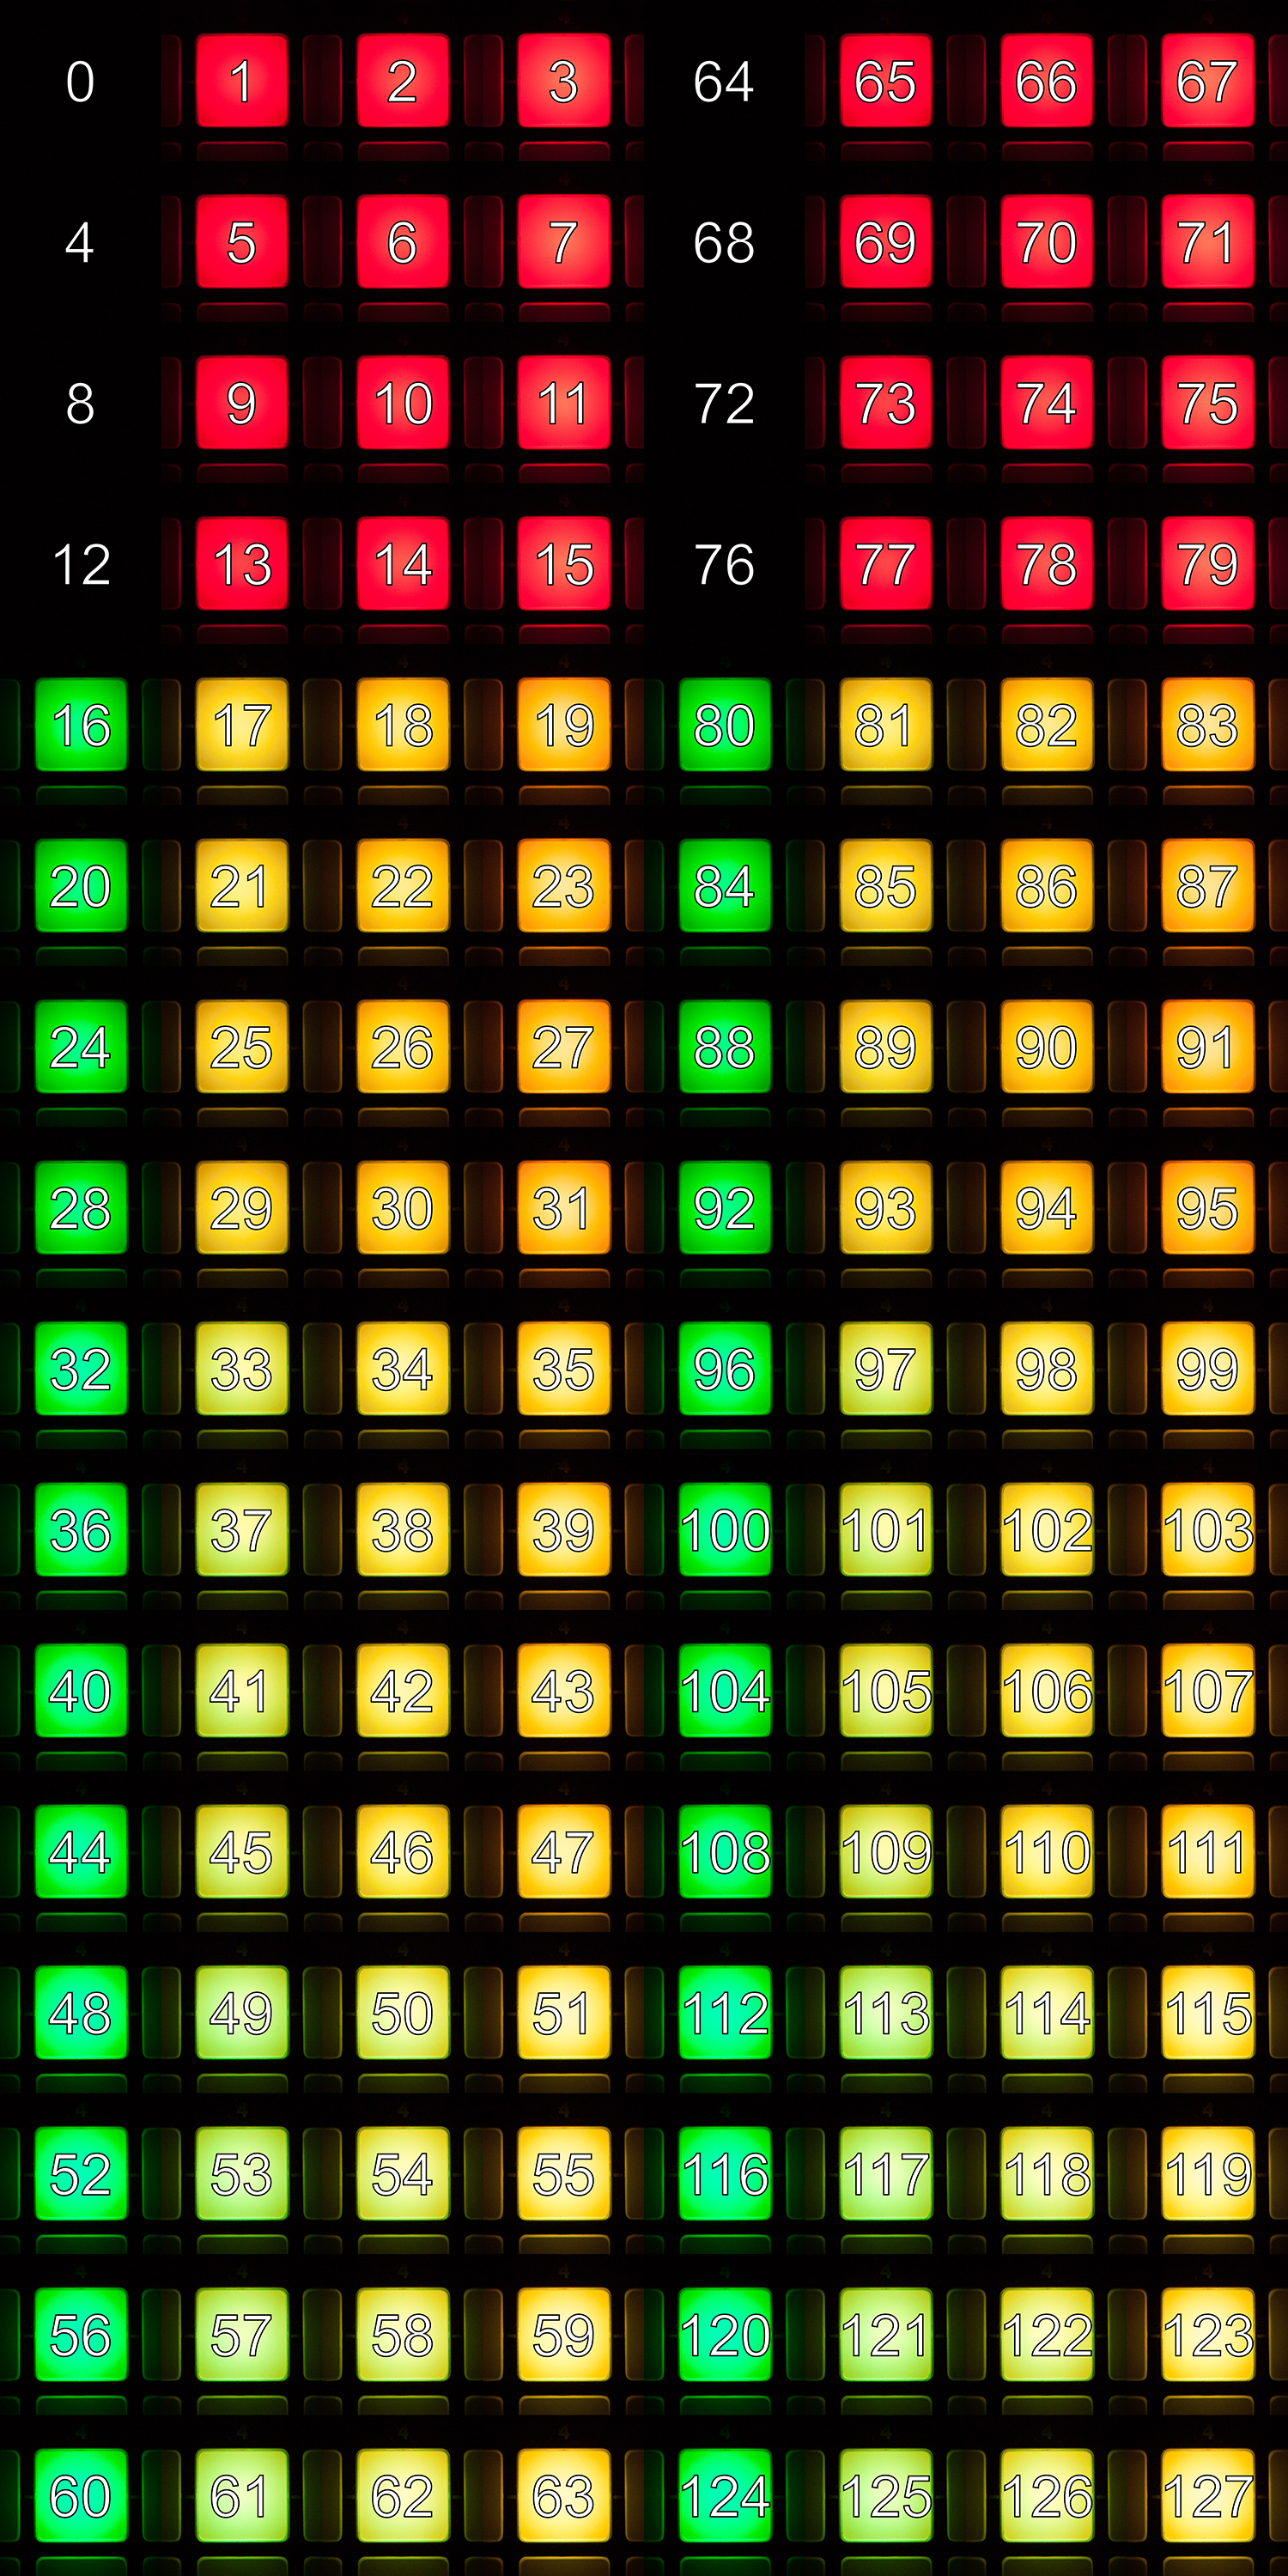
The Launchkey Mini has 18 controllable LEDs: two rows of 8 drum pads, and two round buttons.
The LEDs are controlled using a “note on” command on MIDI channel 1 (byte 0x90), where the “note” is the LED to control, and the “velocity” is the color to set.
0x90 {LED #} {Color}
Be aware that a respective “note off” command will not turn off the LED, you need to send an additional “note on” command with the off color.
LED IDs
The LEDs are numbered sequentially from left to right. On the top row, the LEDs start at note C6 (96) and end at note G#6 (104). On the bottom row, the LEDs start at note E7 (112) and end at note C8 (120).
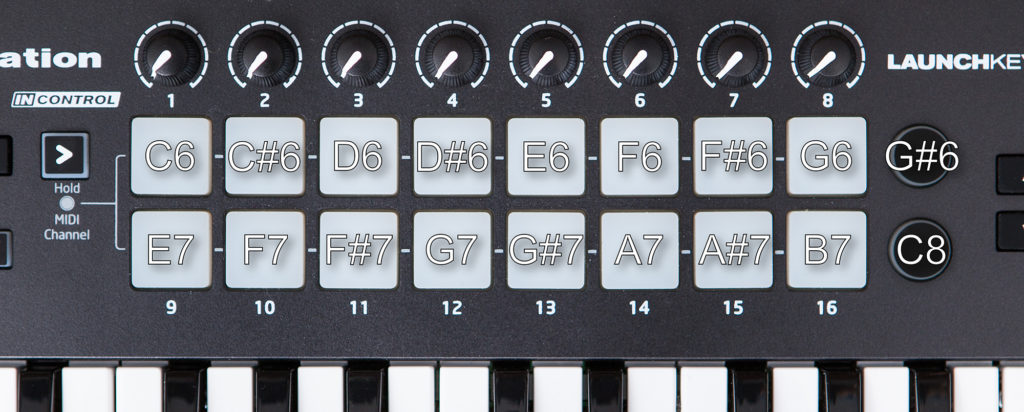
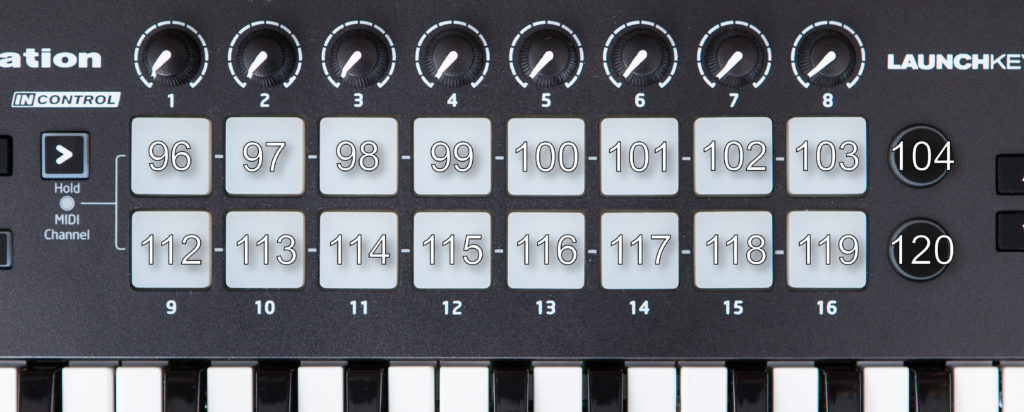
Note: For some bizarre reason, there is debate with MIDI about whether middle C (60) is “C3” or “C4”. I’m going to use C3 = 60 just because that’s how Ableton labels its notes and that’s what the controller was designed around. If you’re using software where C4 = 60, just transpose all of the octaves up by one (e.g. C6 becomes C7). Or use the decimal numbers.
Color Palette
The Launchkey Mini has a limited color palette. For each pad there are only red and green diodes, so you can’t display any colors with a blue component. In other words, no RGB / full color display. That’s a hardware limitation and there is no workaround.
On top of that, you’re limited to the 127 velocities you can specify via the MIDI “note on” message. If that wasn’t bad enough, there are only 16 unique colors available:
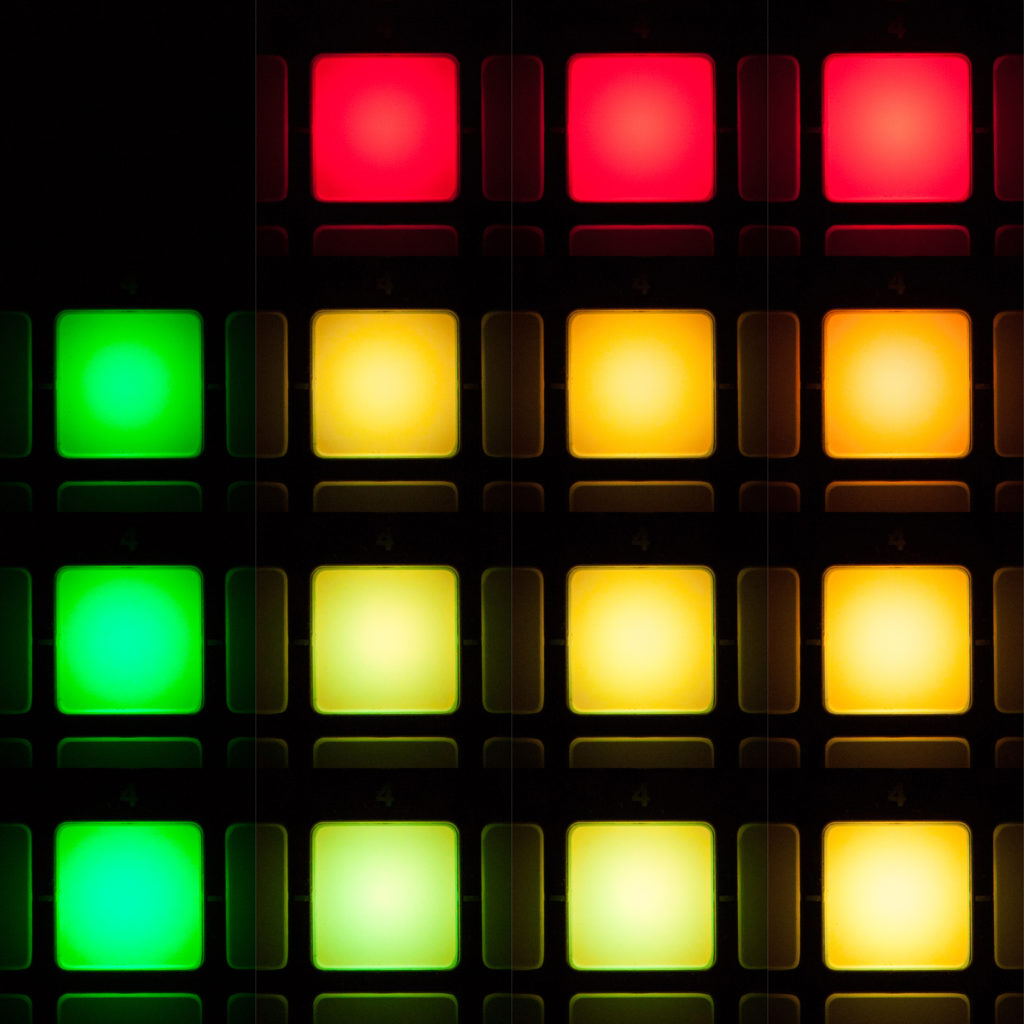
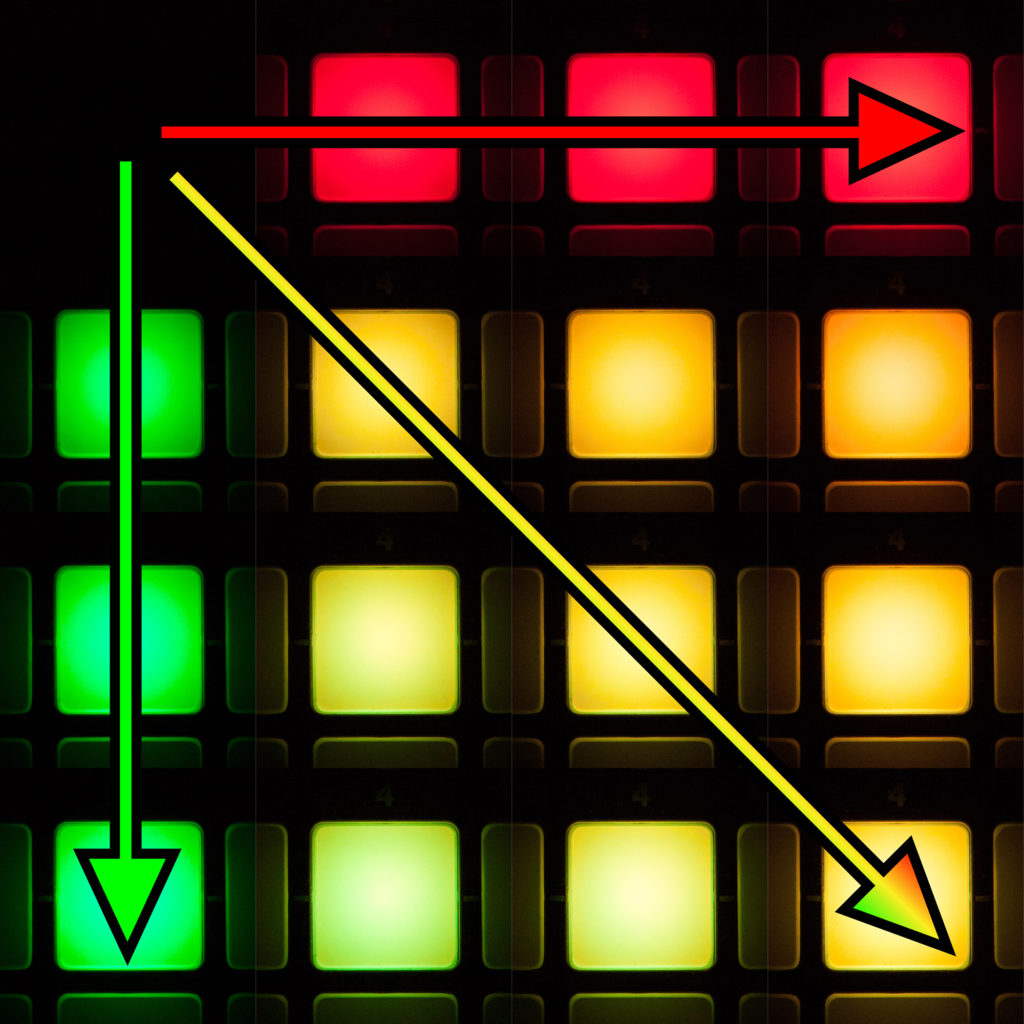
Colors increase in red brightness from left to right, and increase in green brightness from top to bottom. For any given color, add 1 to increase the red value and add 16 to increase the green value (up to a max of 3x per component).
For completeness, here is the full palette of available colors. You can see that colors are grouped in fours and then repeated four times, and the entire palette of 64 is duplicated twice.
Demo
To demonstrate this new-found power of LED control, I wrote a short sweeping animation in Python. The script generates a random color from the available palette, then progressively writes it to the device’s LEDs from left to right.
The only external dependency here is the mido library, which handles the MIDI communication. Here is the script, in full:
#
# Launchkey Mini II Sweep Animation
# by David Madison © 2018
# www.partsnotincluded.com
#
# This is a sweep animation to demonstrate control of the Novation Launchkey Mini
# II's RG LED pads. The script will generate a random color from the LED palette
# that sweeps from left to right across the available LED pads.
#

import mido
import random
from time import sleep

row1 = (96, 97, 98, 99, 100, 101, 102, 103, 104)  # LED indices, first row
row2 = (112, 113, 114, 115, 116, 117, 118, 119, 120)  # LED incides, second row
leds = row1 + row2  # LED indices, combined


def write_led(led_id, color_vel):
	midi_out.send(mido.Message('note_on', channel=0, note=led_id, velocity=color_vel))


def random_color():
	red_or_green = bool(random.randint(0, 1))  # Making sure the number is always >0 for one component
	return random.randint(int(red_or_green), 3) + \
		   random.randint(int(not red_or_green), 3) * 16


if __name__ == "__main__":
	try:
		midi_out = mido.open_output("MIDIOUT2 (Launchkey Mini) 2")  # Launchkey InControl port
		midi_out.send(mido.Message.from_bytes([0x90, 0x0C, 0x7F]))  # Switch to "InControl" mode

		while True:
			color = random_color()

			for index, led in enumerate(row1):
				# Set current LED color
				write_led(row1[index], color)
				write_led(row2[index], color)

				# Turn off last set LEDs
				write_led(row1[index - 1], 0)
				write_led(row2[index - 1], 0)
				sleep(0.1)

	except KeyboardInterrupt:
		pass


for led in leds:
	write_led(led, 0)  # Turn off all LEDs
midi_out.send(mido.Message.from_bytes([0x90, 0x0C, 0x00]))  # Disable "InControl" mode
midi_out.close()
Conclusion
To recap: in order to control the LEDs on your Novation Launchkey Mini II, you need to connect to the second MIDI output port and set InControl mode to “on” (either via Ableton or using the special message 0x90 0x0C 0x7F). Then to change colors you use another “note on” message where the LED position is your “note” and the color of choice is your “velocity”. That’s it!
If you found this post helpful, like, follow, and subscribe check out some of my other projects.
Getting InControl
When I was originally fiddling around with this, I figured out I could get the LEDs to respond to messages from Ableton so long as the “InControl” mode was enabled, and yet I couldn’t switch the device into “InControl” mode without having Ableton open. There was no information about switching modes outside of Ableton in the user manual, and after contacting Novation support they were unable to help me either. So I put on my reverse engineering cap and got to work.
USB-MIDI
The Launchkey Mini is a class-compliant USB device, which means it must behave by the publicly available (and well-documented) USB MIDI standard (pages 16-17 are particularly helpful). I installed a copy of Wireshark (2.6.2) which came with USBPcap for analyzing USB packets on Windows. I then plugged in the Launchkey Mini II, started up Ableton, and watched as the messages flew by.
After a flurry of messages, the device sends a message back:
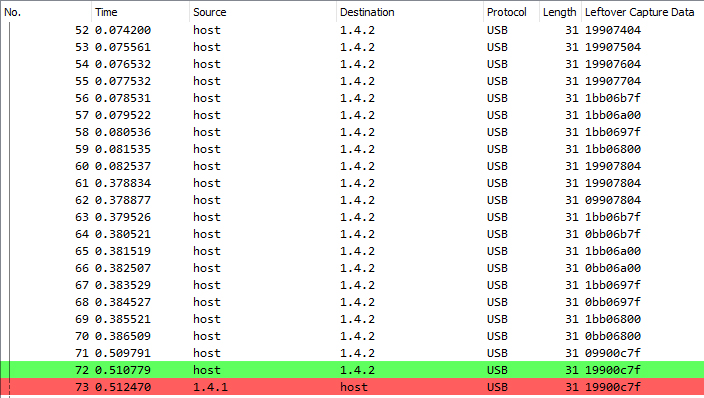
This message mirrors what was sent by Ableton, indicating that it’s an acknowledgement of something important.
Unpacking
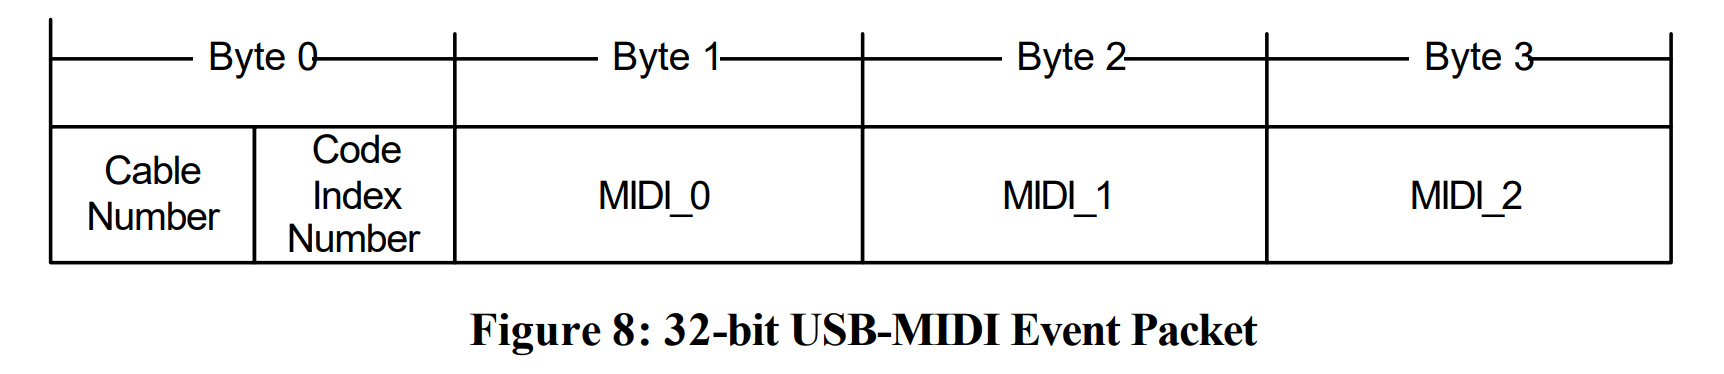
Ignoring the extra USB header information, the message is composed of four bytes, which matches a standard USB-MIDI event packet. The four-byte packet sent from Ableton is:
0x19 0x90 0x0C 0x7F
The first byte is USB specific. The first nybble, 1, indicates that it’s a message intended for the second (indexed at 0) “virtual cable”. In other words, it’s meant for the second virtual MIDI device on the microcontroller – the InControl MIDI port. The second nybble, 9, shows that it’s a “note-on” message.
The following three bytes are your standard serialized MIDI message. 0x90 means it’s a “note-on” message on channel 1, 0x0C means it’s for note 12, and 0x7F means it has a velocity of 127. I threw these values into a Python script and the InControl light came on immediately.