Oye beltalowda! I, like many an Earther before me, recently fell in love with The Expanse – James S.A. Corey’s vision of warring factions struggling for control of the solar system’s resources in the not too distant future. The story follows James Holden and the intrepid crew of the Corvette-class frigate Rocinante, as they try to survive in the hostile cold of outer space and uncover the secrets behind a dangerous conspiracy which threatens to destroy all of humanity.
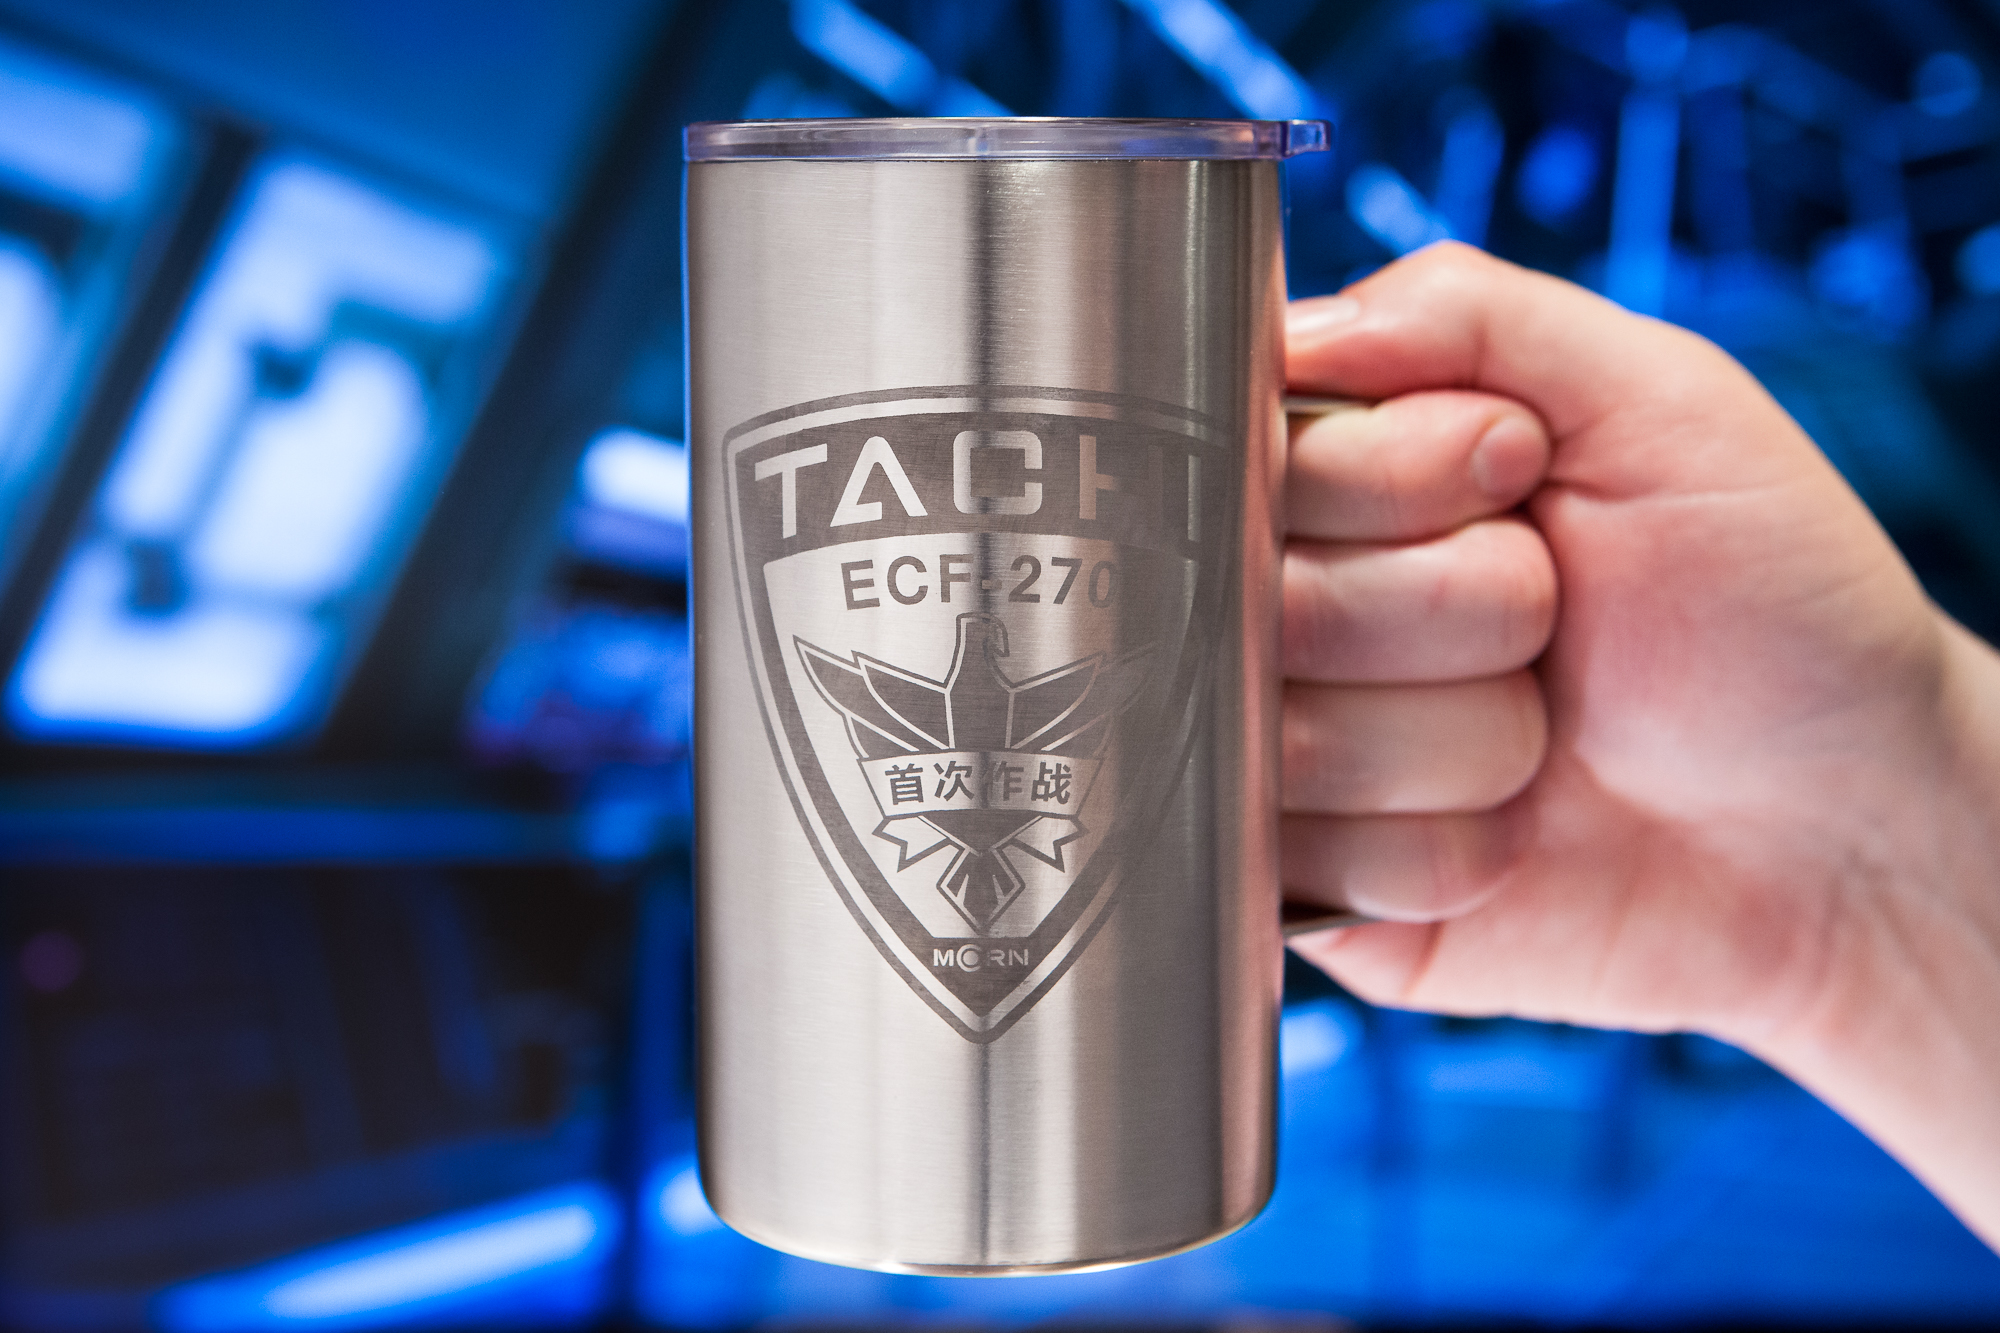
To show my love for this series I decided to make some custom merch, in the form of a coffee mug made in the style of those aboard the Rocinante. Or as it was originally known: the vessel Tachi of the Martian Congressional Republic Navy (MCRN).
Gathering Materials
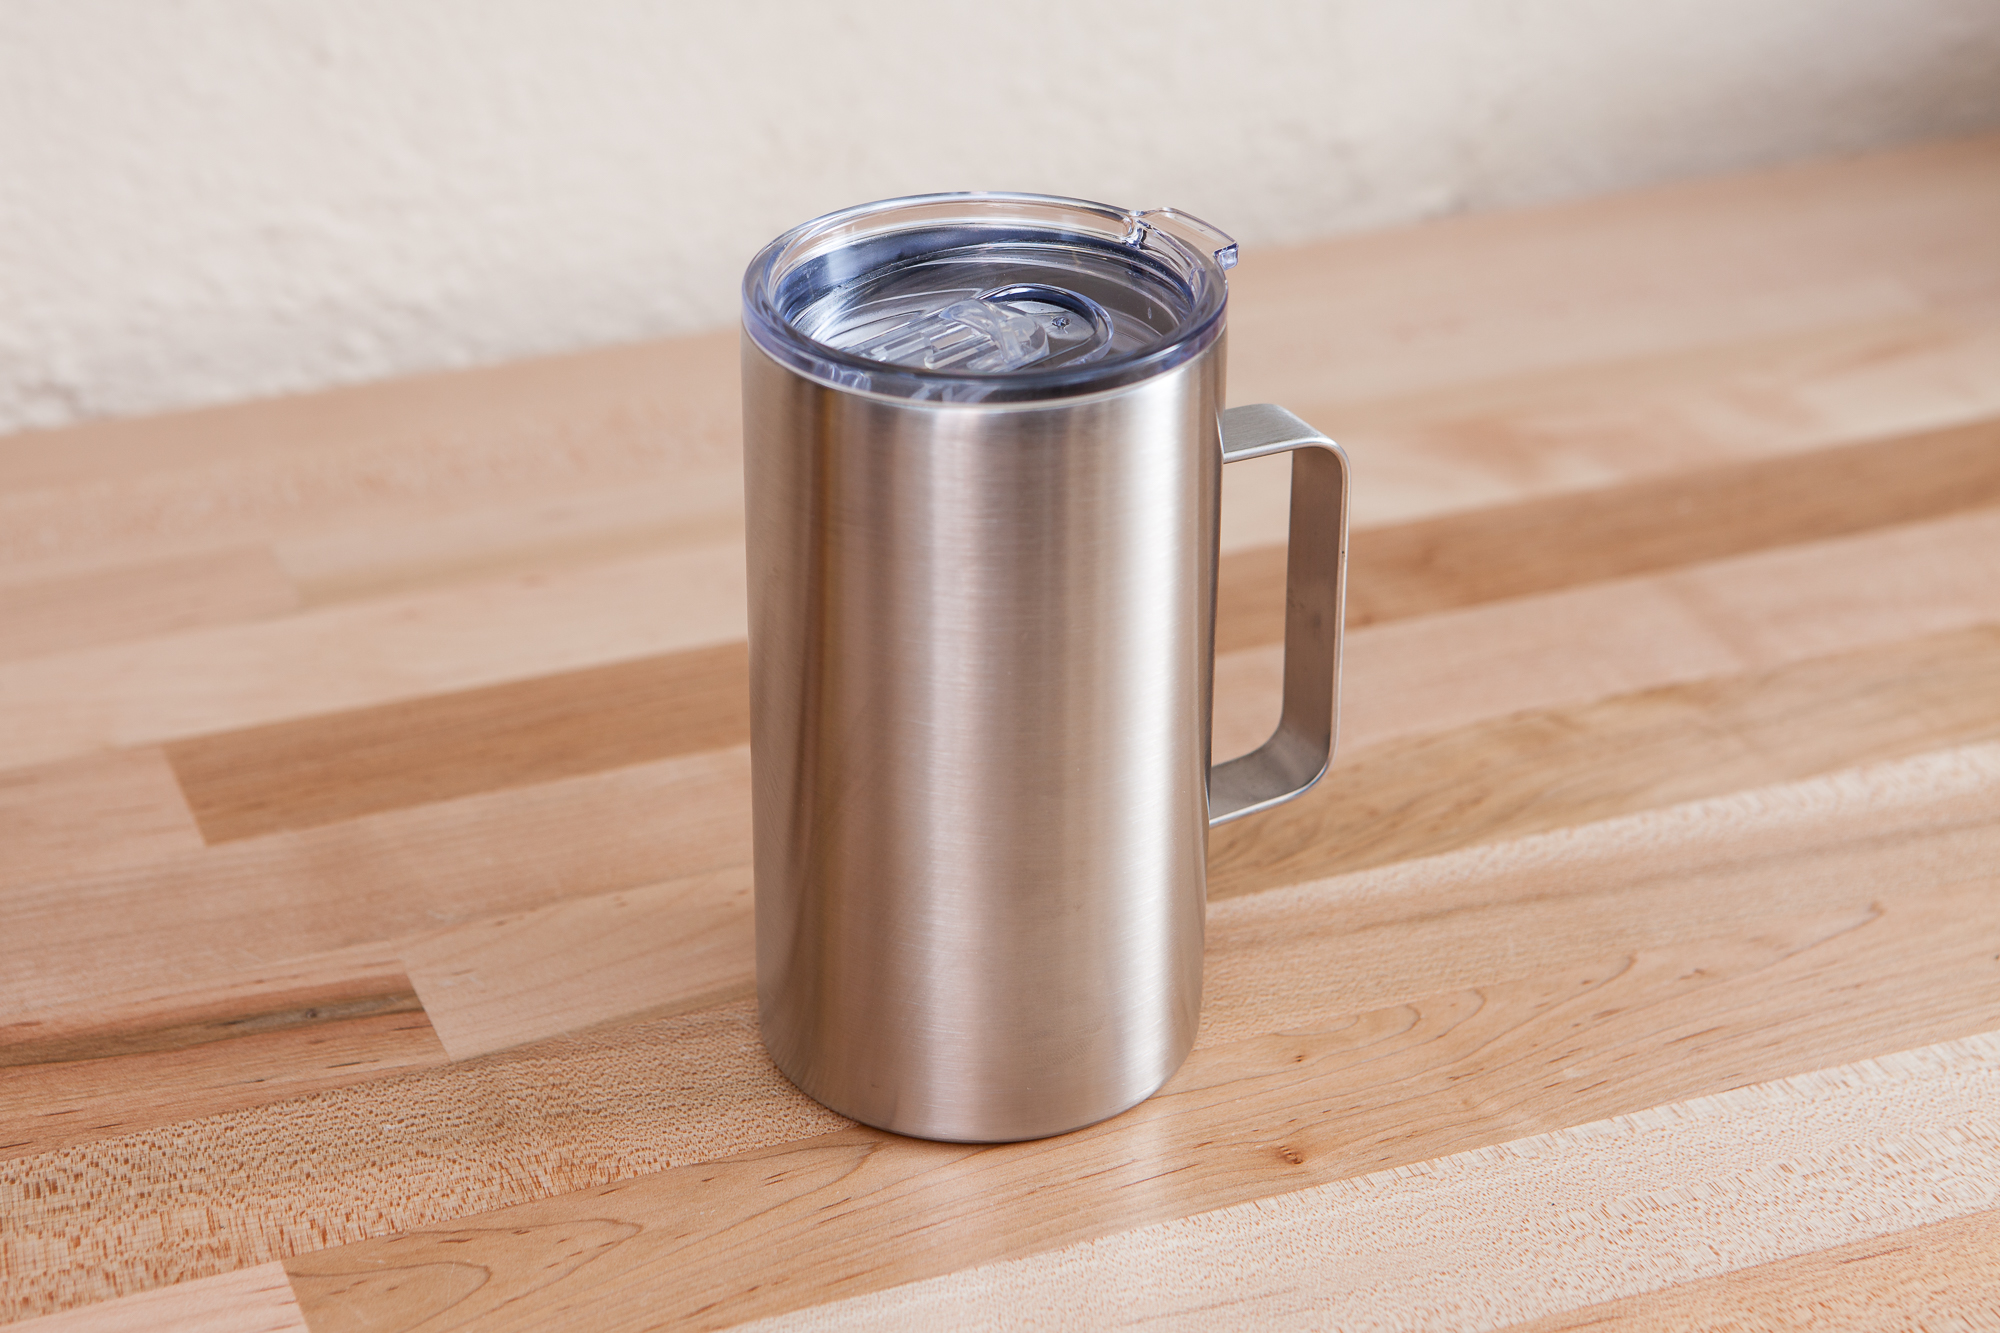
The mug for this project is a 14 oz. stainless steel mug by Celebrate It®, purchased at my local Michaels craft store. This was chosen for its stout modern appearance, and made me think of something that you might find in a military spaceship mess in the 24th century. (Ignoring the ESMA 504843 “City Cup” mugs with MCRN lettering we actually see on board the ship at 18:20 in season 1 episode 5, because headcanon is more fun.)
The graphics are going to be applied using toner transfer and acid etching. This is the same process that is used for making custom circuit boards at home, which is where I acquired the rest of the supplies a few years ago. The finished graphics will be printed out on my home laser printer onto glossy paper. Using heat, the toner that forms the design is transferred from the paper to the object being etched to act as a resist. You can then use ferric chloride to etch the exposed areas, and acetone to remove the toner when everything is complete. Sounds like fun!
Designing Graphics
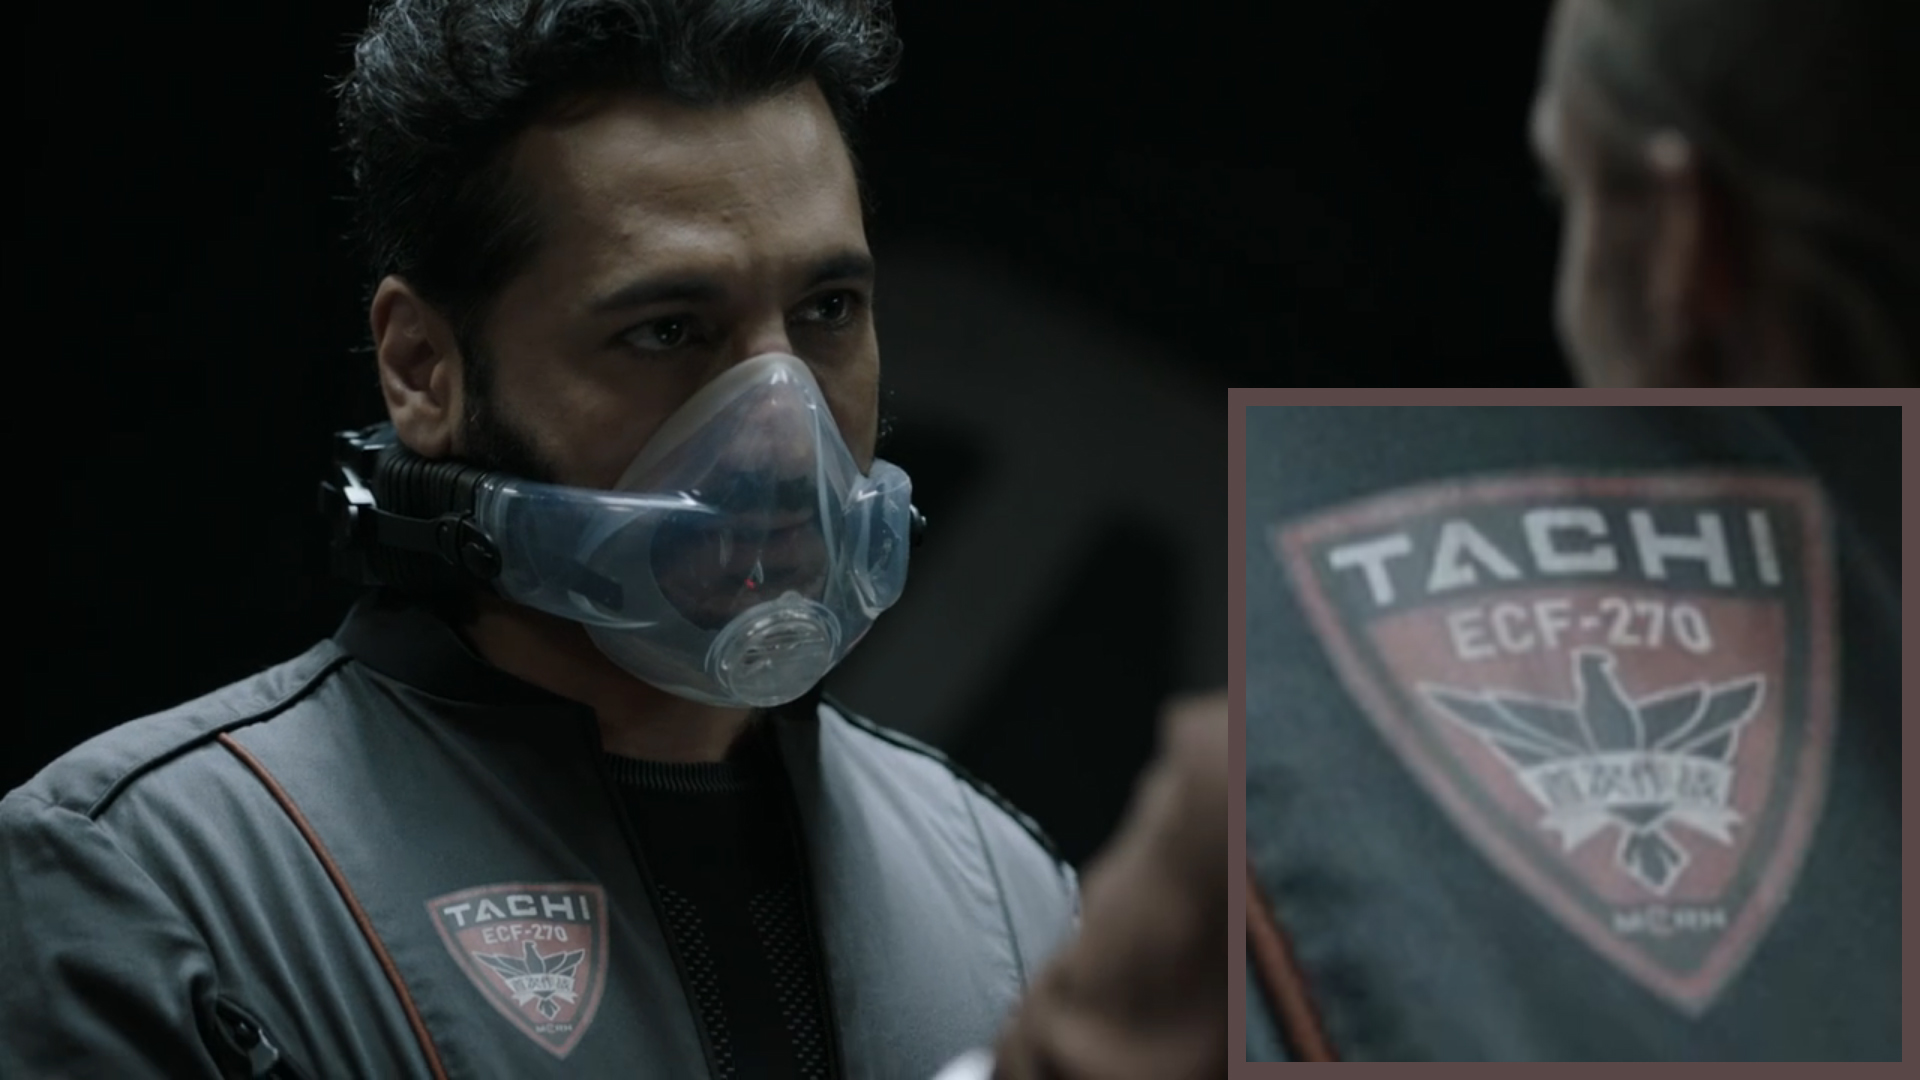
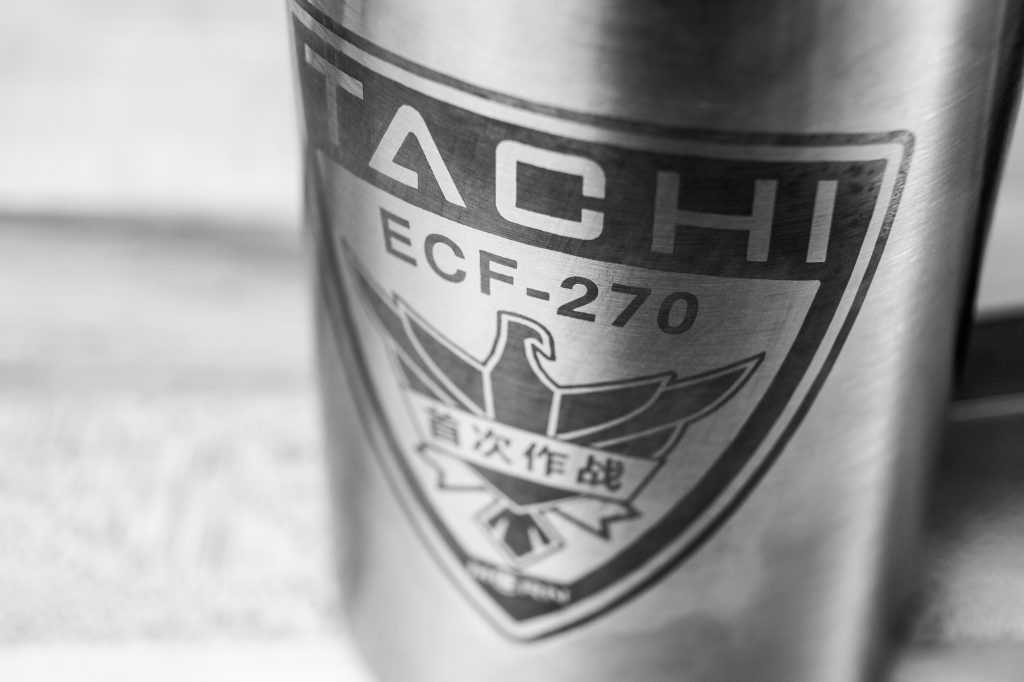
I began by searching for references. In the first episode of season 2, at around 6 minutes in, Alex is taking medical scans of the people they saved from Eros and wearing a Tachi jumpsuit with a patch on the right breast. It’s exactly the type of design that would be used to mark other equipment aboard, and I though it would look great as an etching. On the fan wiki page for the Rocinante there is a close-up version of this badge, and I found a graphic version by “Shadowsgaurd” on DeviantArt.
Using the graphic as a foundation, I cleaned up the lines in Photoshop and then created a vector-based version in Illustrator. Because the etching is black and white and the full color patch is tri-color (black, white, and Mars red), I needed to make some adjustments to the design before I could apply it to the mug.
I created a couple different versions of the patch in black and white, varying which areas were etched and adding borders where necessary to create contrast. I ended up using the most complicated design, which has added borders around the bird, the banner, and the outer edge of the patch. The version I chose also had the etching concentrated towards the outside of the design – this leaves the main text (“Tachi”, “MCRN”) as a negative but doesn’t require the large etched area in the center which I was concerned would not come out evenly.
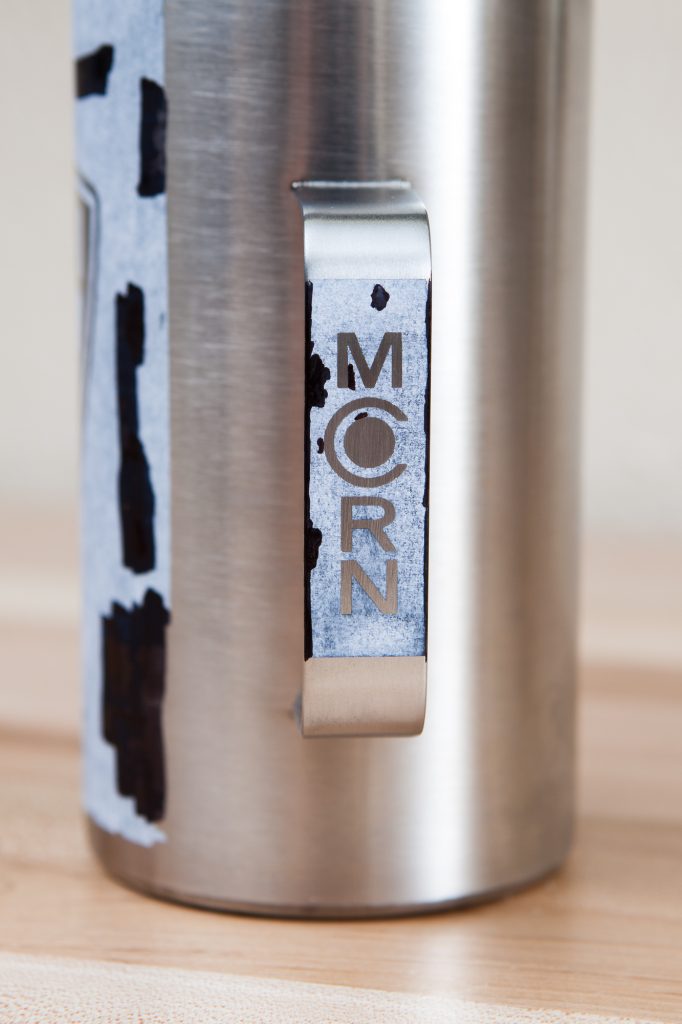
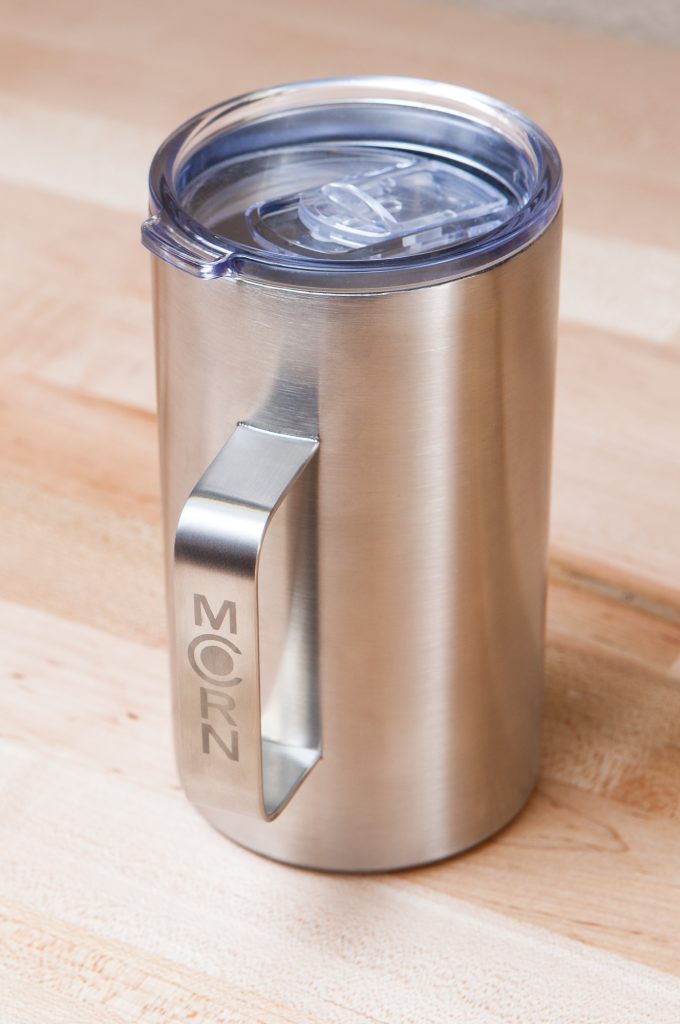
For added effect I created a simple vertical “MCRN” logo like on the uniforms to fit on the mug’s handle. Thankfully that part of the design was straightforward.
The logos were inverted, mirrored horizontally, and then printed on glossy paper using a laser printer.
Prepping the Mug
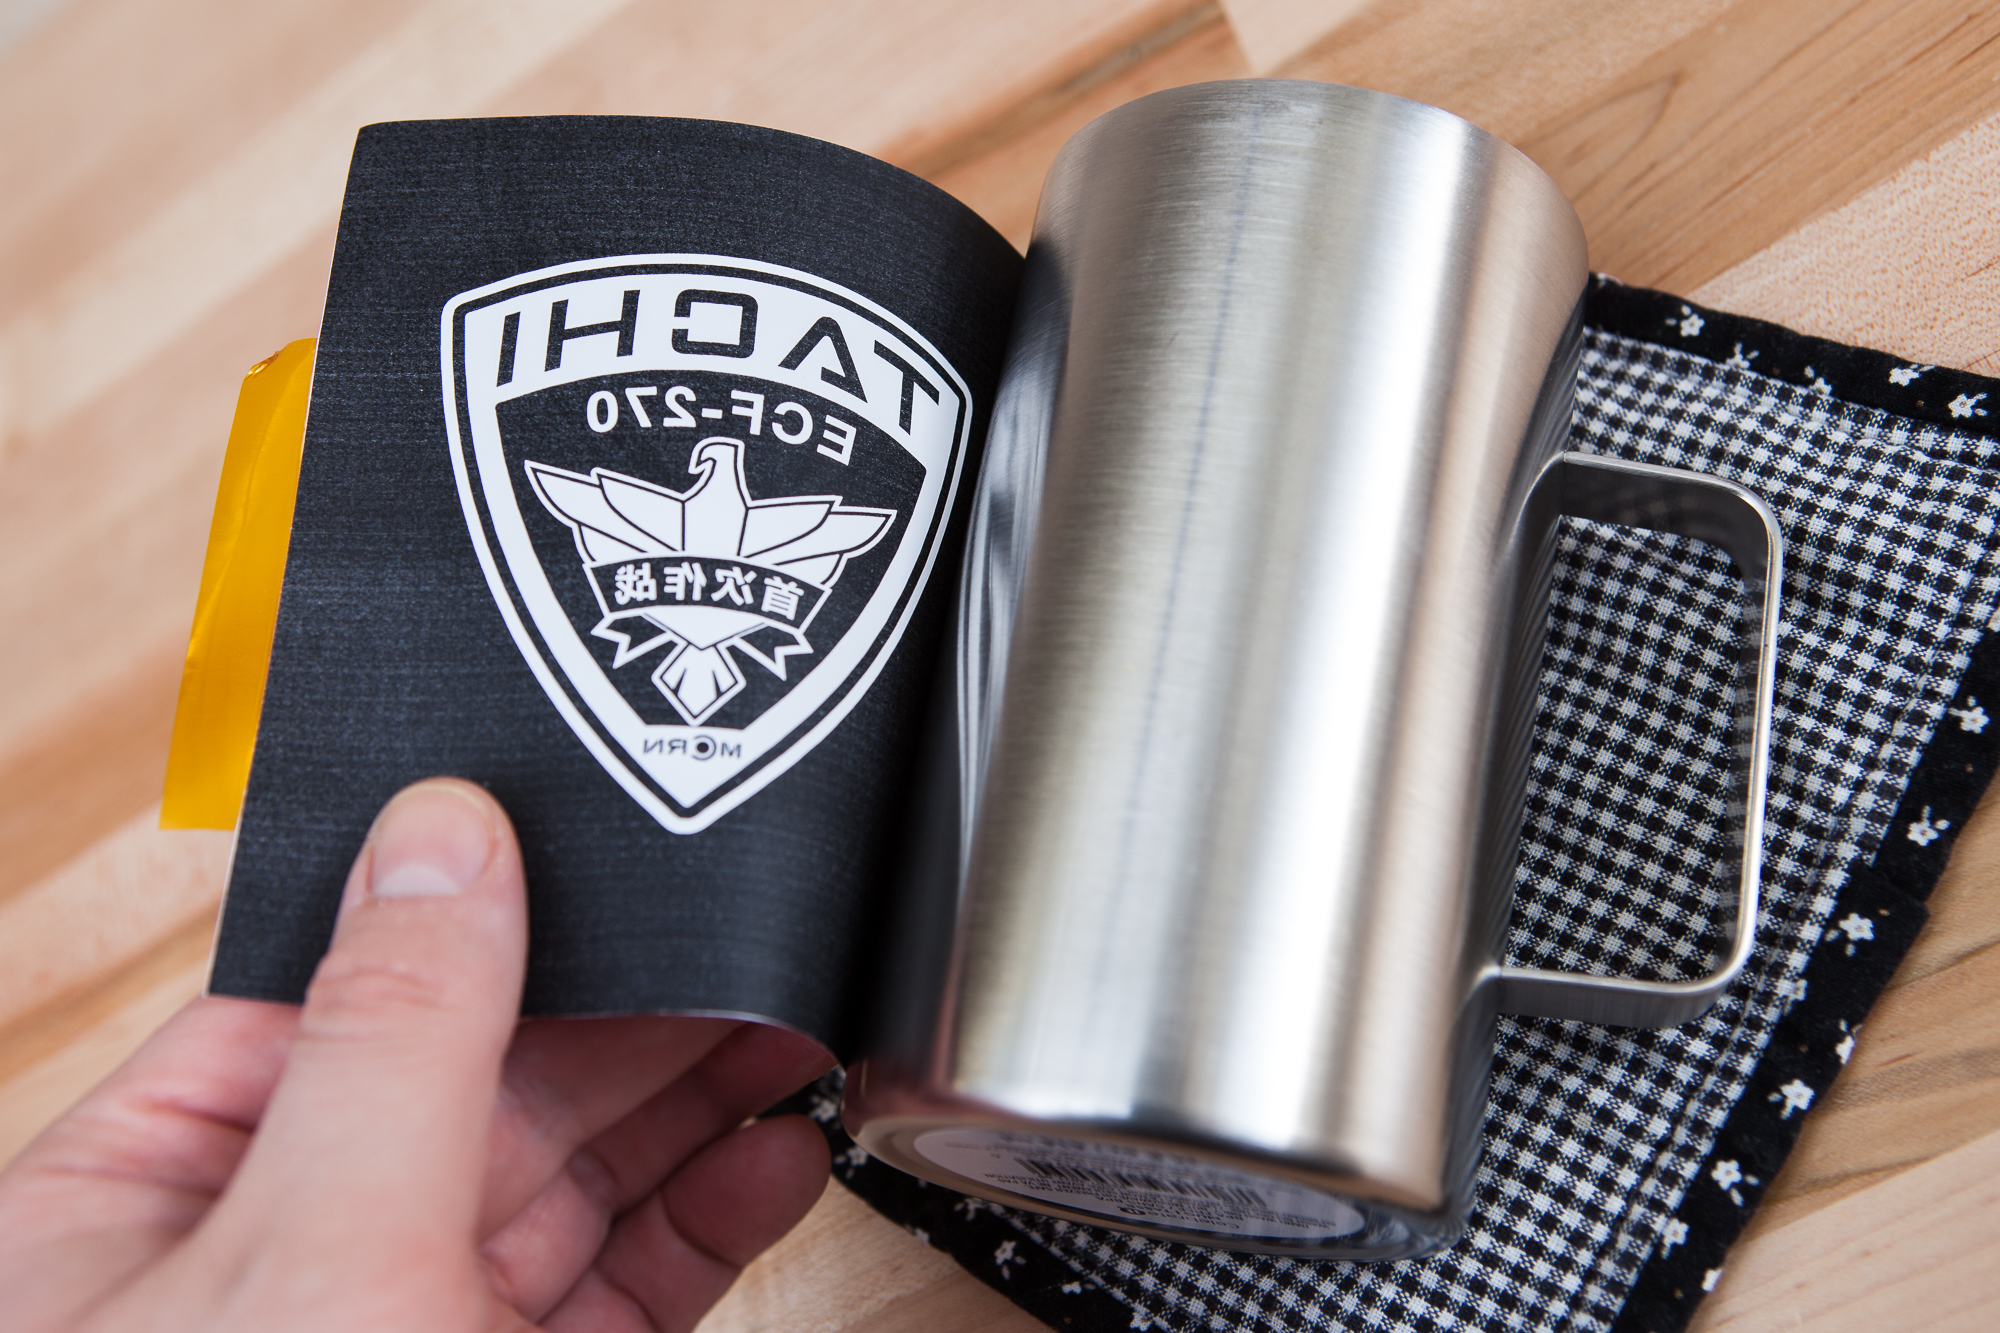
In preparation for the toner transfer, I washed the mug in soapy water and let it dry thoroughly. I then cut out the printed graphics and taped them face-down using some thin Kapton tape.
Using a household clothes iron on its hottest setting and without steam, I heated up the design through the paper to get the toner to stick to the face of the mug. I went back and forth across the surface of the paper for about five minutes, always keeping the iron moving and trying to concentrate most of the heat on the detailed areas. When I was done, I let the mug cool and removed the Kapton tape. At this point the paper was held in place entirely by the toner’s bond to the mug’s surface.
I then submerged the mug in lukewarm water and let it soak for a few minutes. When the paper was fully saturated, I scraped it off gently with my fingers and let it dissolve in the water. This exposed the face of the mug, now covered with the toner of the design.
There were a few areas where the toner didn’t fully transfer from the paper, likely due to uneven application of heat. I used a permanent marker to paint over these gaps and keep the mug surface fully covered.
After completing the toner transfer for the main logo, I repeated this process for the smaller “MCRN” logo on the handle.
Etching
Although the acid etching was the most nerve-wracking part of this project, it was also the quickest. The ferric chloride I used is aggressive and it only takes a few seconds of contact before you start to see the effect.
I performed a grid test on an identical mug and found that the etching effect evened out if applied for 30 seconds or more. In my testing, longer times didn’t seem to make a significant difference in the tone of the etched area or cause issues with bleeding. I settled on an application of 60 seconds and probably should have gone for a little longer. A few areas near the top edges were unfortunately a little undercooked and up close you can see some spotting.
After putting on the requisite safety gear (gloves, goggles, respirator) and ensuring adequate ventilation, I applied the acid to some cotton balls and rubbed them over the surface of the mug. As I learned from my experiments with homemade circuit boards, the key is to keep the applicator saturated and move fresh etchant over the surface continuously. When the timer expired, I wiped off the etchant with a clean cotton ball and then used a wet paper towel to wash off the surface of the mug.
The etching process was repeated for the handle logo, using cotton swabs in place of cotton balls for better control in the smaller area. The cotton swabs are much easier to work with, though I would caution that they make it more difficult to get an even result when used over a large area.
To finish the mug, the laser toner acting as an etch resist was removed with a paper towel and some acetone. It’s almost magical to see the finished design revealed as the resist is washed away. One final wash and rinse with soapy water, and the mug is ready for use!
The Finished Product
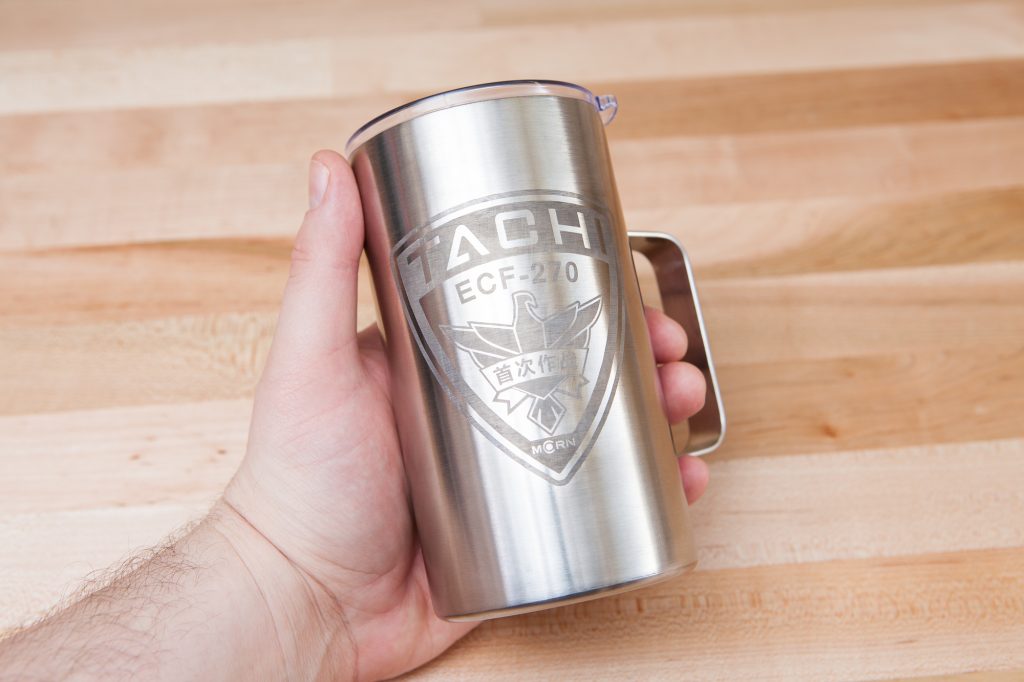
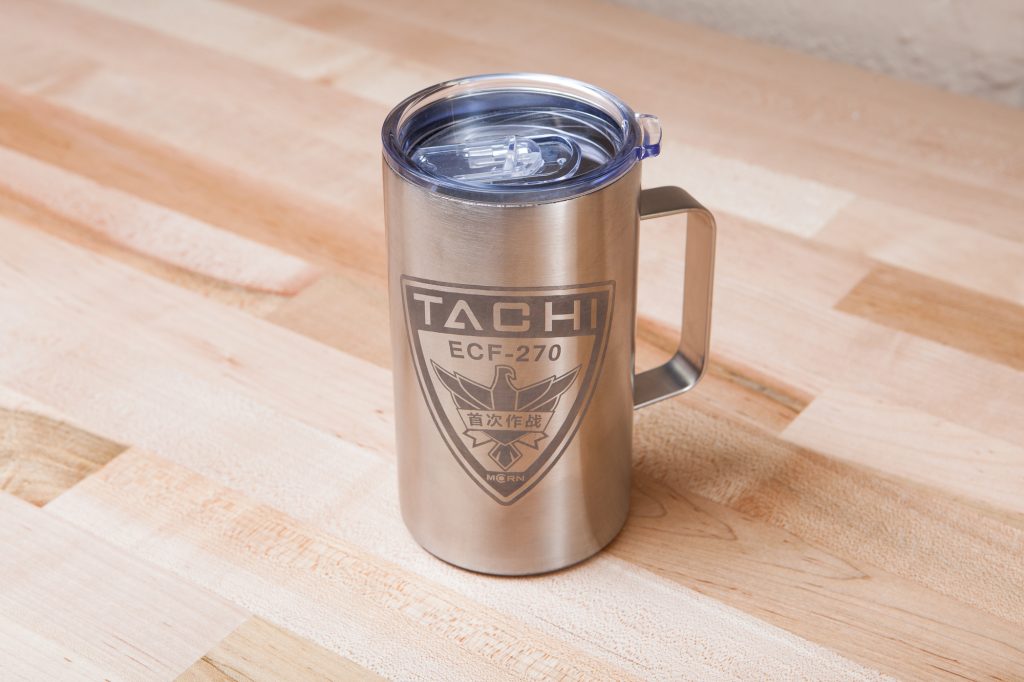
I’m very happy with how this turned out. The etching looks great and I love the design. It’s subtle enough that it doesn’t call attention to itself while still being recognizable to fans.
The process to get there, on the other hand, was a little rough. Using the flat clothes iron on the curved surface meant that heat was applied in slices, and it was difficult to get even heat over all parts of the design. If I was going to revisit this project in the future, I would try to work on a way to apply the heat more evenly so that the resist wouldn’t need to be touched up with a marker. While the marker ink did protect the design it is not as thick as the toner, and requires some care to avoid burning through it.
The etching itself was also a bit rough around the edges (literally!). I think in my focus to get the main portion of the design even and keep the acid away from the unprotected areas I neglected the perimeter, which is why it’s a bit light. For next time, increasing the etching time by a bit and focusing more on even coverage would probably provide a better result.
But! Even with those minor flaws I’m still quite proud of the end result. It will work great as a coffee mug for years to come. Just so long as I got every last bit of protomolecule etchant off of it safely. Eh, kopeng?
All six seasons of The Expanse are available for streaming on Amazon Prime Video.
This article includes Amazon affiliate links which help fund the content on this site. As an Amazon Associate I earn from qualifying purchases.