Guitar Hero X-Plorer USB-C Mod

When the sixth generation of video games consoles were released in the mid 2000s, console manufacturers began the process of transitioning from wired to wireless controllers. Both the PlayStation 3 and the Xbox 360 came with wireless controllers but offered wired options for gamers still reluctant to move on from the bulky tethers of yore. Similarly, many 3rd party controller manufacturers were hesitant to switch to the new wireless systems and only offered their controllers with bulky, permanently attached cables.

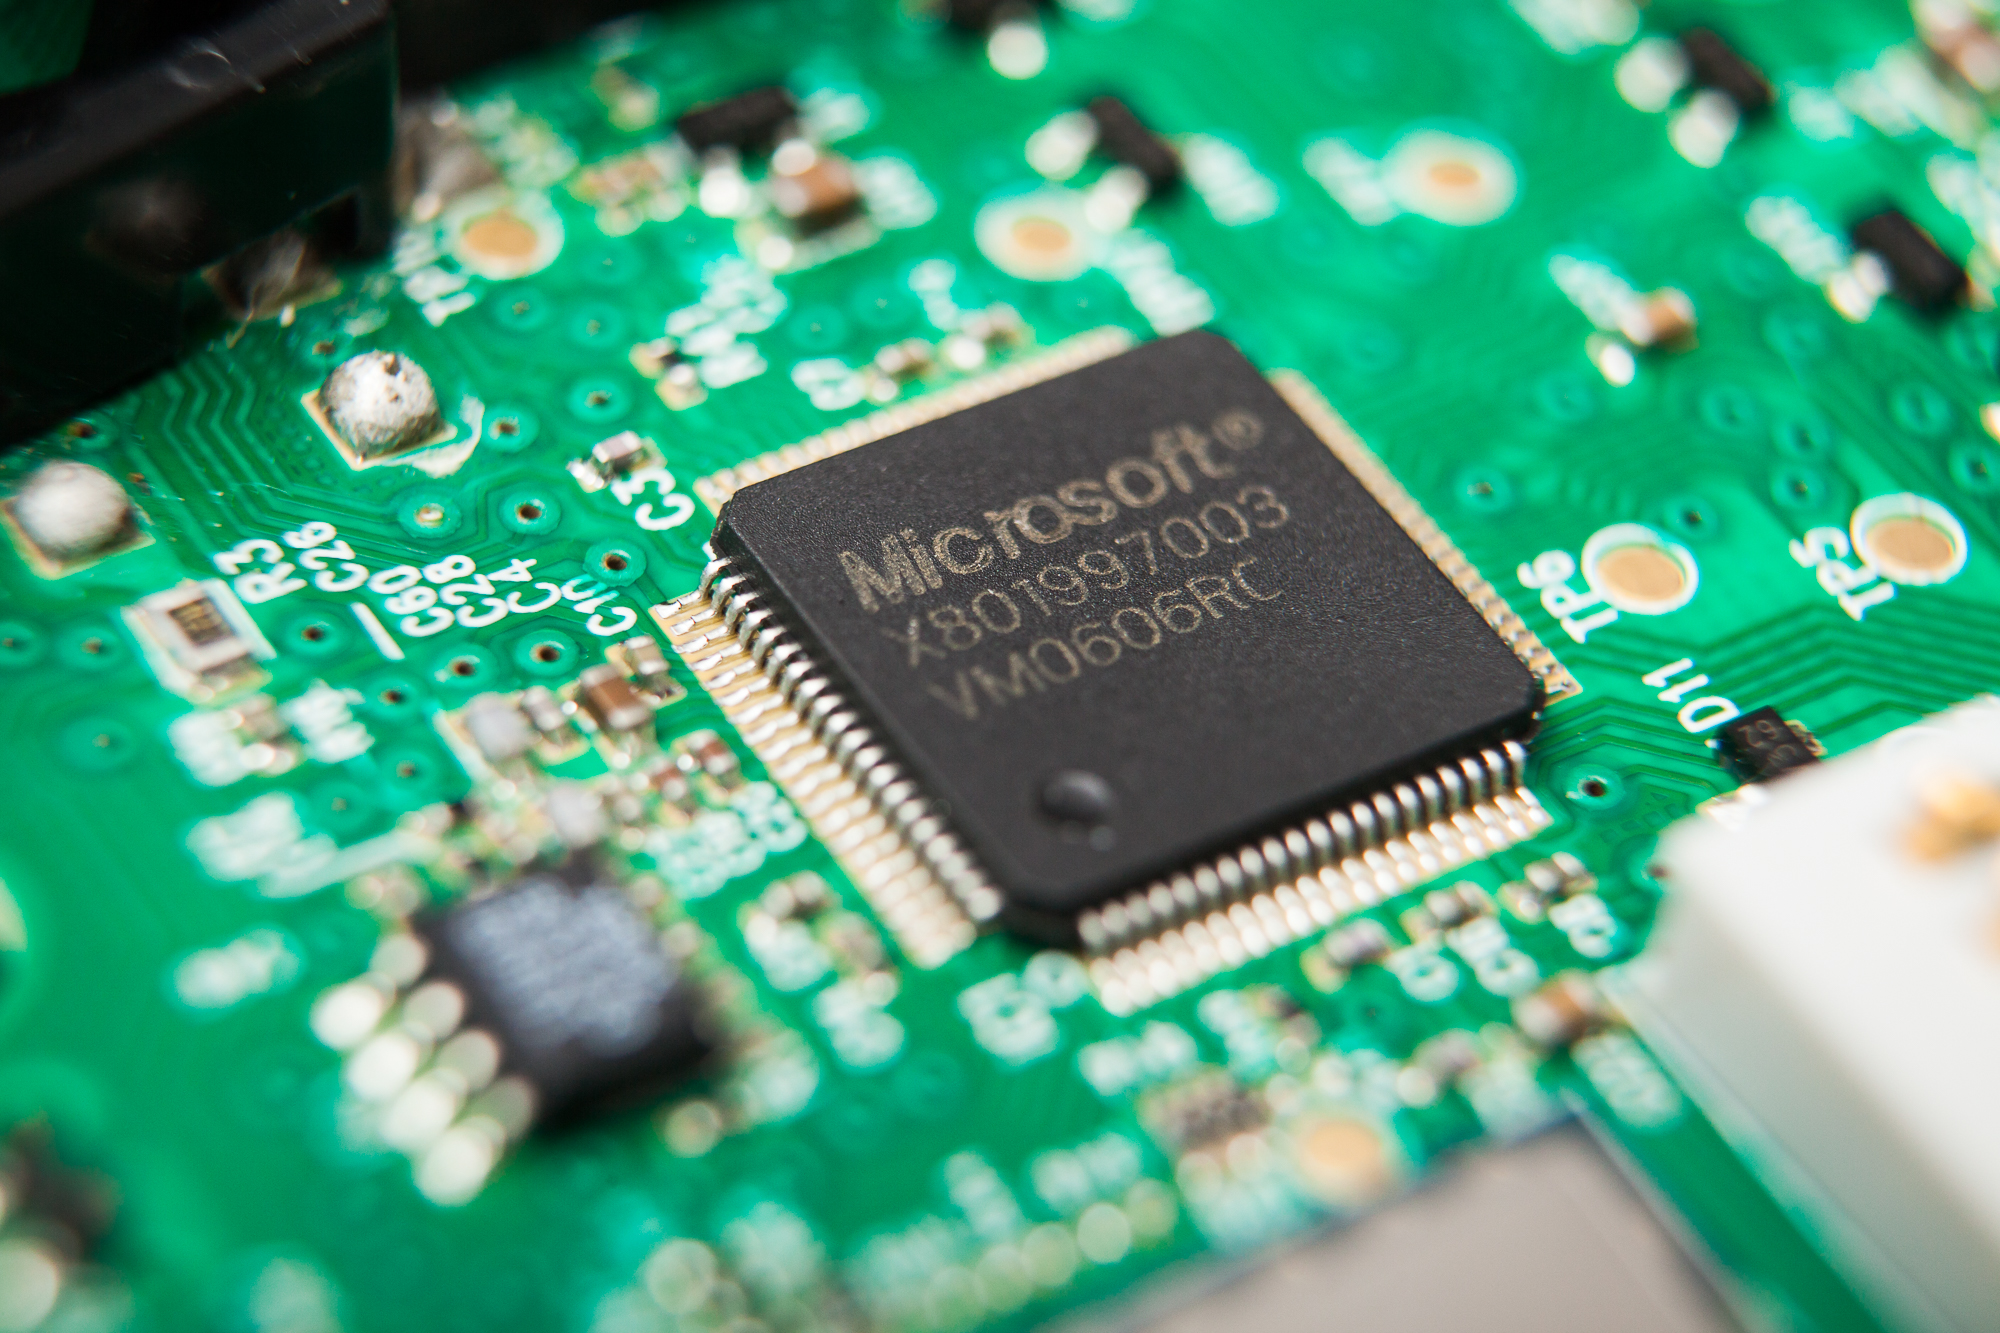
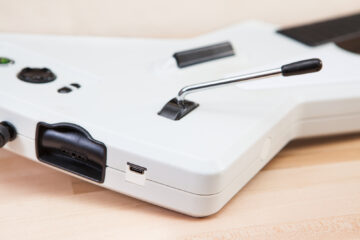
One such controller is the Guitar Hero X-Plorer, an Xbox 360 rhythm controller made by RedOctane. Modeled after a Gibson Explorer, the X-Plorer was released with Guitar Hero 2 and is still a popular choice today for Guitar Hero and Clone Hero players. It comes with a permanently attached 10 ft. USB cable that is great for playing from the couch, but is long and unwieldy when sitting at a desk.

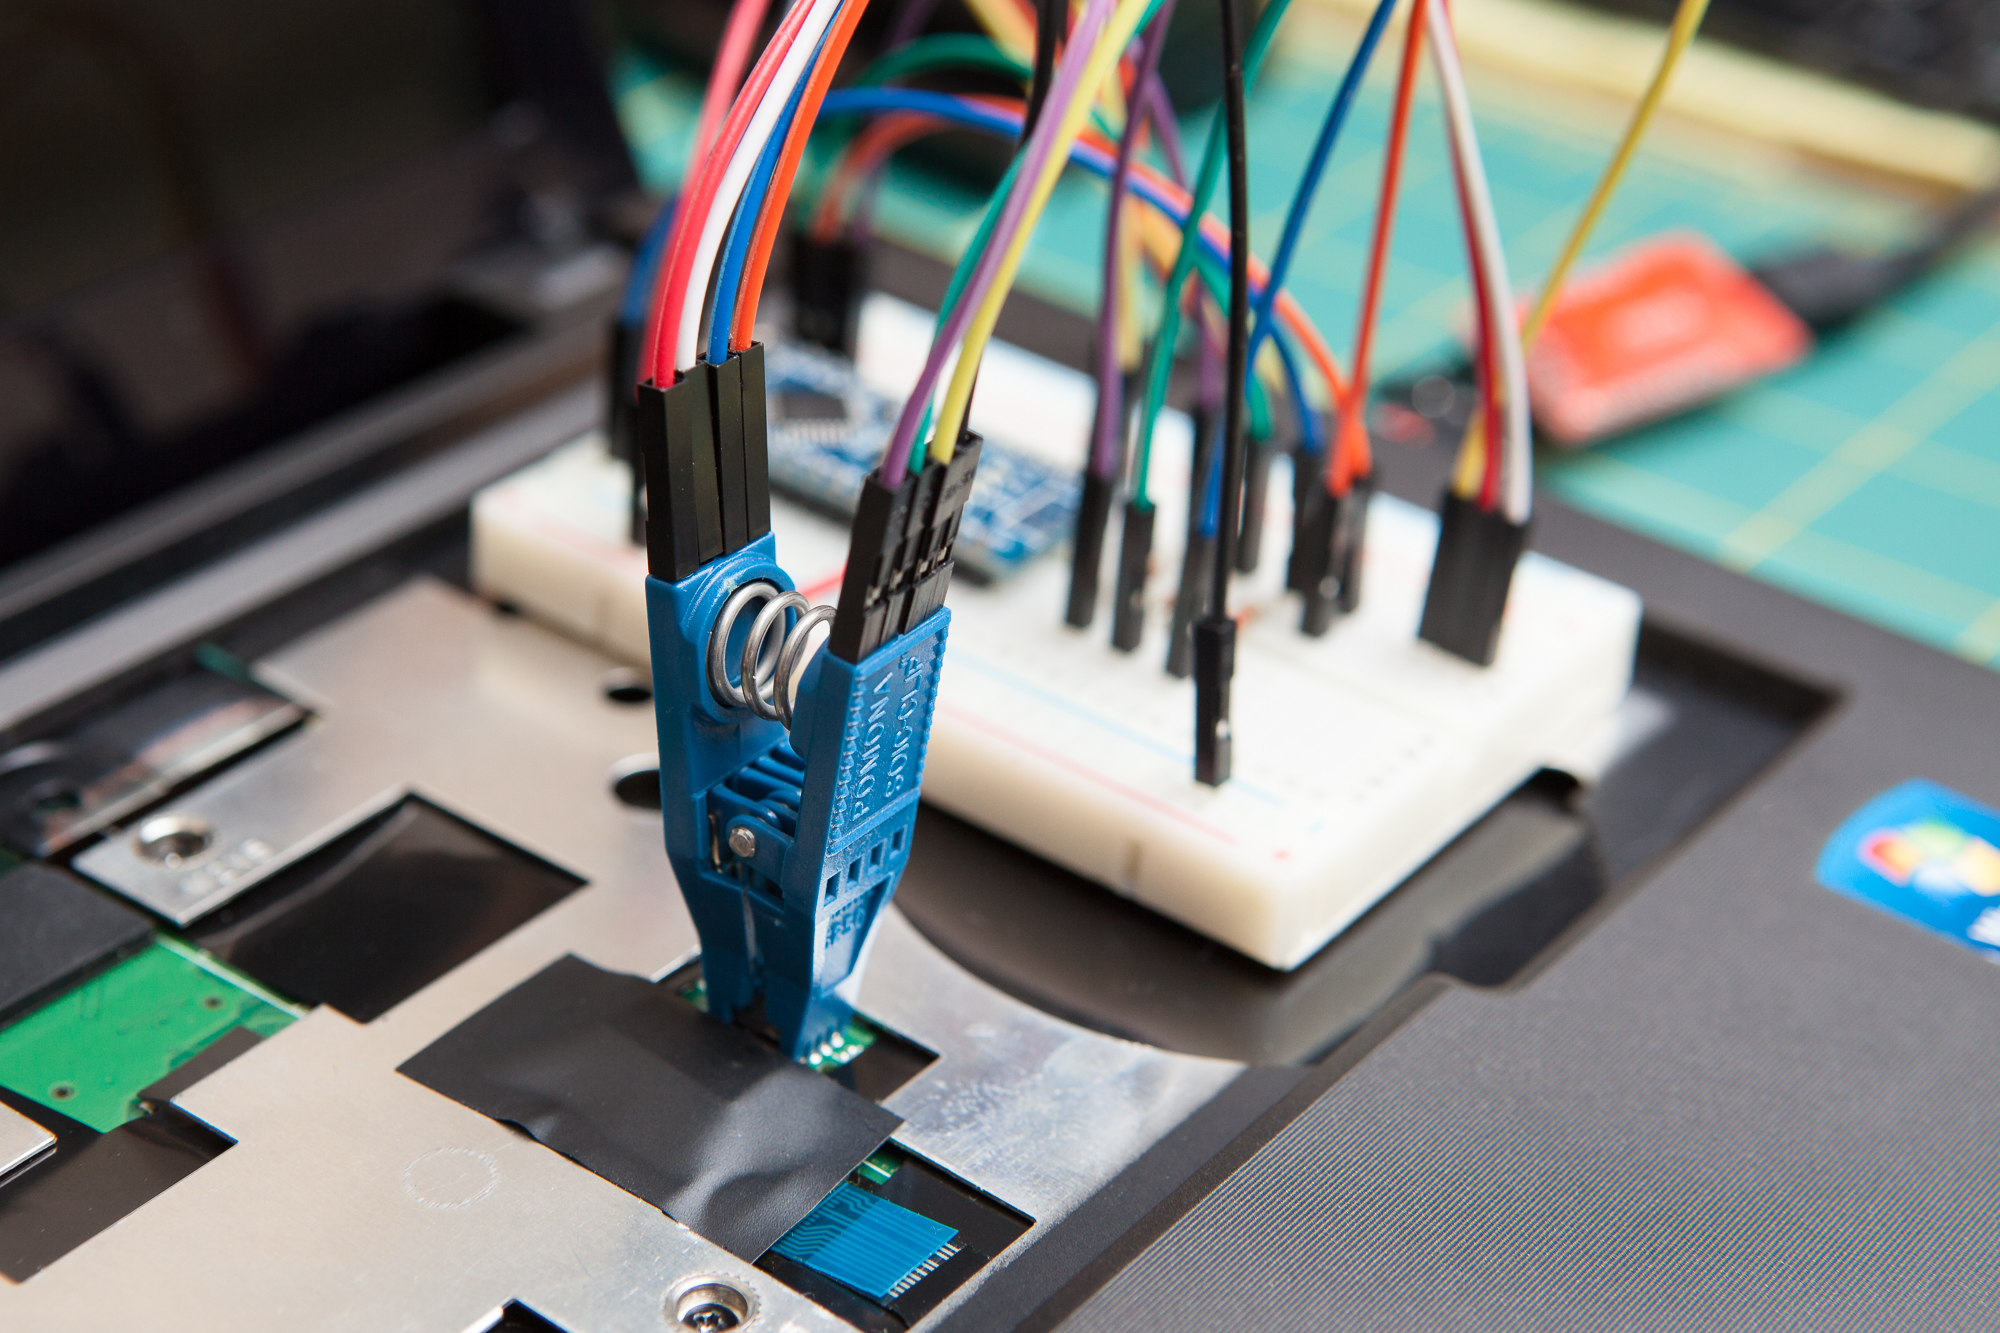
To solve this problem, I’m going to remove the cumbersome USB cable and replace it with a sleek and modern USB-C jack.

(more…)

Teensy 4.0 Minimalist USB Host Shield

When the Teensy 4.0 development board hit the market in late 2019 it blew the doors off the place. Sporting a blazing fast 600 MHz ARM processor, 2 megabytes of flash memory, and over 40 I/O pins, at only an inch and a half long it packs a serious punch in a (Teensy) tiny package.

One of the awesome features of this board is its built-in USB host capability. This allows the microcontroller to talk to other USB devices such as human interface devices (mice, keyboards, joysticks), MIDI controllers, and even other development boards over USB serial. While some previous boards such as the Teensy 3.6 had this feature, this is the first Teensy board to include USB host functionality in a small format package.

To take advantage of this awesome new feature, I decided to design a minimalist USB host shield for the Teensy 4.0.

(more…)

FastLED NeoPixel Library

Here’s a solution to a niche problem: what do you do if you have an animation written for the Adafruit NeoPixel library but want to use some of the more advanced features of the FastLED library?

In the past that would mean rewriting a significant portion of your code! You would need to research the corresponding FastLED command for every Adafruit NeoPixel function, then modify your program line by line. This requires a working understanding of how both libraries work and how LED data is managed and manipulated.

Now the answer is simple: you can use the FastLED NeoPixel library!

(more…)

Modifying an RC Controller to Play Forza Horizon

I’ve always been fascinated by RC cars. The dynamics, the engineering, the speed… all wrapped up in a package that you can hold in one hand. Almost more than the cars themselves I’ve always loved the remotes. Ever since I watched Back to the Future and saw that awesome modded Futaba remote I’ve been captivated by the possibilities contained in one of those mystical black boxes. I was playing a racing game the other day when the idea came to me: what if I could modify an RC controller to control a racing game?

And just like that, I decided to convert an RC controller into a gamepad to play Forza Horizon 4.

(more…)

How to Use an RC Controller with an Arduino

Whether you’re modifying a remote controlled vehicle or creating something completely new, Arduino boards are a great way to expand the functionality of your RC receiver. Adding a microcontroller lets you program complex logic functions, sound effects, lighting animations, and more – all managed from the comfort of a wireless remote.

In this tutorial I’m going to show you how to connect a PWM-based RC receiver to an Arduino and read data from it using the Servo Input library.

(more…)

DIY SparkFun Pro Micro with USB-A Port

Lately I’ve been working on a project that will use an Arduino to translate signals from a wireless receiver into USB HID inputs for my computer. I had the perfect microcontroller picked out too: the SparkFun Pro Micro, which uses the Arduino-compatible ATmega32U4 and has enough I/O pins for my project and then some. There’s just one problem – the Pro Micro doesn’t have a USB-A port to plug directly into a computer! Instead it has a micro USB-B port, and requires a short cable to connect it to a PC.

Luckily for me the Pro Micro, like many of SparkFun’s designs, is open source and licensed under Creative Commons Share-alike. So I decided to dive in and modify the design to create my own version of the Pro Micro with a USB-A port!

(more…)

Playing Spin Rhythm XD with a Modified DJ Hero Controller

A few weeks ago, a friend of mine introduced me to a new rhythm game. Unlike previous titles such as Guitar Hero or Rock Band that use multiple discrete buttons in order to match different notes, this game used a virtual wheel – an analog input to slide, spin, and tap along with the beat. To top it off the game featured an electronic music tracklist and was a blast to play.

The game is called Spin Rhythm XD, and it was designed to be played with a DJ MIDI controller. Having no such professional DJ-ing equipment handy I decided to do the next best thing: convert my old plastic Wii DJ Hero turntable into a controller for Spin Rhythm XD!

(more…)

Flashing the BIOS to Fix a “Bricked” Lenovo Laptop

A few months ago I was attempting to reformat my laptop as a dual-boot machine with both Ubuntu and Windows 10 and I was having issues getting the boot manager to properly detect both operating systems. Shortly after changing a setting in the BIOS related to SATA operation, the laptop suddenly stopped working after rebooting. Powering it on resulted only in a pure black screen where after approximately fifteen seconds it flashed “Lenovo Misto Ontario”, and then nothing. It was true and thoroughly “bricked”.

I tried everything I knew to fix it, including pulling the CMOS battery, reformatting the hard drive, and trying to ‘auto-flash’ the BIOS from a USB drive – nothing worked. I’ve had this little Lenovo S205 netbook for a few years and although it’s gotten slower it’s always served me well.  And since it was working perfectly fine up until it er, wasn’t… it seemed like a waste to just throw it out without trying my best to fix it.

I’m happy to say that I succeeded. The solution was to reflash the BIOS chip with a replacement BIOS I found online, using an open source program called ‘flashrom’ and an Arduino acting as an SPI flash programmer. Here’s how I fixed it.

(more…)