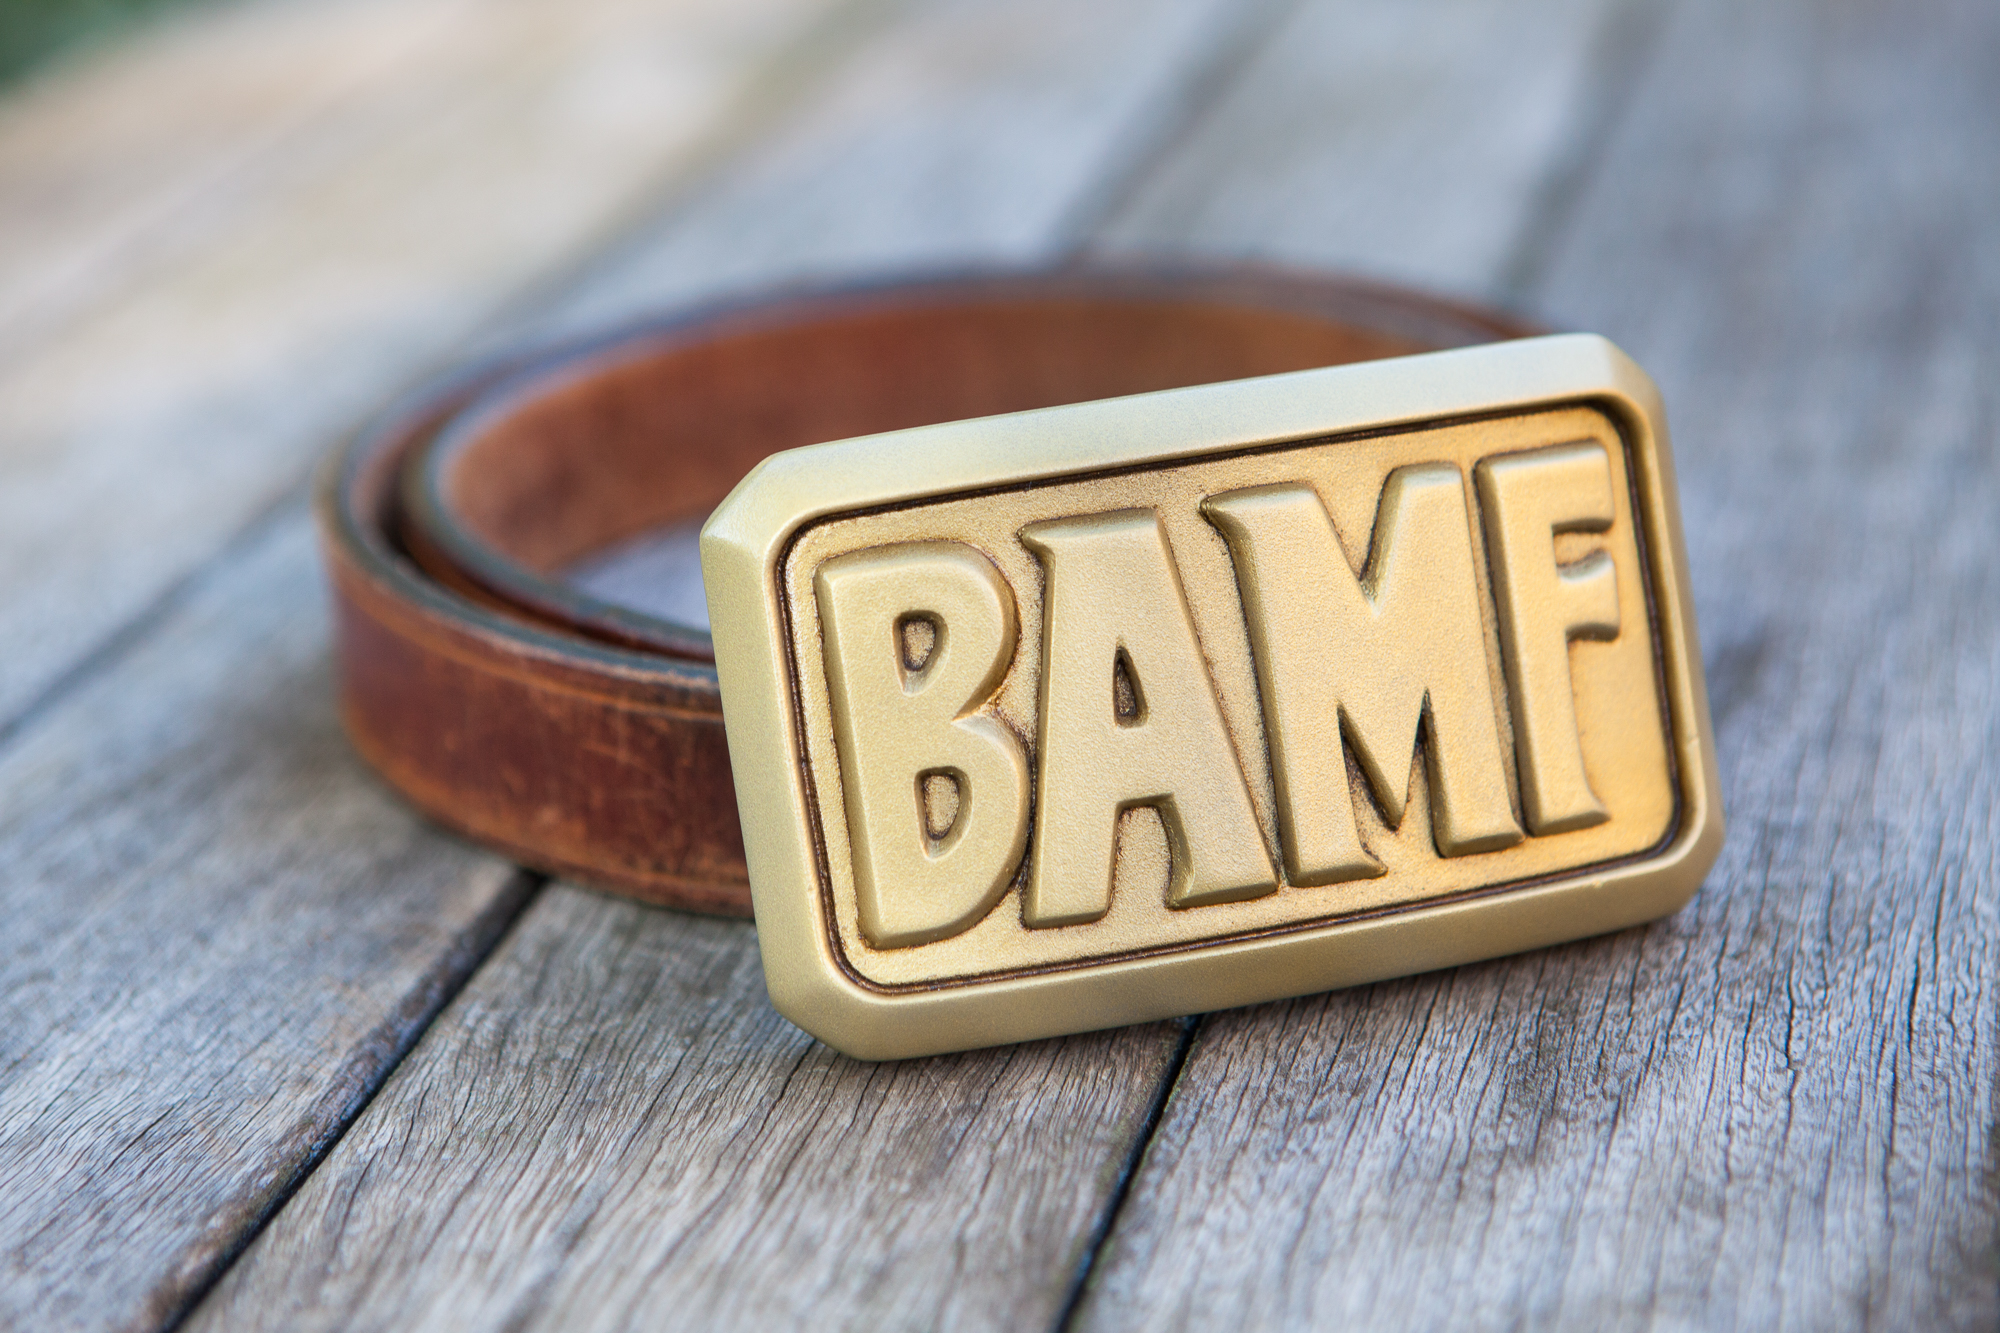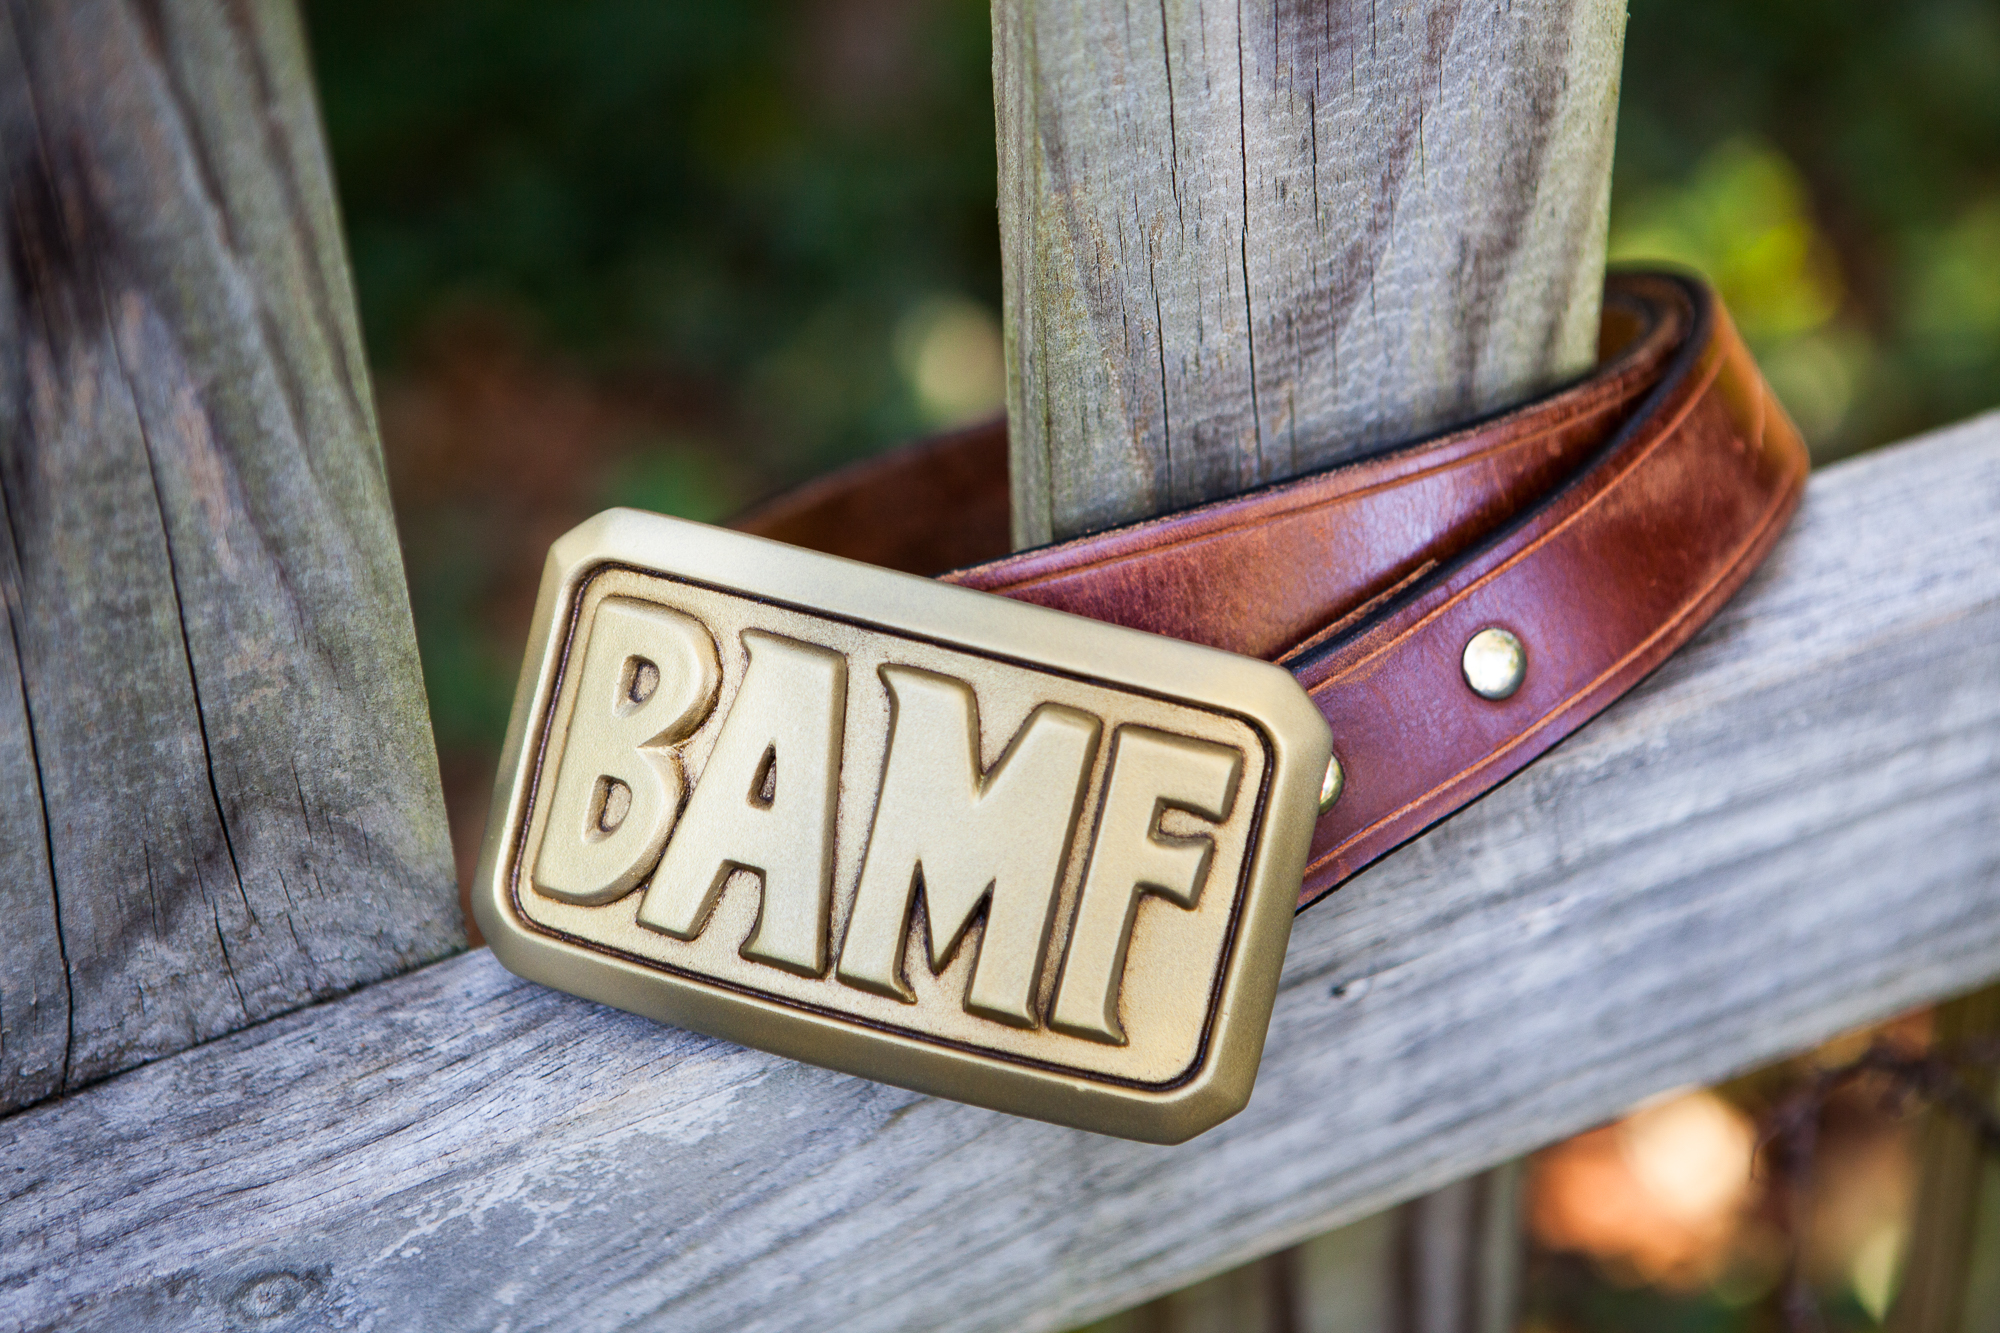
In the previous posts of this series, I created a comprehensive 3D model and physical ‘master’ prop of McCree’s belt buckle based on references from Overwatch. Now that I have a polished physical version of the buckle in hand, the next step is to create a solid cast of the buckle from a silicone mold!
But… Why?
Hold on a minute. So far the buckle looks pretty good! The ‘master’ is assembled, smooth, and all that’s left is a nice gold coat of paint. Why do we need to go through the moldmaking and casting process?
Two reasons: durability and repeatability.
#1: Durability
The master may look the part, but under its outer paint it’s rather fragile. The base pieces are hollow 3D printed parts that can crack or tear. Not including the alignment pins, it’s made up of at least 6 parts that have been glued, epoxied, and filled to here and back again. On top of that there are a number of layers of spot putty and paint making up the surface which can crack or wear off, revealing the rough 3D printed texture underneath. All-around, it’s just not built for wearing.
By making a mold of this 3D printed master, the resulting cast will be solid plastic through-and-through, which will be much more durable and can take a beating in use as an actual belt buckle.
#2: Repeatability
The other reason to make a mold is repeatability. Although I still have the digital model of the buckle, it takes a lot of time and effort to get to this point where I have the smooth, assembled master prop in my hand. By making a mold I can create multiple copies in minutes rather than days.
(I’m going to completely screw this one up, but it was a good idea at the time!)
Making the Mold
The buckle doesn’t have any flat surfaces, so the plan is to make a two-part mold split along the back face of the buckle with the pour spout stemming from the center of the back face. This should minimize the visibility of the parting line and put the pour spout in an area that’s going to covered up by the metal mounting plate. At least, that’s the plan.
The Box Form
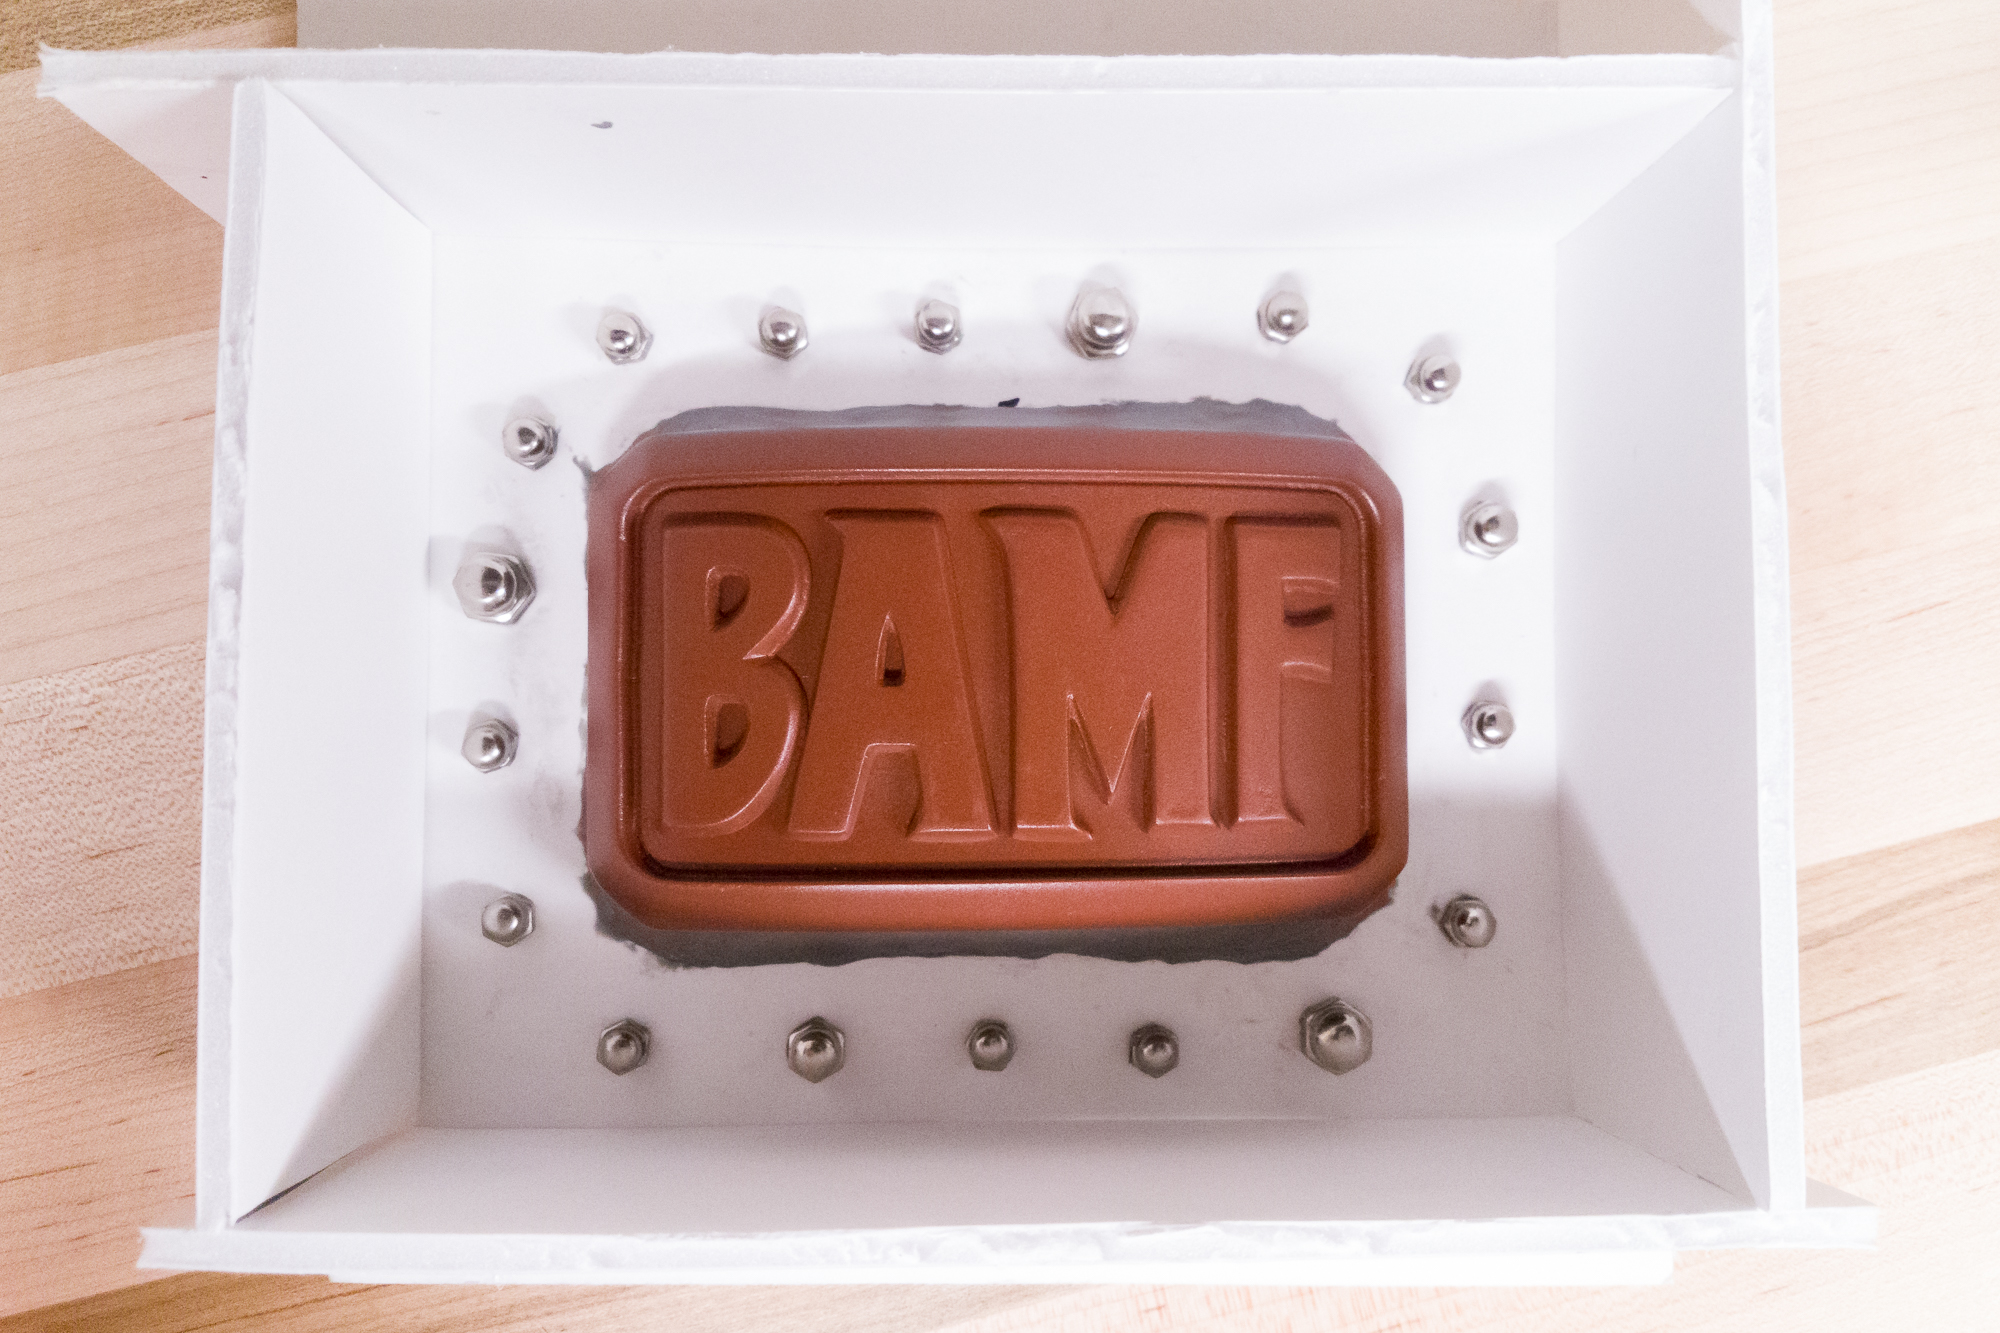
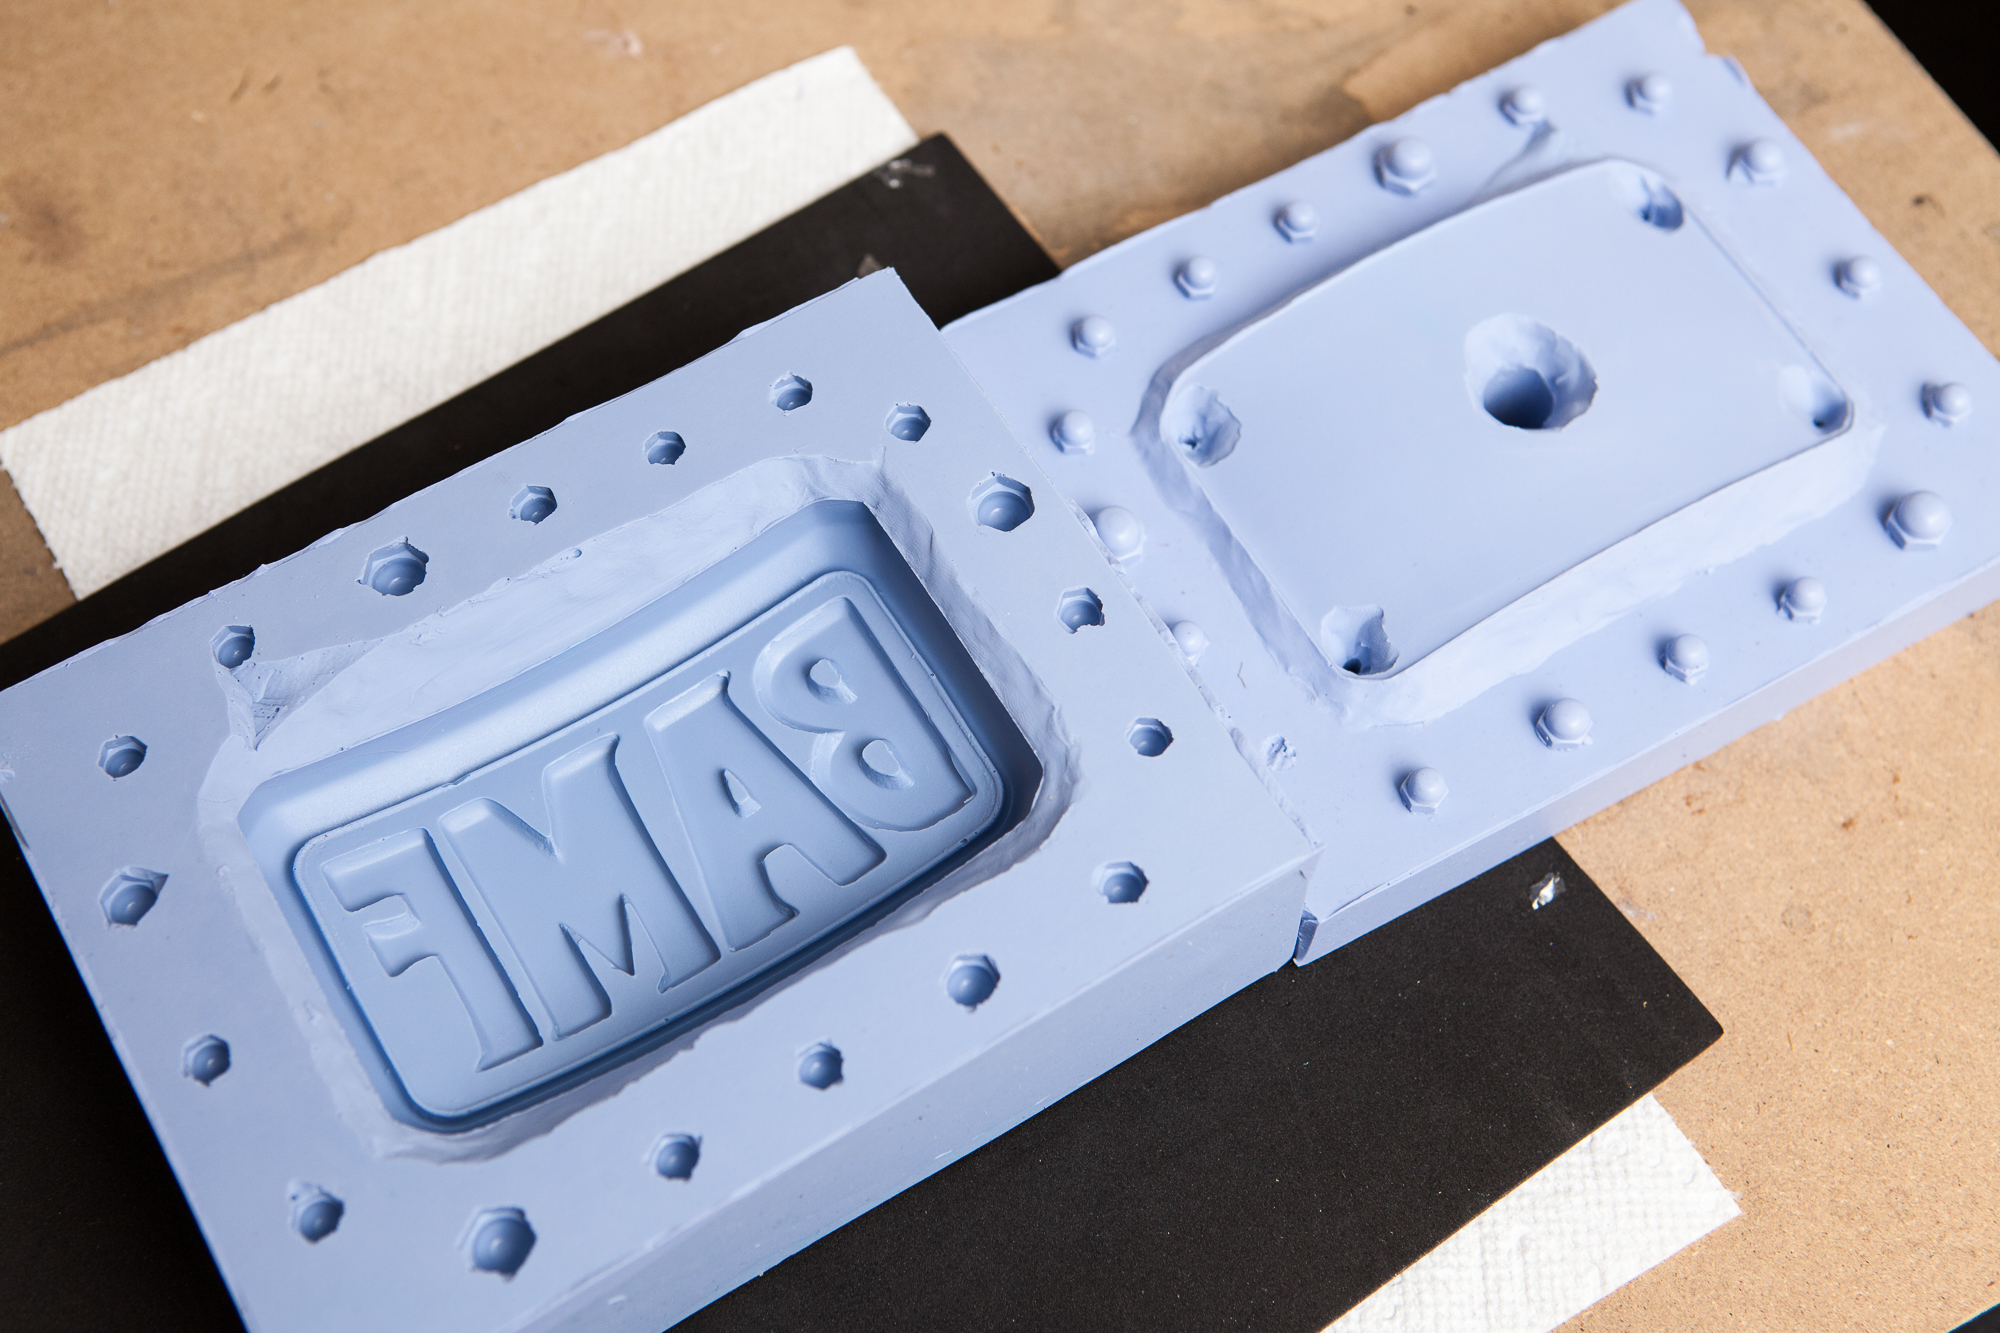
Molding form, with acorn nut alignment keys, ready for silicone
I started by setting the buckle on a sheet of foam board, using a chunk of plasticine clay to hold it into place about 1/4″ above the board. From there I started adding more globs of clay to build out a base. This big clay chunk underneath the buckle has a large positive draft angle – this is so that the second half of the mold (which will take up the space of the clay) will wedge into the mold to seal the seam. Due to the curvature of the belt there is a significant negative draft angle on the sides and a smaller one on the top and bottom edges, but since I’m using a reasonably soft silicone for the mold it’ll be fine.
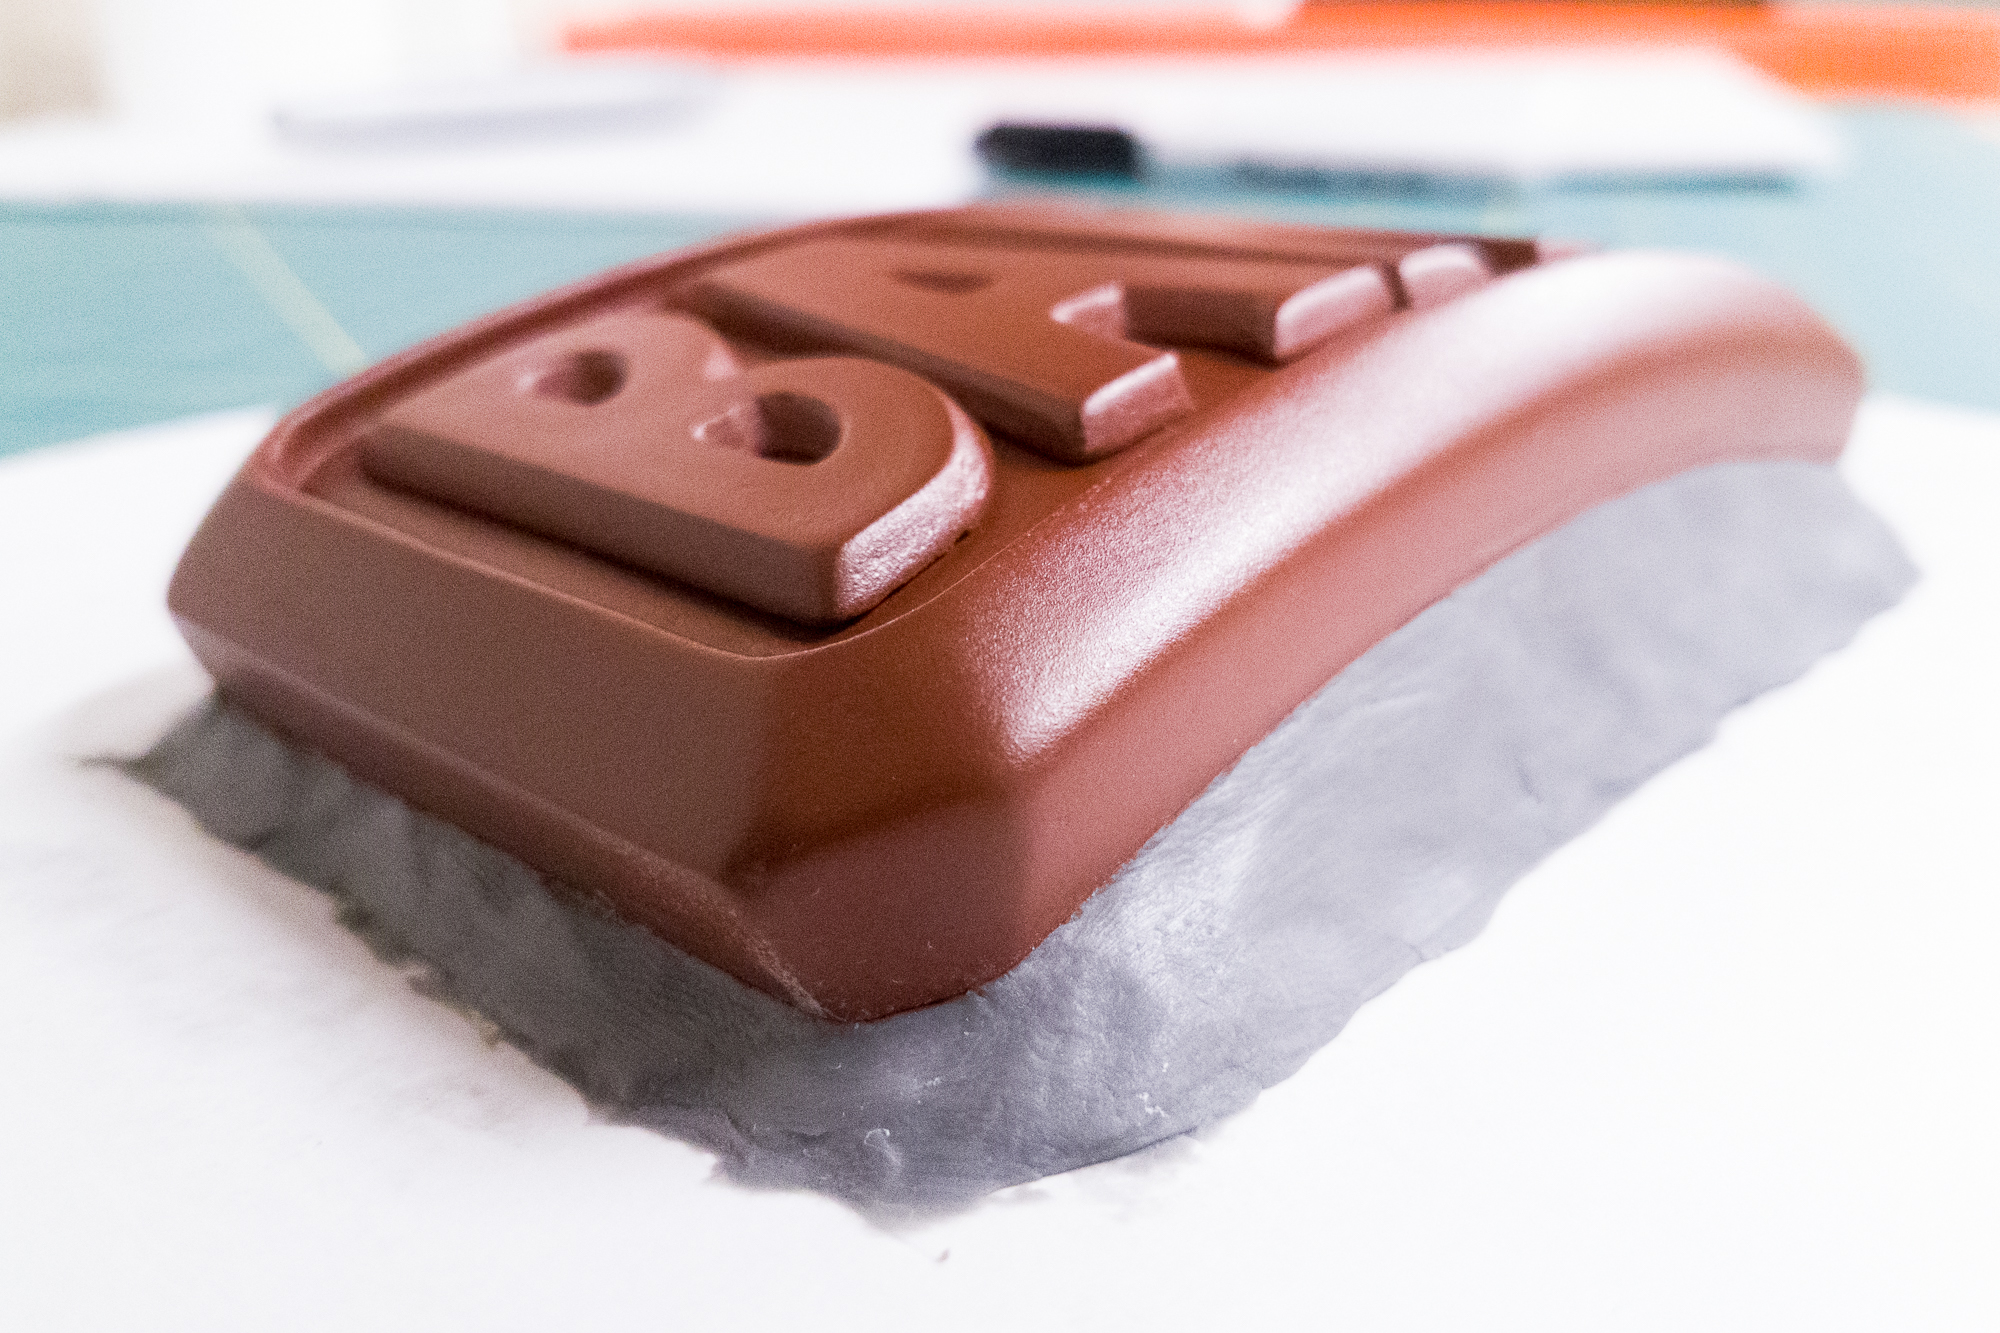
Clay-built draft angle underneath the buckle master
The clay was molded just using my finger and some water. Once I had it in the shape I wanted it, I arranged a few acorn nuts around the perimeter of the buckle to use as mold keys. These were held in place with small bits of excess clay in the screw cavities.
After adding the keys I cut some more foam board to use as the walls of the form. I intentionally made this box a little oversized because I wanted the center of the mold to be well supported – I didn’t want the second half of the mold to bend down and distort the shape of the buckle. I then sealed the edges of the form with hot glue to make it liquid-tight and ready for the silicone.
Pouring The Silicone
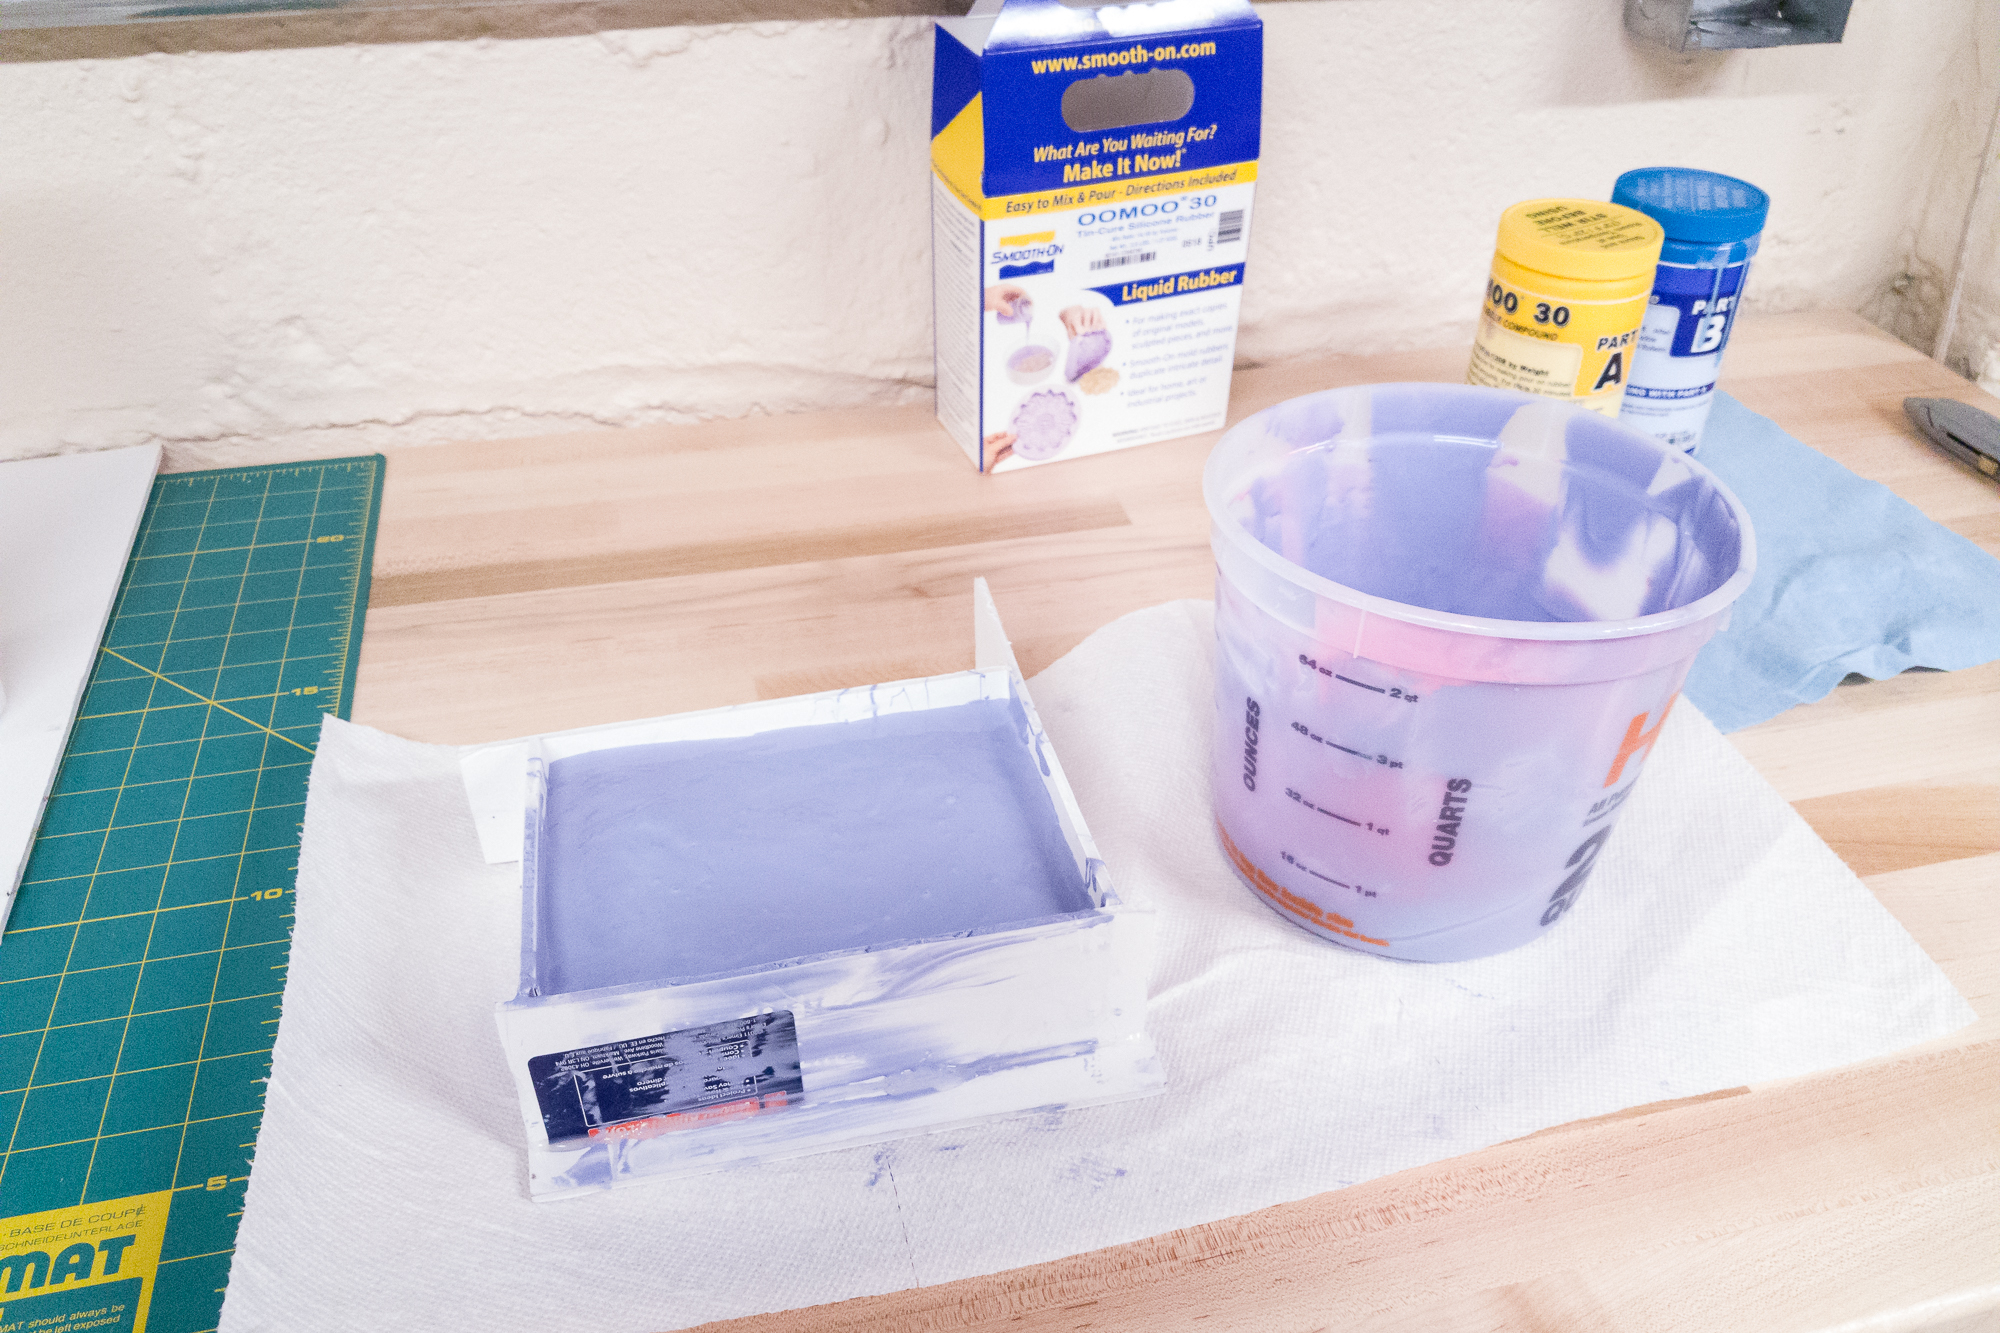
The silicone I used for this project was Smooth-On OOMOO 30. This is a tin-cure silicone that has a 1:1 mix ratio and doesn’t require vacuum degassing, which makes it easy to use for a novice moldmaker like me. I had done a few smaller test pieces before attempting this, but this buckle was going to be my first large-scale mold and I didn’t want to mess it up.
I ordered a trial-size kit from Amazon and then got to work. Smooth-On’s suggestion was to have at least 1/2″ of silicone coverage on all surfaces, so I built the mold box with 3/4″ on all sides to play it safe. From the size of the form I calculated the volume and figured that if I used the entire trial kit I would cover the buckle with at least an inch of silicone over the front face. As I didn’t have any other molds to do, I decided to go all-in with the full kit.
For good measure and because of the negative draft angle I also gave the buckle a coat of Ease Release 200 to make it easier to release the master from the mold. After mixing each part of the silicone thoroughly in their own containers, I poured both parts A (pink!) and B (blue!) into a large 2 ½ quart mixing container. After mixing them together until they formed a nice and even pastel violet, I started the process of slowly dripping the silicone mixture into a corner of the form.
This was my first major mistake in making the mold.
You see, I don’t have a vacuum degassing chamber and although the silicone is advertised as not needing a vacuum degassing chamber, it still traps air bubbles like any other silicone. One method to avoid the number of bubbles that end up in the final mold is to slowly drip the silicone from above in a thin stream. The silicone stretches and the air bubbles pop as it thins out, resulting in fewer bubbles in the final mold. I had done this before with small molds and it worked well, but for a larger mold like this the ‘drip’ method introduced a problem: there’s a lot more silicone to get from the mixing container to the mold, but still only a small constant stream of silicone to get it there.
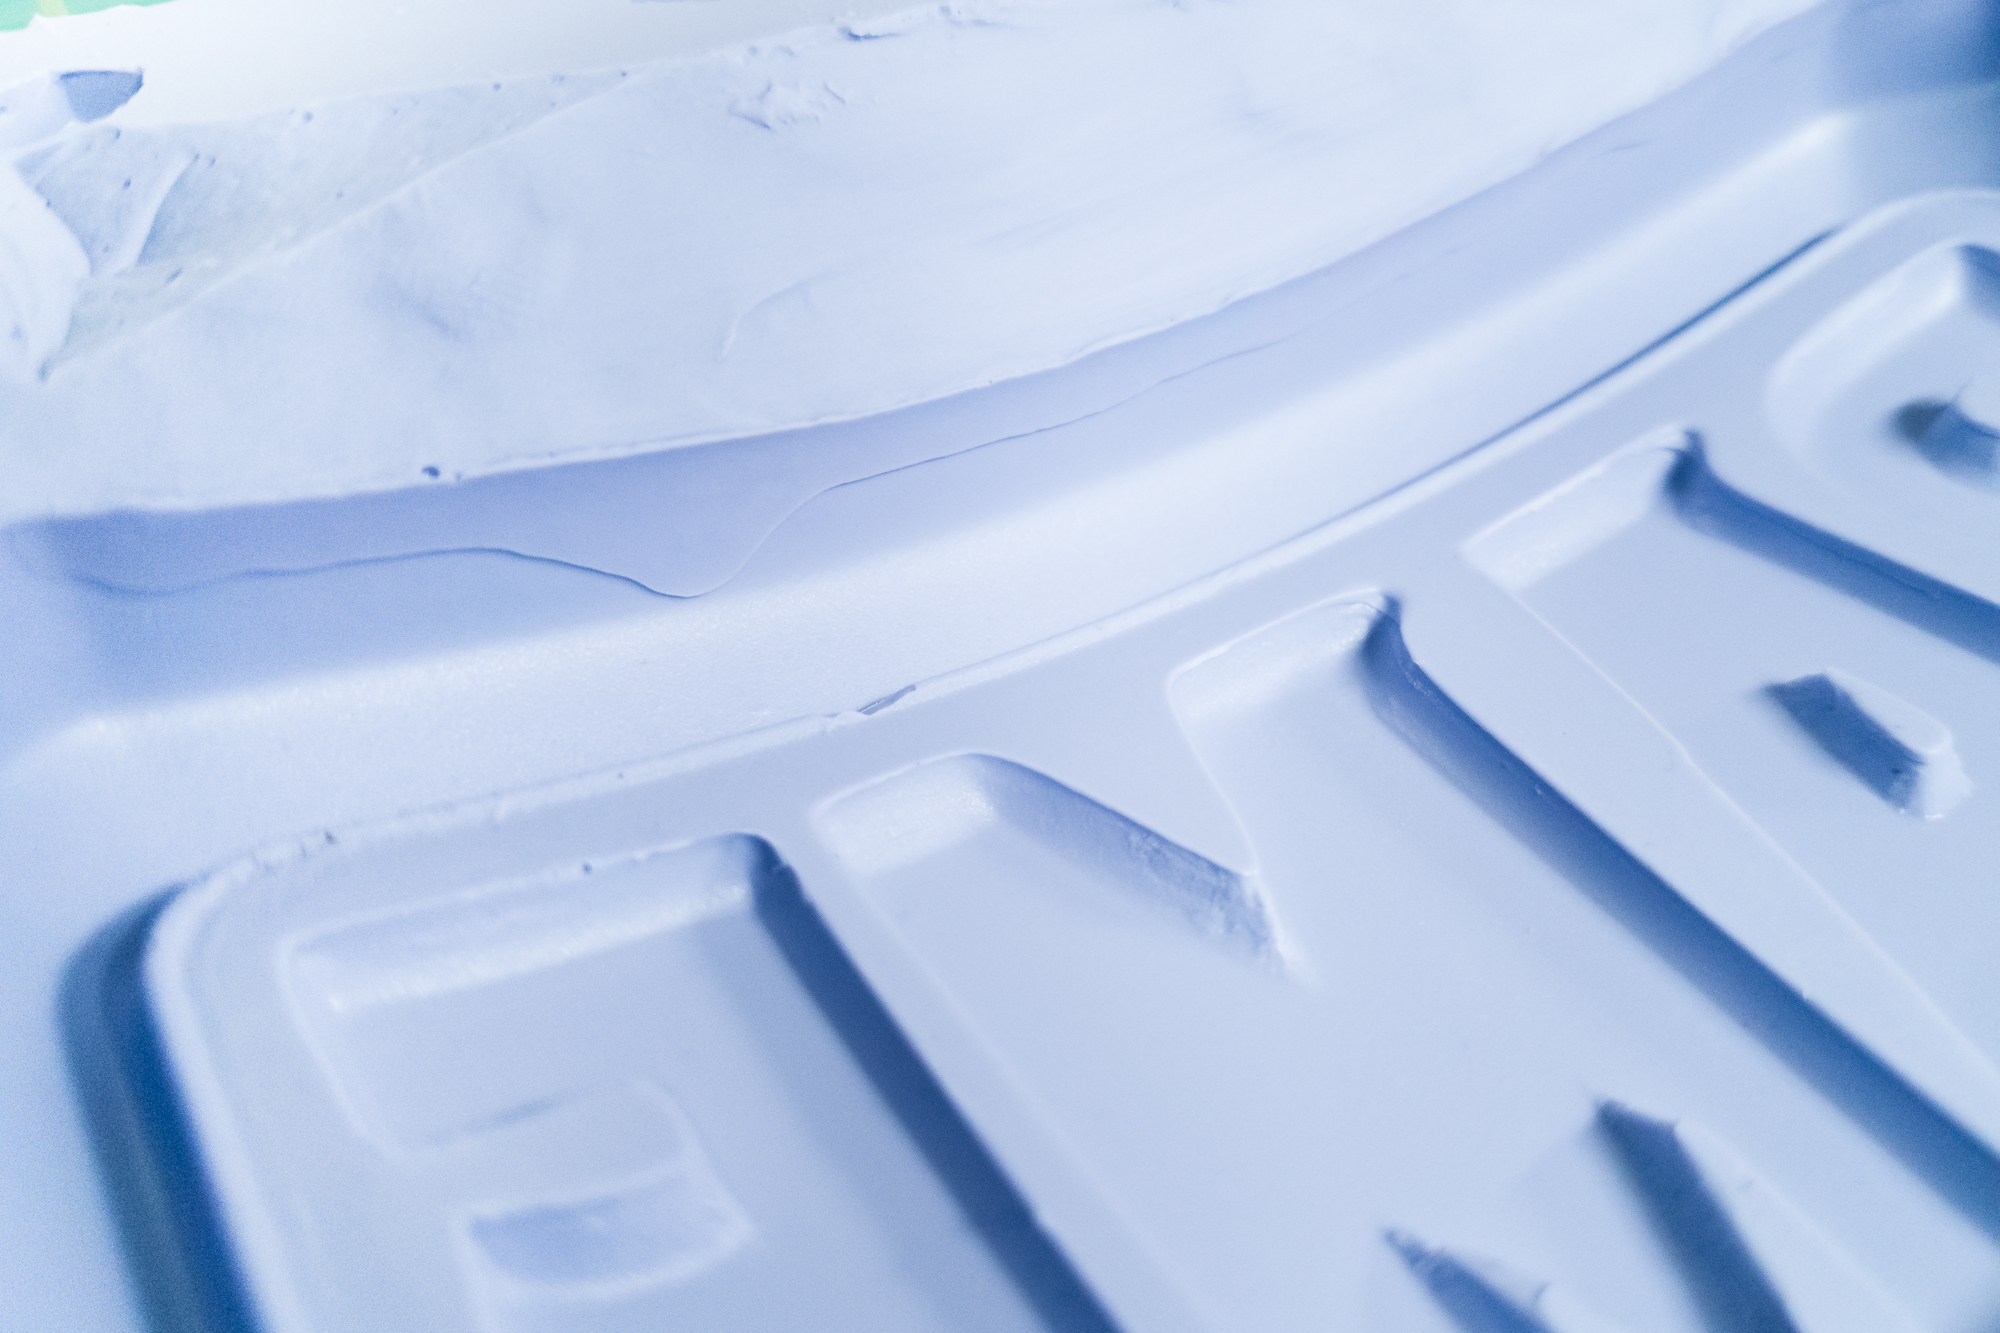
The first half of the silicone mold poured. Note the uneven, bubbly top surface.
Oomoo 30 silicone is a “fast” silicone. It has a cure time of 6 hours and a pot time of only 30 minutes. I was also doing this inside on a slightly warm day (~77° F), which also decreases the cure time. By the time the silicone in the form was at the base of the buckle I could already feel it starting to solidify in the mixing bucket. I quickened my pace and got the rest of the silicone into the mold as a liquid, but the damage was done. You could see on the top surface of the mold that it was uneven and full of bubbles, like thickened batter rather than a still pond.
“Inspecting” The Mold
Also known as “ruining”. This was my second major mistake in making the mold.
24 hours later and the first half of the mold was fully cured – yay! I ripped off the foam board pieces making up the walls of the form and then very carefully pulled away the base piece. Some of the acorn nuts got stuck in the silicone and had to be pulled out, but all-in-all this went smoothly. I then very carefully started pulling off the clay, revealing the silicone and belt buckle sandwich underneath.
That’s where where I should have stopped. The surface of the silicone where it was touching the clay was more-or-less okay, but where the silicone met the buckle I noticed a suspiciously large void. The previous day’s silicone mishaps still fresh in my mind, I decided to “inspect” the mold to see if the surface under the buckle was still good. I didn’t want to waste more silicone if the mold was already trashed.
I broke the vacuum seal between the buckle and the silicone and peeked underneath the edge. This taught me next to nothing except that there was a large void near one edge. Otherwise I couldn’t see anything of note. And now the mold was no longer sealed tightly against the buckle.
Mold Part II (Silicone Boogaloo)
Ah well, onwards and upwards. Time for the second part of the mold! And, well, my third major mistake in making it.
Four months and much hemming and hawing later, I pulled this mold off of the shelf and decided I should just go ahead and finish it. If it didn’t work out it was still going to be a good learning experience.
The second portion of the mold went much more smoothly. Once again I created a mold box around the first half of the mold using foamboard and hot glue. I then added a fill stem to the center of the buckle’s back face using a 1/2″ wooden dowel rod and some more plasticine clay to smooth the transition.
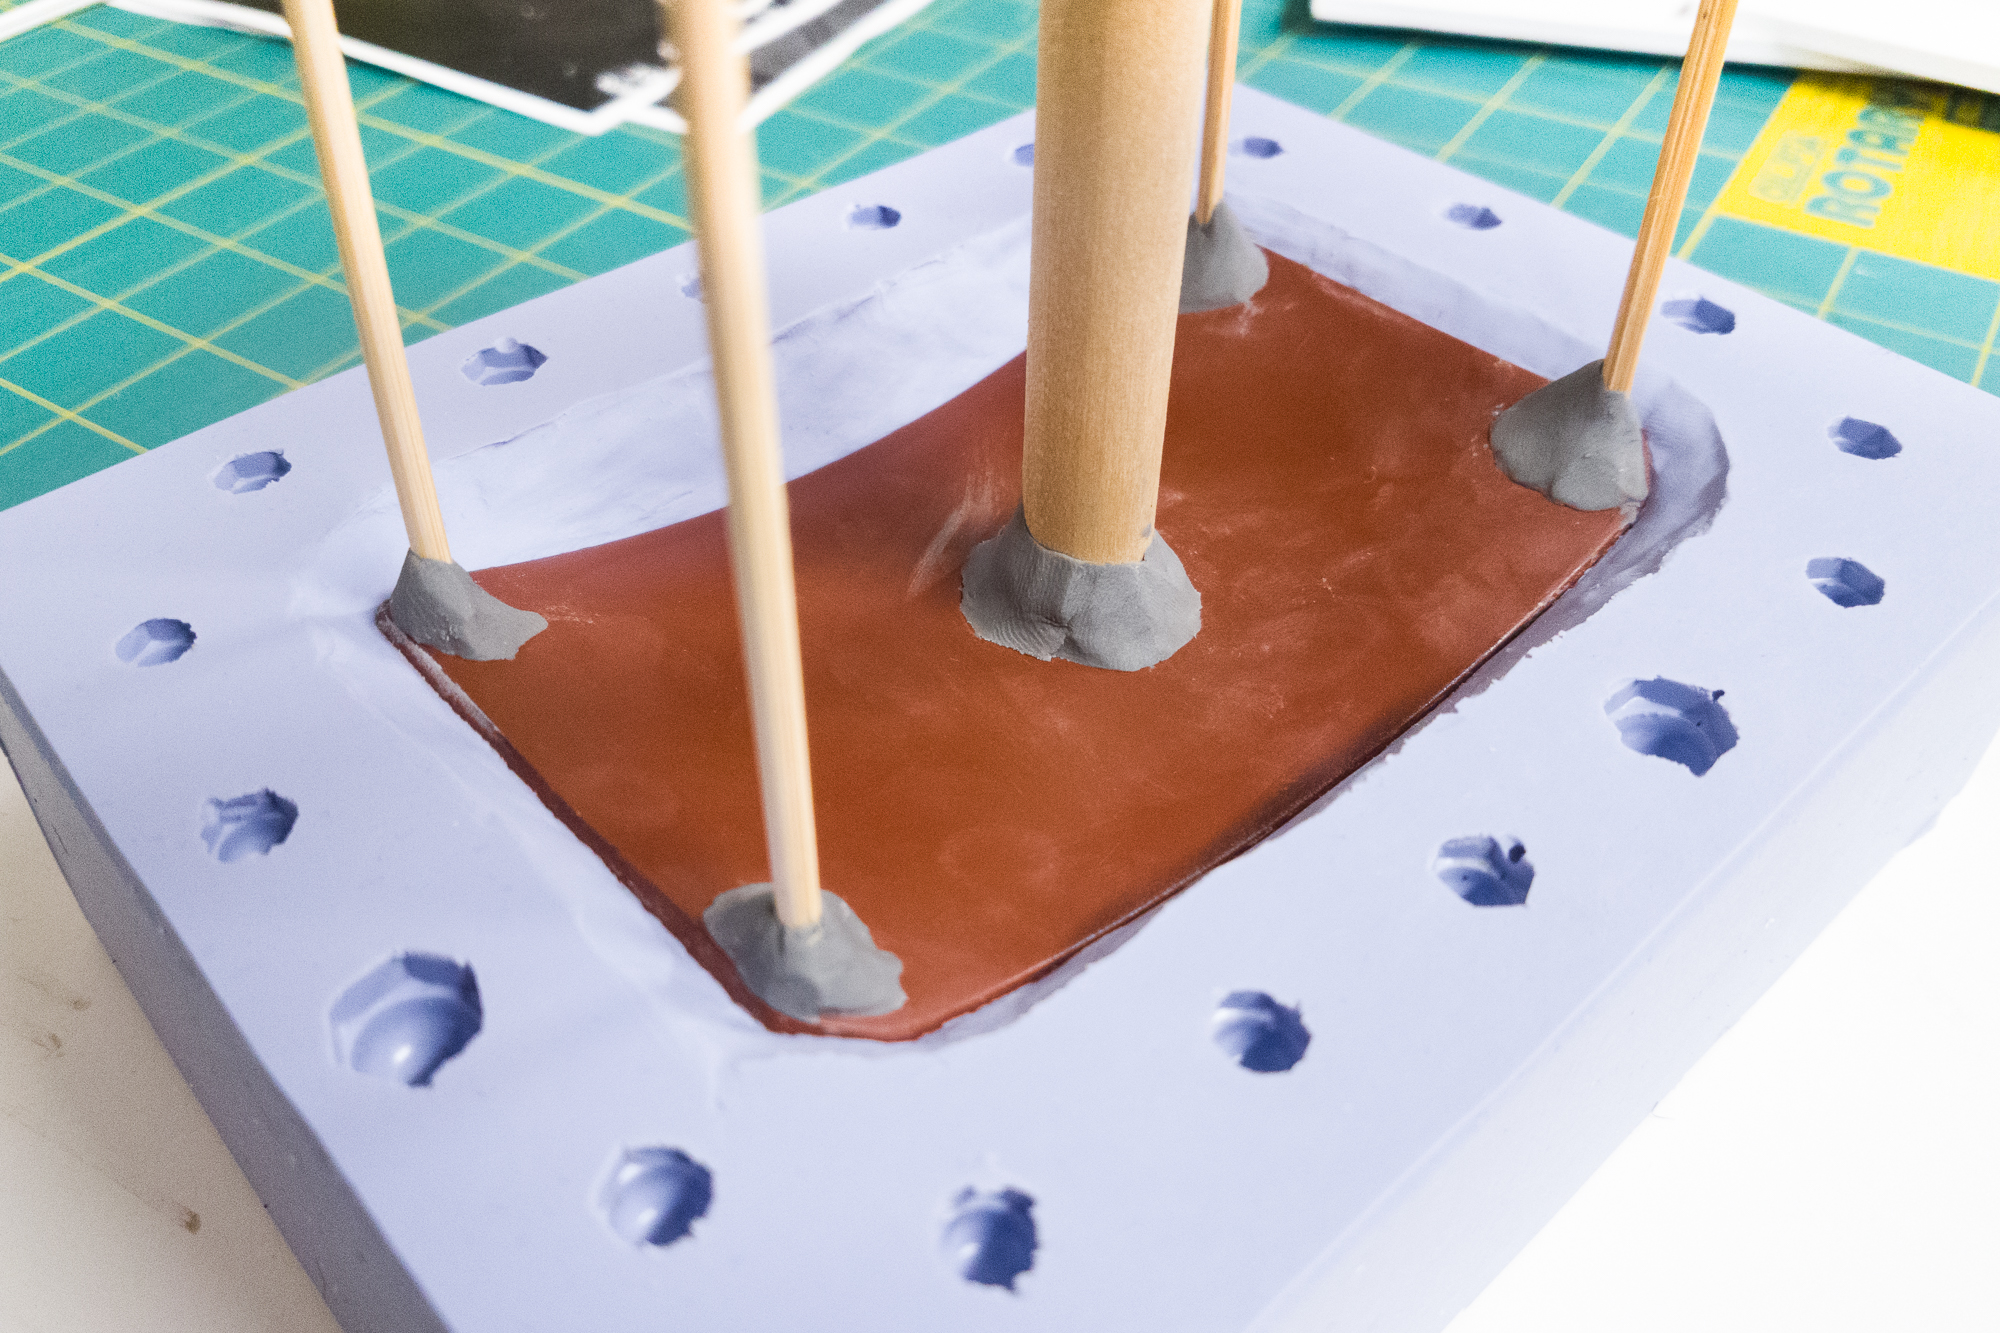
Vents and pour spout negatives being prepared for the second half of the mold
At the last second I also decided that I needed some vent holes in the corners of the buckle. I didn’t think about it before, but with where the fill stem was located air was going to be trapped in the corners of the buckle and prevent the plastic from expanding to the edge. Although I’m mentioning it here since this is where I discovered the issue, this was actually a mistake made in the planning and could have been avoided had I been smarter with how I designed the mold. The vent holes were formed with some 1/8″ bamboo skewers and more of that plasticine clay to smooth the transition.
I ordered a second trial unit of the Oomoo 30 silicone so that the two mold halves used the same silicone and there would be no unexpected effects. I then doused the original mold with a dusting of Ease Release 200 (absolutely critical in order for the new silicone to not stick to the first half!), mixed up a new batch of silicone, and poured it for the second mold. Much more quickly this time.
The Finished Mold
Another 24 hours later and the second half of the mold was ready for unboxing. I pulled out the wooden forms for the pour spout and the vent holes, ripped off the foamboard walls, carefully freed the belt buckle master, and then stared longingly at my brand new shiny mold.
Well, not that longingly. My instincts were correct – the mold was not in great shape. It would work, but it was not without its problems.
For starters – for whatever reason when separating the mold halves, the second half of the mold ripped out a chunk of the first. I’m guessing that the mold release was thin in that area and that portion of the silicone fused enough to tear along a stress riser made by the acorn nut. Underneath the ripped off chunk you can see that the silicone is full of small air bubbles, which would have also weakened it. Thankfully the portion that ripped was not part of the model surface, so this won’t affect any castings.
The ‘drip’ created by breaking the vacuum seal against the master to “inspect” the mold.
Second, remember that big air void that formed in the first half of the mold? That was now completely gone (yay!), but in its place was a nice gooey drip down the side wall (not so yay). This is a direct result of separating the belt buckle from the mold to “inspect” it before the second half of the mold was poured. The spray release agent didn’t make its way into that seam but the new silicone did, merging with the first half of the mold and leaving this “drip”. Lesson learned…
Third: due to my slow pouring of the first half of the mold, there are small air bubbles around the surface of the buckle face, each one maybe a millimeter to half a millimeter in diameter. These are rather few and far between, but they’re still present and will show up in castings.
Fourth – remember way back when I attached the letters to the face of the belt buckle, there was a gap between the face and the letters? That gap came back with a vengeance. I thought it would have been retained in the mold as a slight edge and then provided separation between the letters and the belt body in the final castings. Instead, the silicone found its way into those gaps but when the master was removed it just flopped right over onto the side walls of the letters. I was able to tear off some of the thinner bits, but unfortunately that’s just part of the mold now.
All-in-all, not a great showing. On the plus side, the mold’s registration worked well with the acorn nuts and aside from the drip down the side the two-part mold process seemed to work great. I learned a lot of lessons from making this mold, but rather than starting over and spending yet another ~$70 on silicone I decided to press on and try a few castings.
Casting Buckles
I had planned to cast the buckles using Smooth-Cast 300, an ultra-low viscosity urethane resin by Smooth-On that doesn’t require vacuum degassing and cures to a bright white finish. With a few drops of black tint, you can make this resin cure a soft opaque gray color which would be perfect to hide blemishes if the buckle got scuffed.
Best laid plans. When I ordered the second batch of Oomoo Silicone for the mold, Blick accidentally sent me a trial unit of Smooth-Cast 325 instead. So that’s what we’re going to use to cast the buckle!
According to Smooth-On, Smooth-Cast 325 is a urethane resin designed “specifically for adding color pigments and fillers to achieve true color representation or filler effect”. Without any added color tint, it clears to a frosty transparent color. It also doesn’t explicitly not require vacuum degassing, which means there will probably be some trapped bubbles in the final casting. Since the most important surface of the buckle is the bottom face of the mold, this shouldn’t be a problem (bubbles rise!).
The Casting Process

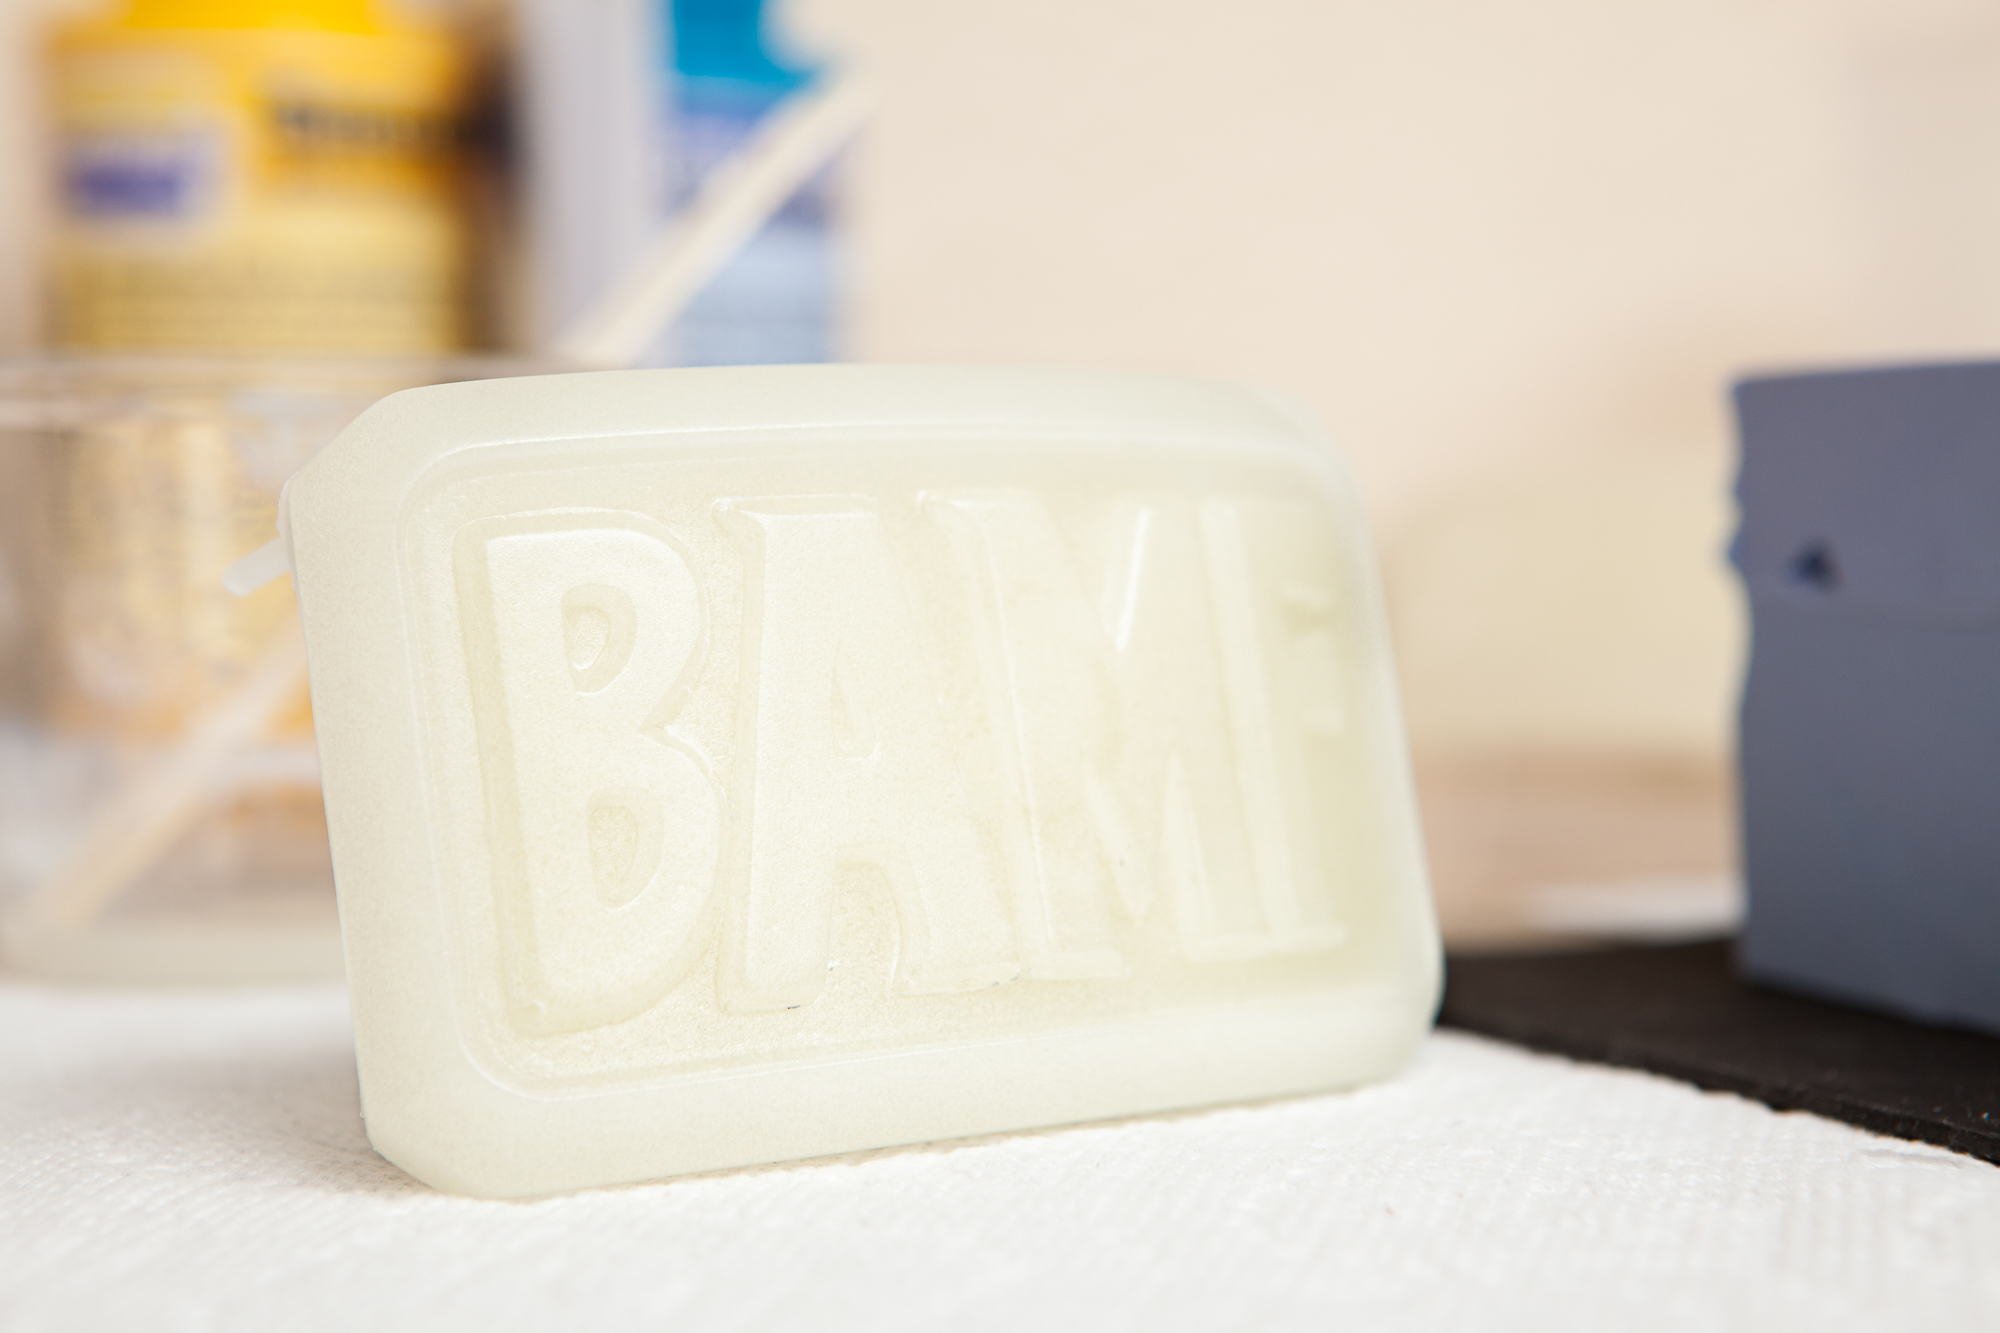
Raw buckle casting, fresh from the mold.
Before anything else, I assembled the mold and filled it with water to test how much plastic I would need. After draining and drying it, I then sprayed down the mold with a healthy coating of Ease Release 200. This isn’t strictly necessary since the plastic won’t permanently stick to the silicone, but the release agent makes castings easier to free and prolongs the life of the mold. Per the instructions on the can I applied a light coating, brushed it into the tight crevices of the mold, and then applied another light spray coat five minutes before I poured in the resin.
The casting resin was then measured by weight and premixed for a full minute before it was poured into the mold using the pour spout. I poured as much as I could until I saw plastic come out through the vent holes in the corners, then topped it off again once some of the bubbles had had a chance to escape. For good measure, I also picked up the mold and rolled it around a bit to try and get the air bubbles out of the corners.
Smooth-Cast 325 is a very fast curing resin. It only has a pot life of 2.5 minutes and a cure time of 10 minutes, so I had to work quickly. Once I was satisfied that I got as much resin into the mold as I could, I set the mold aside for an hour to cure fully.
Demolding
One quick hour later and the buckle was ready for demolding! A little bit of resin had pooled on top of the mold where it had come up through the air holes, so the first thing I did was use a pair of side cutters to trim off the excess so I could pull the top of the mold off. With the top of the mold removed, I applied a little pressure around the mold to break the vacuum against the face of the casting, and then it popped right out!
However, it was clear that the casting wasn’t fully cured. The surface of the plastic was not tacky, but the short plastic stems left over from the vent holes were flexible rather than stiff. And with a little force I could bend the main body of the buckle as well.
I’m not sure what caused the issue with curing. Maybe in my haste to get the fast-curing resin into the mold I didn’t mix it well enough. Maybe the temperature was too low – after all I was trying to do this in an unheated garage in the fall. Or maybe the resin was slightly out of date. For whatever reason, the casting was too soft, so I carefully placed it back in the mold and let it cure for an extra few days.
Fixing the Casting
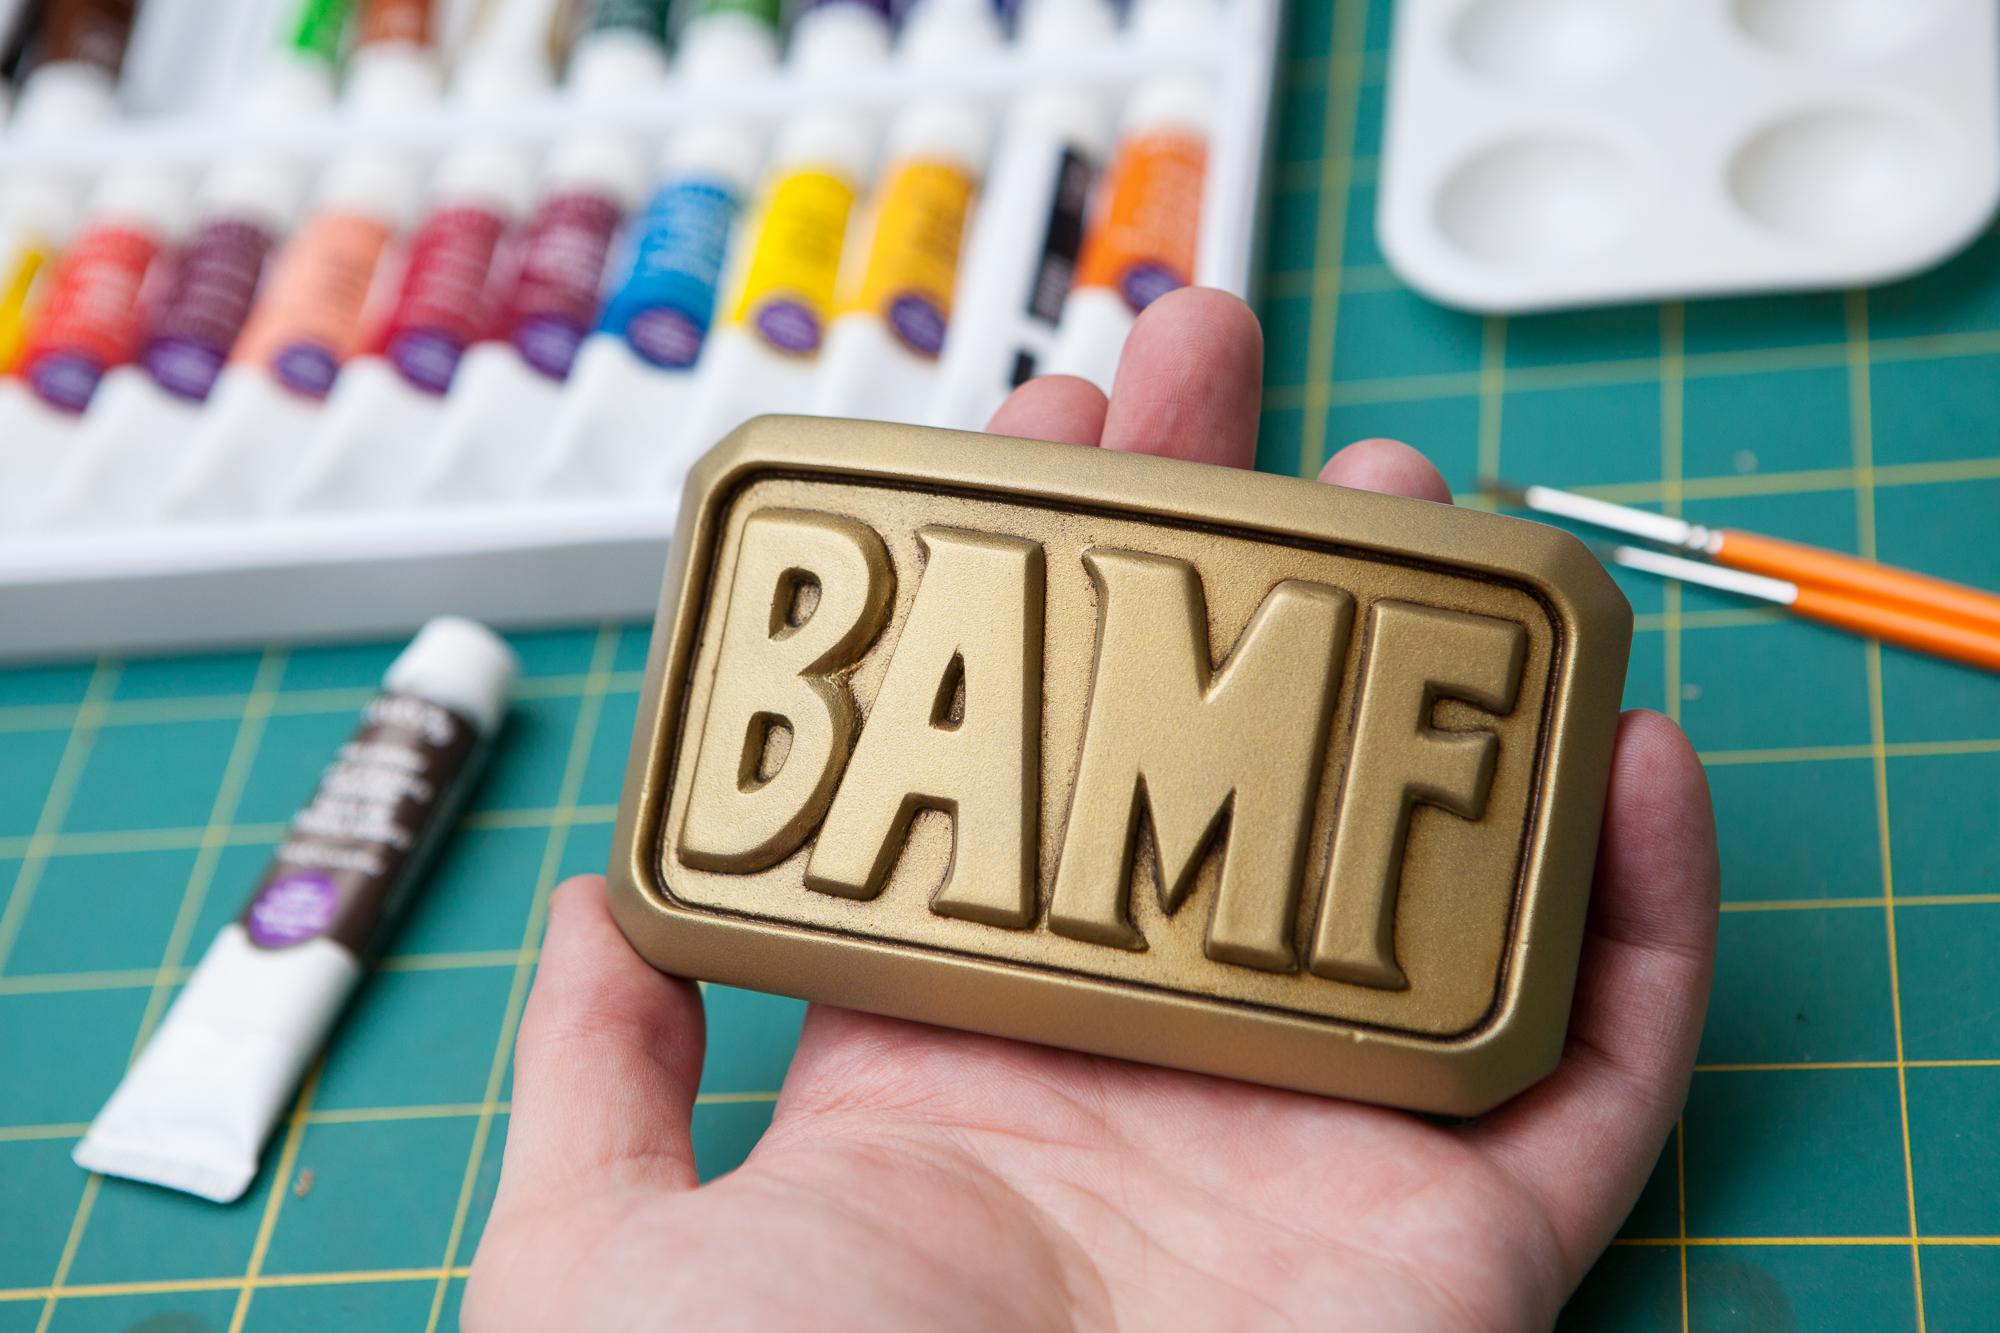
Fast-forward a few days and I have a nice solidly-cured casting! The next step was to clean up the artifacts left over from casting and prepare the buckle for its final paint job.
Removing Sprues
Although the buckle didn’t have an obvious parting line due to the way I designed the mold, it did have five sprues sticking out the back: one in the center for the pour spout, and four in the corners for the vent holes.
I used a small hacksaw to cut off the sprues as close as I could get to the surface of the buckle, and then used a sanding wheel on a Dremel to remove the rest until it was below-flush with the surface. The urethane resin sands to a very fine powder, so wearing a respirator was mandatory!
Although most of this back face was going to be covered by the metal buckle, I still had to fix it up so the edges looked the part. I used white Apoxie-Sculpt to build the corners back up and then sanded them smooth. While I was at it, I also filled in the hole left by the pour spout so that the metal buckle would have a nice smooth area to epoxy to.
Folded Edges
There were also a few places on the mold where the silicone dripped after I “inspected” it that resulted in raised edges on the casting. Most of these were on the outer edges and were easily sanded away, but I couldn’t do much with the folded over edges on the sides of the letters. I tried using some spot putty to fill them in, but there’s only so much you can do when you can’t get in there to sand it easily.
Patching Bubbles
Lastly, remember how I said the casting was supposed to come out translucent? Instead it came out almost off-white, due to how many microscopic (and not-so-microscopic) bubbles are embedded in the plastic. The mediocre mold in combination with the fast setting (and non-degassed) resin was a recipe for bubbles. All of the bubbles.
Thankfully most of the casting-caused bubbles rose to the back face of the buckle and were easily fixed with a healthy coating of spot putty. The bubbles in the silicone that were created when the silicone was poured were a bigger issue. For some of these I used tiny tiny bits of Apoxie Sculpt to rebuild lost features, but for most of the others I used repeated layers of spot putty and filler primer to fill in the gaps – just like when I was cleaning up the 3D printed master prior to moldmaking.
All-in-all, it took almost as long to clean up the cast buckle to a “usable” state as it took to assemble and smooth the master from the 3D printed parts. If I had to do it again, I would just create another (better!) mold and save myself the trouble. Now it’s time for paint!
Disclaimer: This post contains Amazon affiliate links for supplies and tools used in the project. As an Amazon Associate I earn from qualifying purchases, and those earnings help fund projects like this one. Thank you for the support!