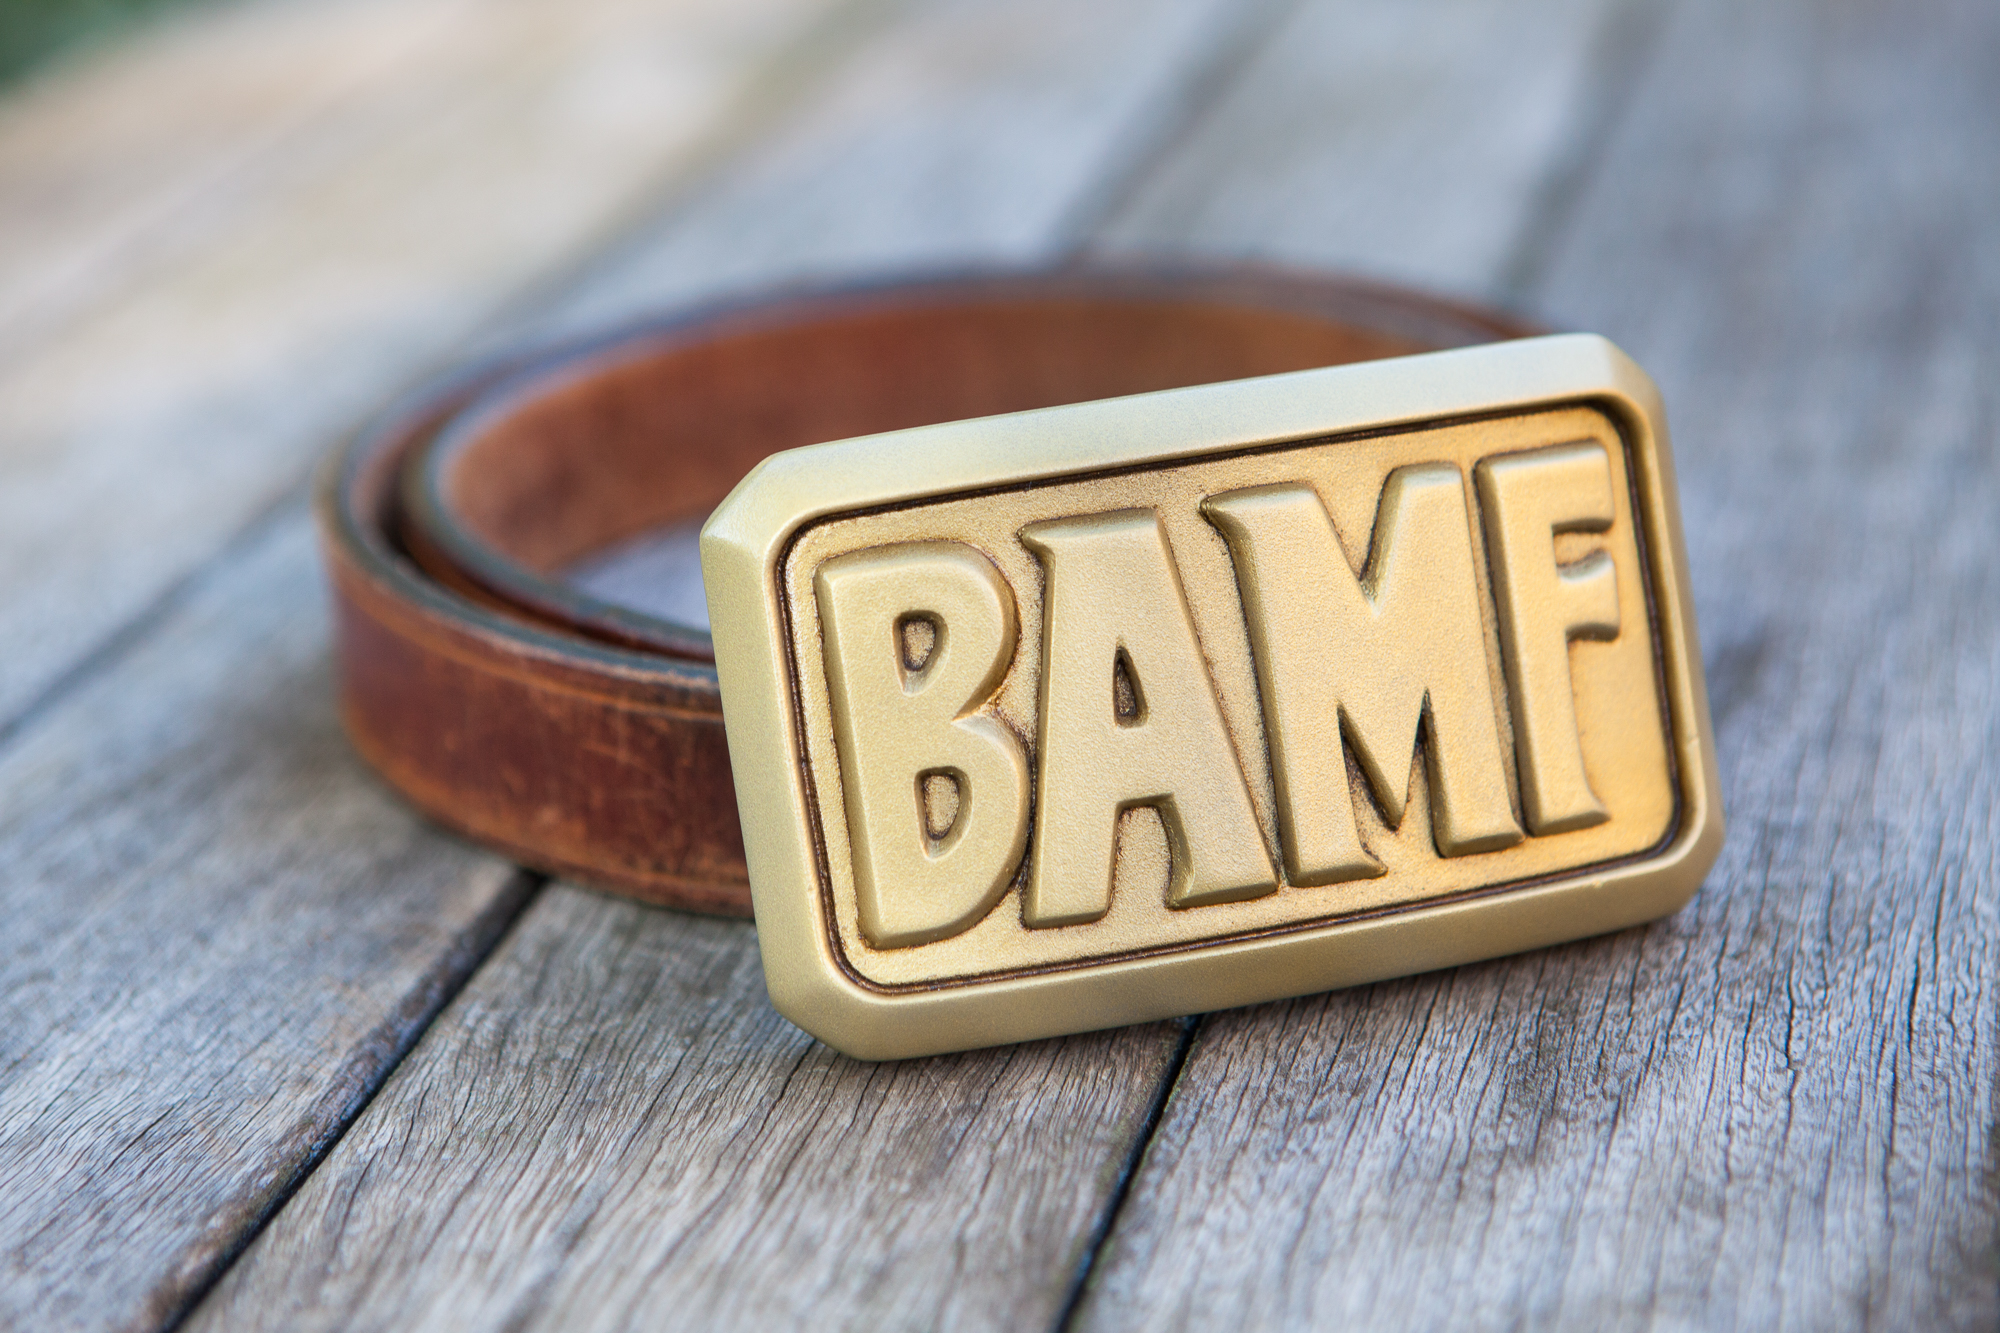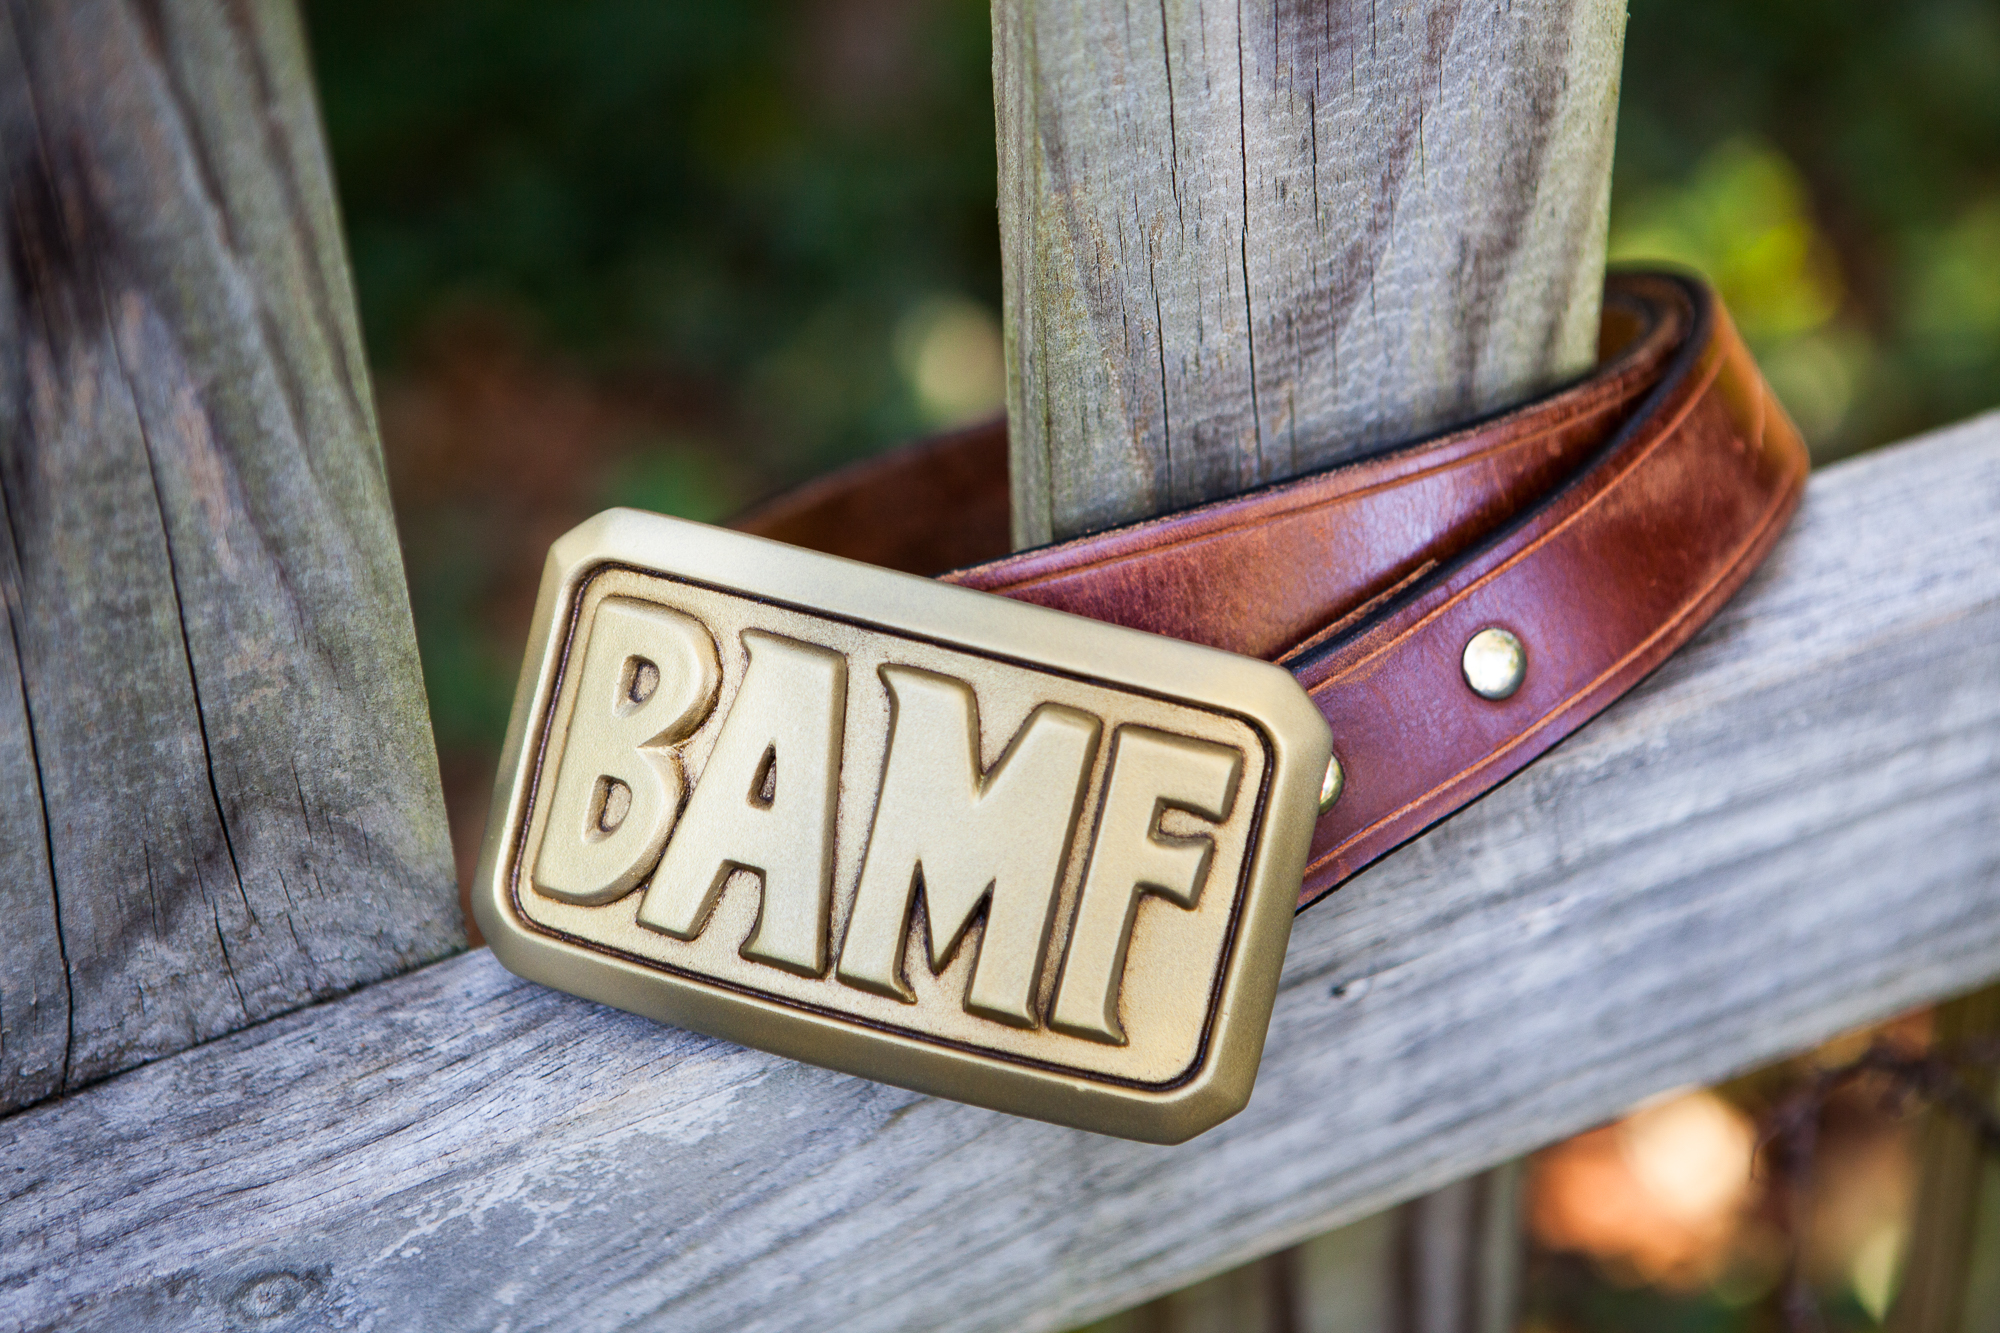
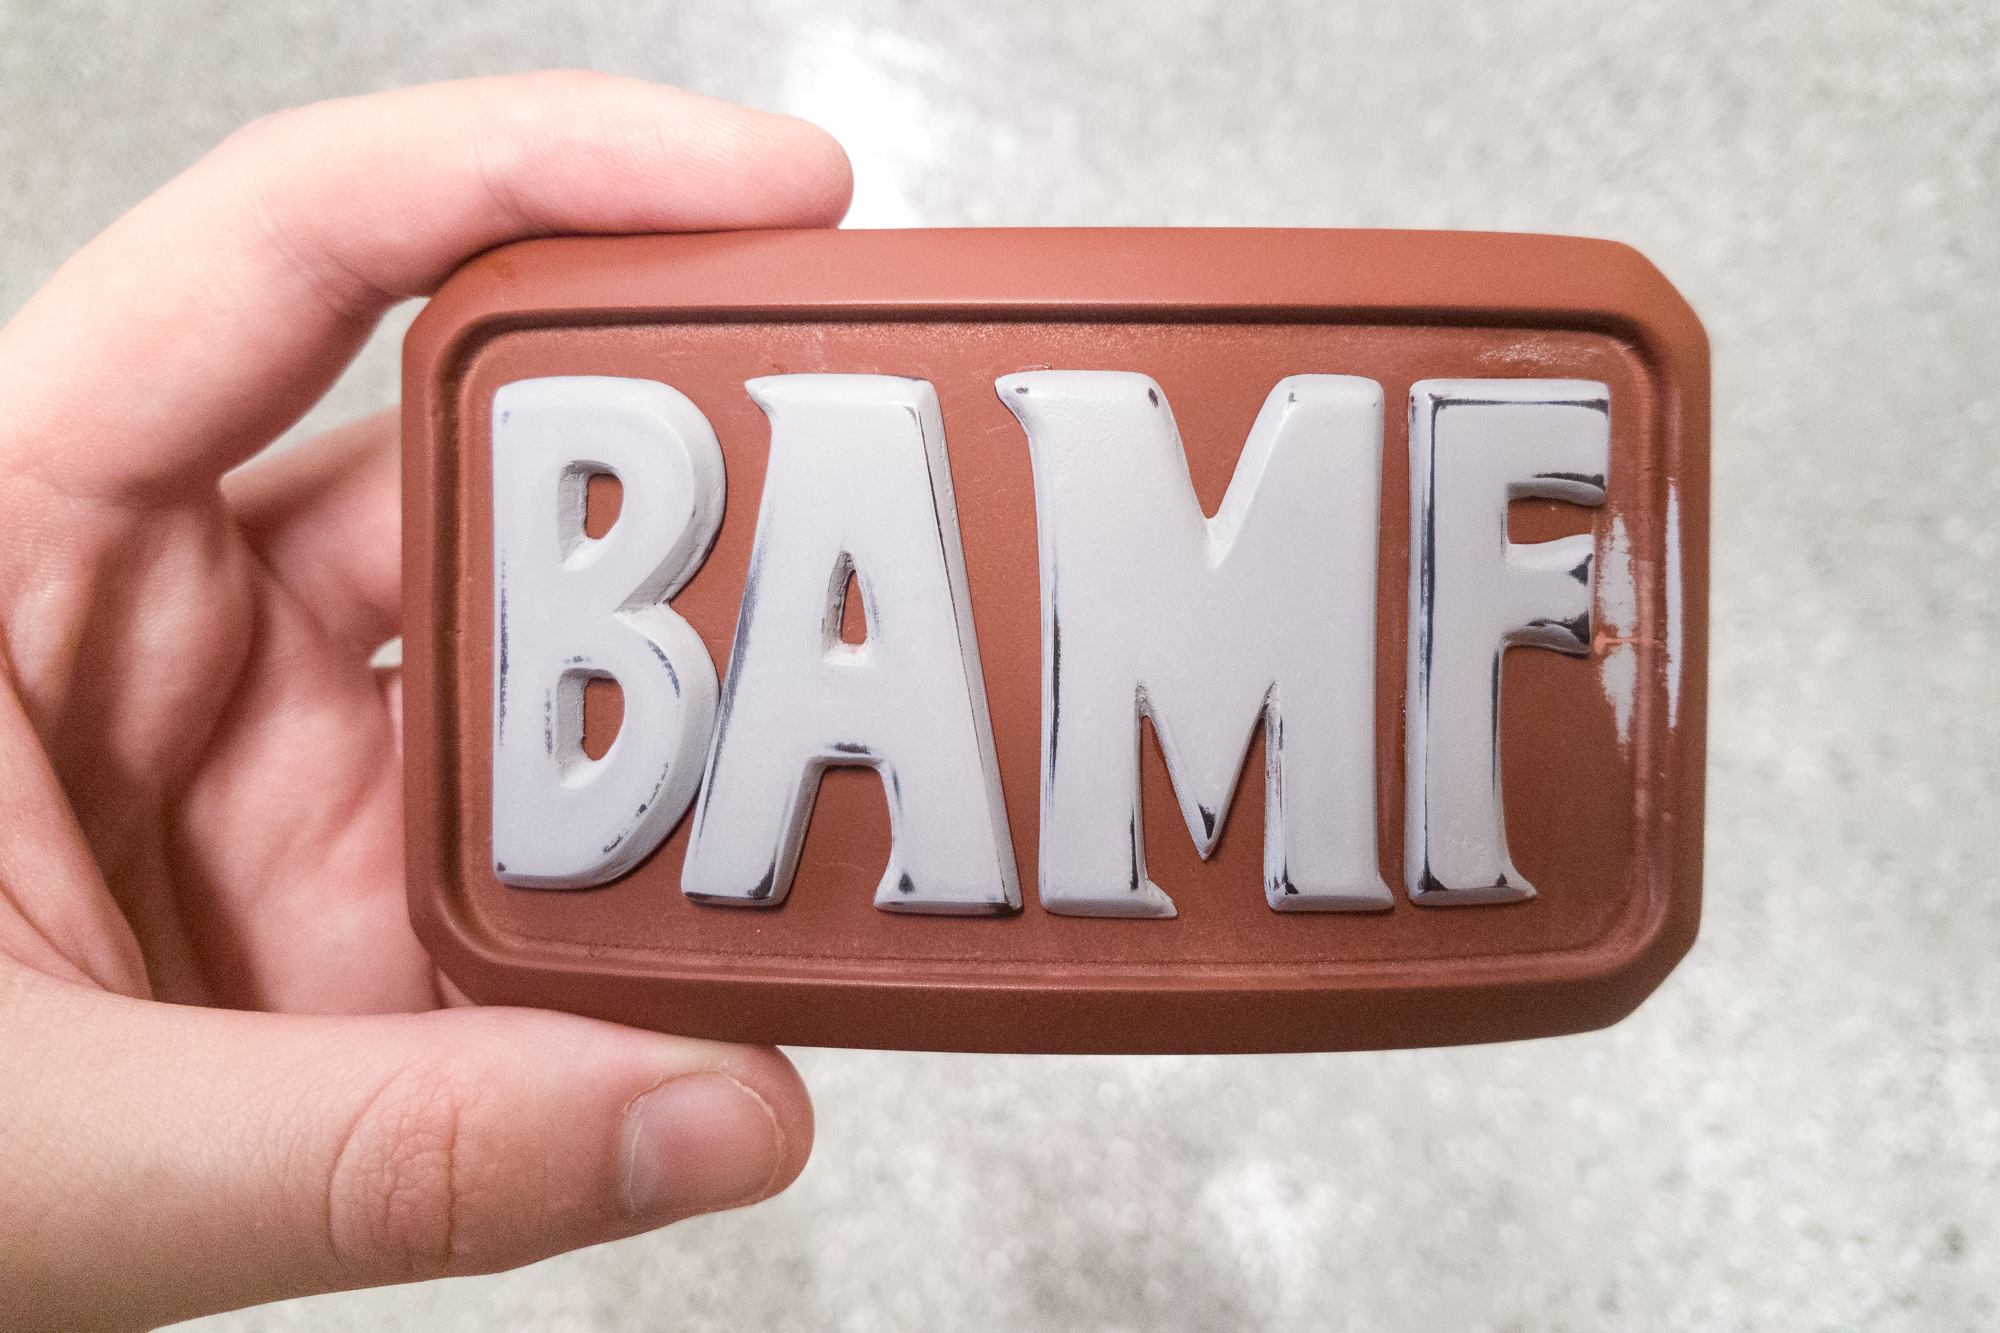
Phew. Three years (three years?!?) and a lot of sweat, sanding, and tears later, I finally have a finished belt buckle! To be honest it turned out much better than I expected. There are of course some issues with it and things I wish I could have done differently, but the final prop itself is fit, functional, and looks the part. I may be biased, but I really do think my version of McCree’s buckle is one of best I’ve seen.
It was quite a journey to get to this point, and there were lessons learned for every step along the way. The buckle is done! Now it’s time to sit back, relax, and figure out what worked well for this build – and what didn’t.
Digital Model Design
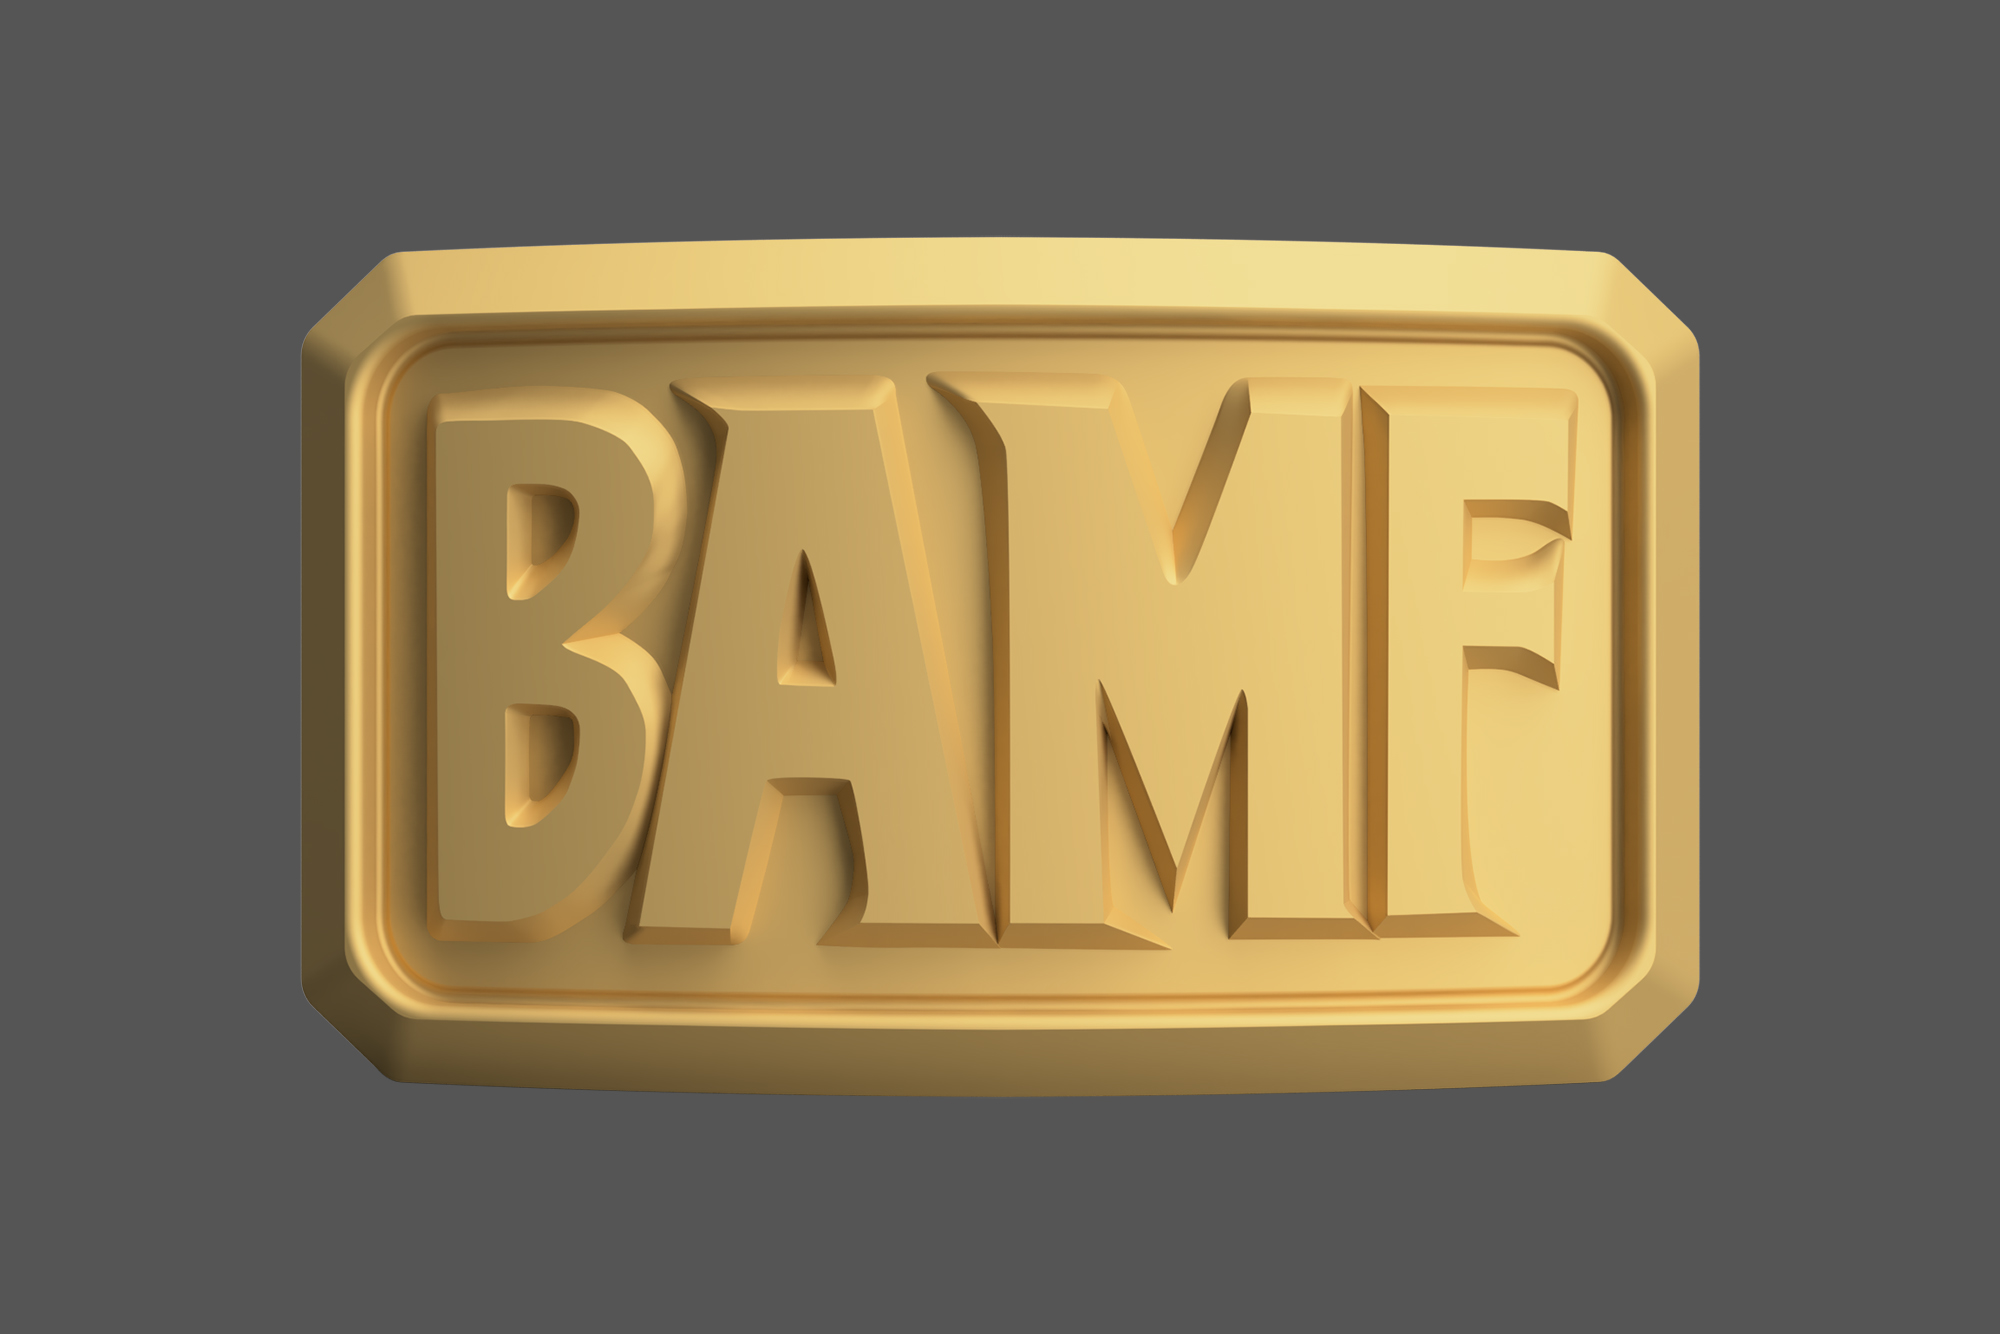
All-in-all I think the design portion went quite well. I think using the extracted geometry from the game files as a reference was a clever move, and the final 3D design is similar enough to the model texture that you wouldn’t be able to tell the difference unless you saw the two side-by-side.
The obvious shortcoming here was that I designed the model using sketch-based parametric modeling rather than using a mesh modeling program like Blender, which would have been significantly faster. The reason I didn’t is of course that I don’t actually know how to use Blender (yet). One more skill to learn…
The one thing that came back to bite me later was the curvature of the back face. I should have had more forethought about how that would match up with the off-the-shelf belt blank, and designed around that rather than keeping strictly to the in-game geometry. It all worked out in the end, although I made more work for myself than I had to.
Master Prop Building
Likewise, I think construction of the master also went quite well. The parts printed well, assembled easily, and even the heat-curving of the letters went to plan. I think this was a good application of 3D printing to get the model from the digital space to reality, although I wish I had access to an SLA (resin) printer so I could have printed the whole assembly in one piece and spent less time sanding and polishing.
One definite mistake in the master was making the ‘flat’ letters the same width as the ‘curved’ letters, because I didn’t take into account the difference in curvature when creating the modified ‘flat’ versions. Although it’s hardly noticeable in the final prop, it’s a shortcoming none-the-less. This is partially a modeling mistake because the mistake was made in the model, but it’s in this section because it’s only a consequence of the way I decided to build the master. C’est la vie.
The other oversight here was leaving the gap between the letters and the body of the buckle, which caused some issues when creating the mold. For next time, I need to be more mindful of the gap (ha) and take time to seal it before proceeding with moldmaking.
Molding and Casting
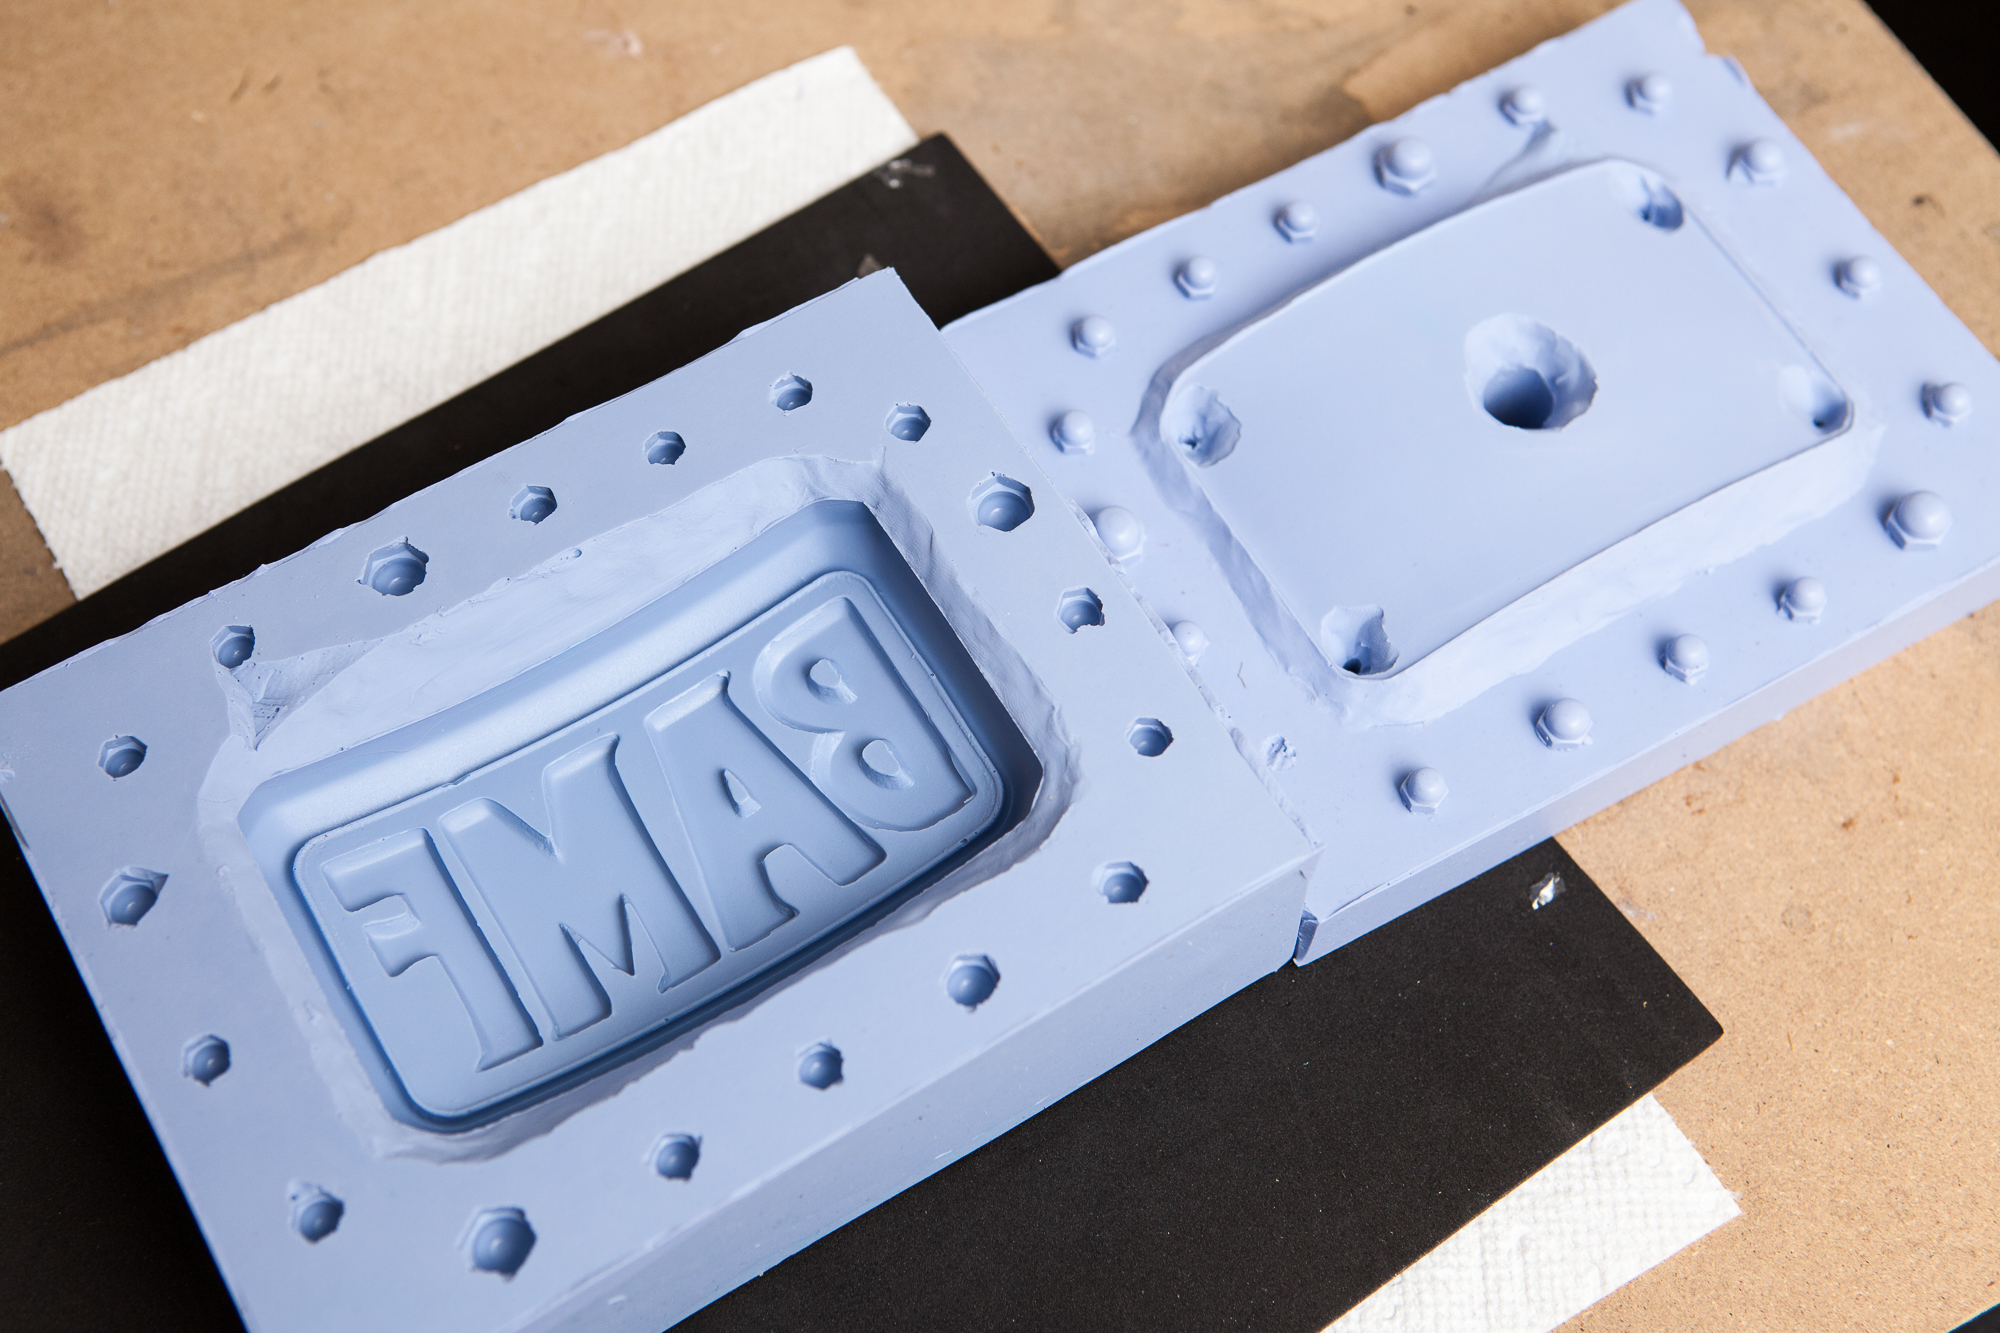
Here is where the rubber hit the road. I had a number of significant issues trying to create a cast version of this buckle, most of which could have easily been avoided if I had more experience.
The Slow Drip / Bubbles
Let’s start with the first problem: dripping the silicone slowly from a tall height so-as to avoid air bubbles in the final mold. As you know, this ended up causing air bubbles, since the silicone started to cure in the mixing bucket before I had finished pouring it.
For future large-scale molds, I either need to hasten my pour speed and accept that there are going to be some bubbles, or I need to spend the money to invest in a small scale degassing chamber. Or both!
Inspector Clouseau
The second problem was caused by me trying to “inspect” the mold by removing the master before the second half of the mold was poured. Yes, the first half of the mold wasn’t in great shape, but nothing was gained by removing the master and it made that much more work for me when finishing the casting. Plus those resulting drips along the sides of the buckle were the final nail in the coffin for the idea of cold casting since they were so intrusive.
For next time, I need to either press on with the second half of the mold or call it quits based on what I can see of the first half. Only bad things happen if you break the vacuum seal with the master.
Sprue Design
The third problem was the mold design itself. I thought that by placing the pouring sprue in the middle of the back face and the parting line across the back edge, I could easily cold cast the buckle without having to clean up any sprues from visible faces. In reality this meant that trapped air would prevent the edges from filling, and I had to add some vent holes in the corners.
It would have been wiser to keep the parting line the same but rotate the mold on an angle for casting, with the pour spout near one of the corners. That way I wouldn’t have needed any extra vent holes, and there would have only been one sprue to clean up. But I would have needed to figure that out before making the first half of the mold.
Paint
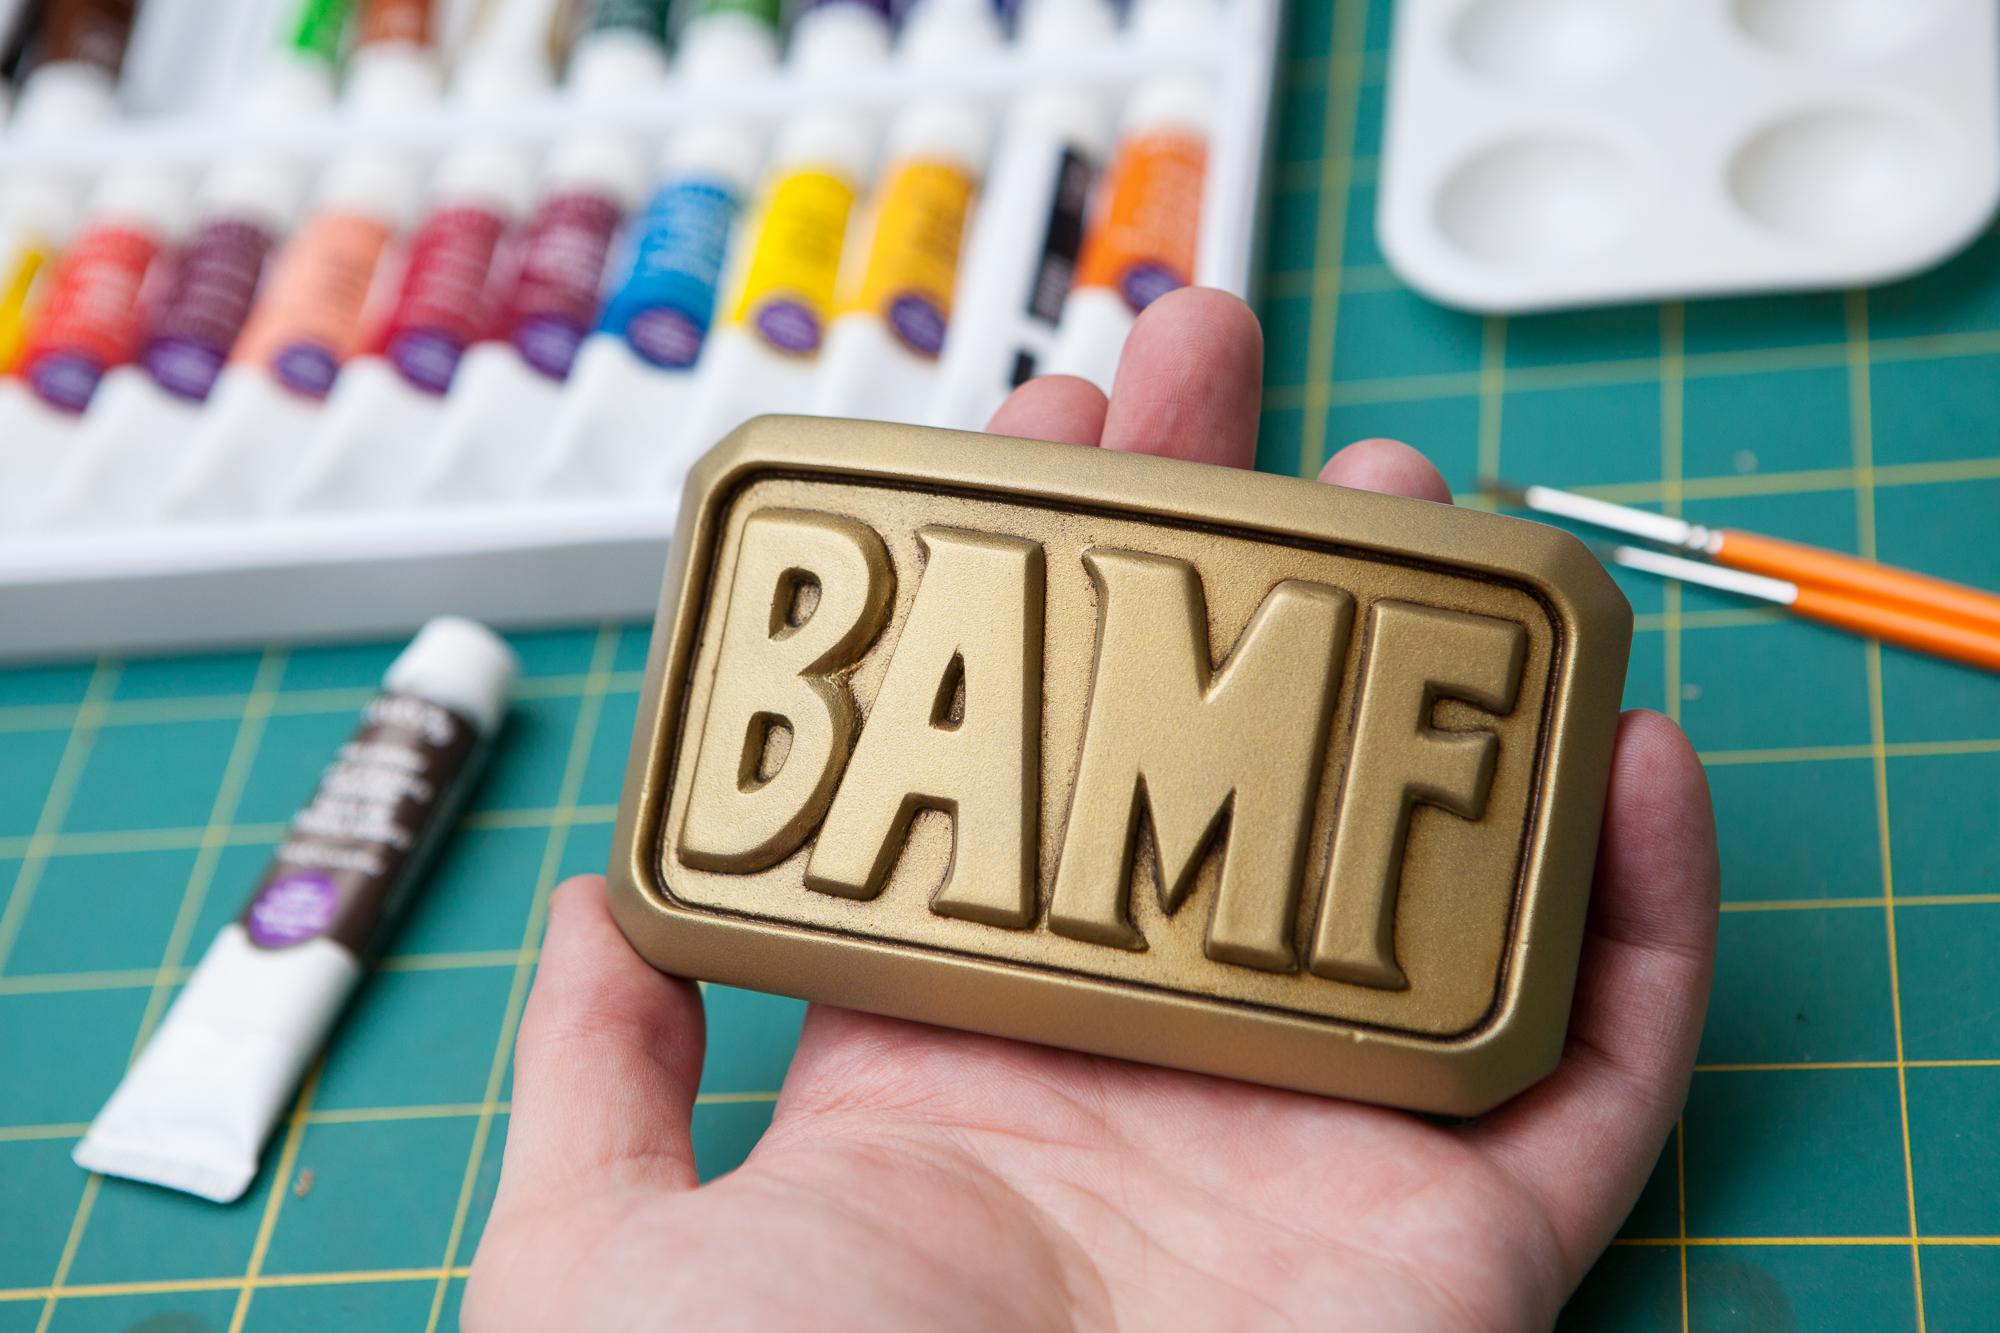
Paint is one of those things that makes or breaks a project, and I’m sorry to say that I am pretty bad at painting. I don’t have enough experience with it and I shy away from it because I know I’m bad at it. But it’s a necessary evil for many projects and I need to practice it more. This project was no exception, although the result is a step up over most.
The airbrushed finish is not as smooth as I would have liked. It’s a little rough, almost like stone. It’s not “orange peel” per-se, but it’s not the smooth, semi-glossy finish I was hoping for. Part of that is due to the gold paint itself, which is speckled and I’m sure looks a little matte regardless of how you spray it. But the other part of that is for sure my application. Like with the Twitch button, I think the paint went on dry – meaning that a not-insignificant portion of the airbrush paint was drying in midair before it hit the buckle, so the paint on the buckle’s surface did not self-level. From what I’ve read, that could be caused by too much air pressure (likely), too much thinning (not so likely), or being too far away from the part (also likely).
I was able to smooth the final finish on the edges with a bit of high grit sandpaper (~3200), but there wasn’t much I could do with the inner crevices of the lettering. Next time I need to be more thorough with my paint testing before trying it on the real part.
Speaking of paint testing, I should have tested a few different colors rather than going with the first one that looked accurate online. The paint I used isn’t bad by any means, but it’s a little darker and greener than I would have liked. It looks more like brass than plated gold, although again it’s only noticeable if it’s side-by-side with a brighter shade.
Procrastination

Oof.
And finally the biggest takeaway: procrastination. This project, with all of the waiting for supplies, dry times, and cure times included, should have only taken a month, maybe two, at the most. Instead, between mulling over how to solve some of the project’s problems (e.g. bending the buckle blank) and dreading working on certain parts (e.g. sanding, airbrushing) I was able to successfully stretch it out over the course of three years.
- Project Started: September 1st, 2016
- Project Finished: October 18th, 2019
- Project Archived: January 13th, 2020
I have a bad habit of getting enamored with how “easy” the concept of a project is. I find a new idea, work on it non-stop for a short period of time, and then lose interest when I get into the nitty-gritty weeds in the middle of the thing. Then another shiny new project idea comes along and the process repeats…
It’s okay to have a couple projects in the works at any given time, but I need to focus on finishing them rather than getting distracted by shiny new ones. Or, if it’s time to give up on a project and put it on the shelf, actually put it on the shelf. Don’t leave it on the workbench indefinitely saying “I’ll get to that soon“. That’s how these things end up taking three years.
A finished project that’s slightly underwhelming is better than an unfinished project that will never be perfect anyways.
Aaaaaand ta-da! That’s it. Yet another project complete and checked off the list! Now I can finally clean out that one corner of the workshop.
If you liked this project, you’ll also probably like my build of Reaper’s mask, which was finished for Halloween 2016 and was actually started after this one. Speaking of “shiny new projects being a distraction”…