I have a friend who likes to stream on Twitch, and he has a problem. Every hour or two he likes to be healthy and take a five minute break – standing up, stretching, going to the bathroom, etc. During this time he mutes his microphone and puts on some background music to keep the audience entertained. But when he comes back he frequently forgets to unmute his microphone so that the stream can hear him. It’s not unusual for him to be talking to himself for five minutes or more until some kind soul in chat speaks up and says “you know you’re muted, right?”
To help him and others who frequently forget to unmute their microphone, I decided to build a physical indicator for the mute status in OBS Studio.
Video Overview
For those of you who like videos, here’s a quick overview of the script and the indicators I came up with. If you want to know more, keep reading!
Fetching the Mute State
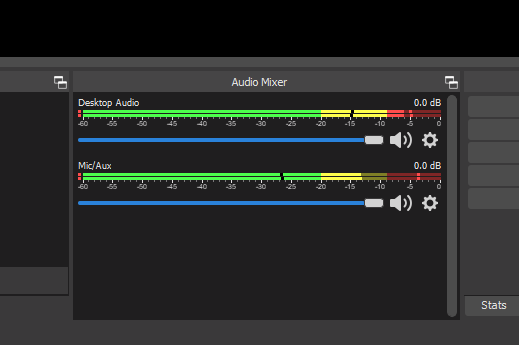
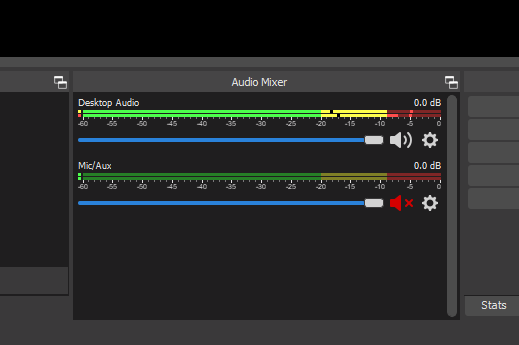
The most popular software for live streaming is Open Broadcaster Software, more commonly known as OBS Studio. In OBS Studio streamers can manage a variety of video and audio sources and collect them together in different ‘scenes’ for display on their live broadcast. Sources containing audio such as webcams and microphones are each given a volume control slider and a ‘mute’ button to cut the output. It’s this ‘mute’ button that we’re interested in – we have to somehow hook into the program to get the state of the mute button for the relevant audio source before we can set the physical indicator.
There are a few different ways to do this, but I’m going to use the “scripting” support that was added to OBS in version 21.0.0. This requires no external plugins (such as OBS WebSocket) and provides a preconfigured Qt “properties” page for adjusting settings from within OBS.
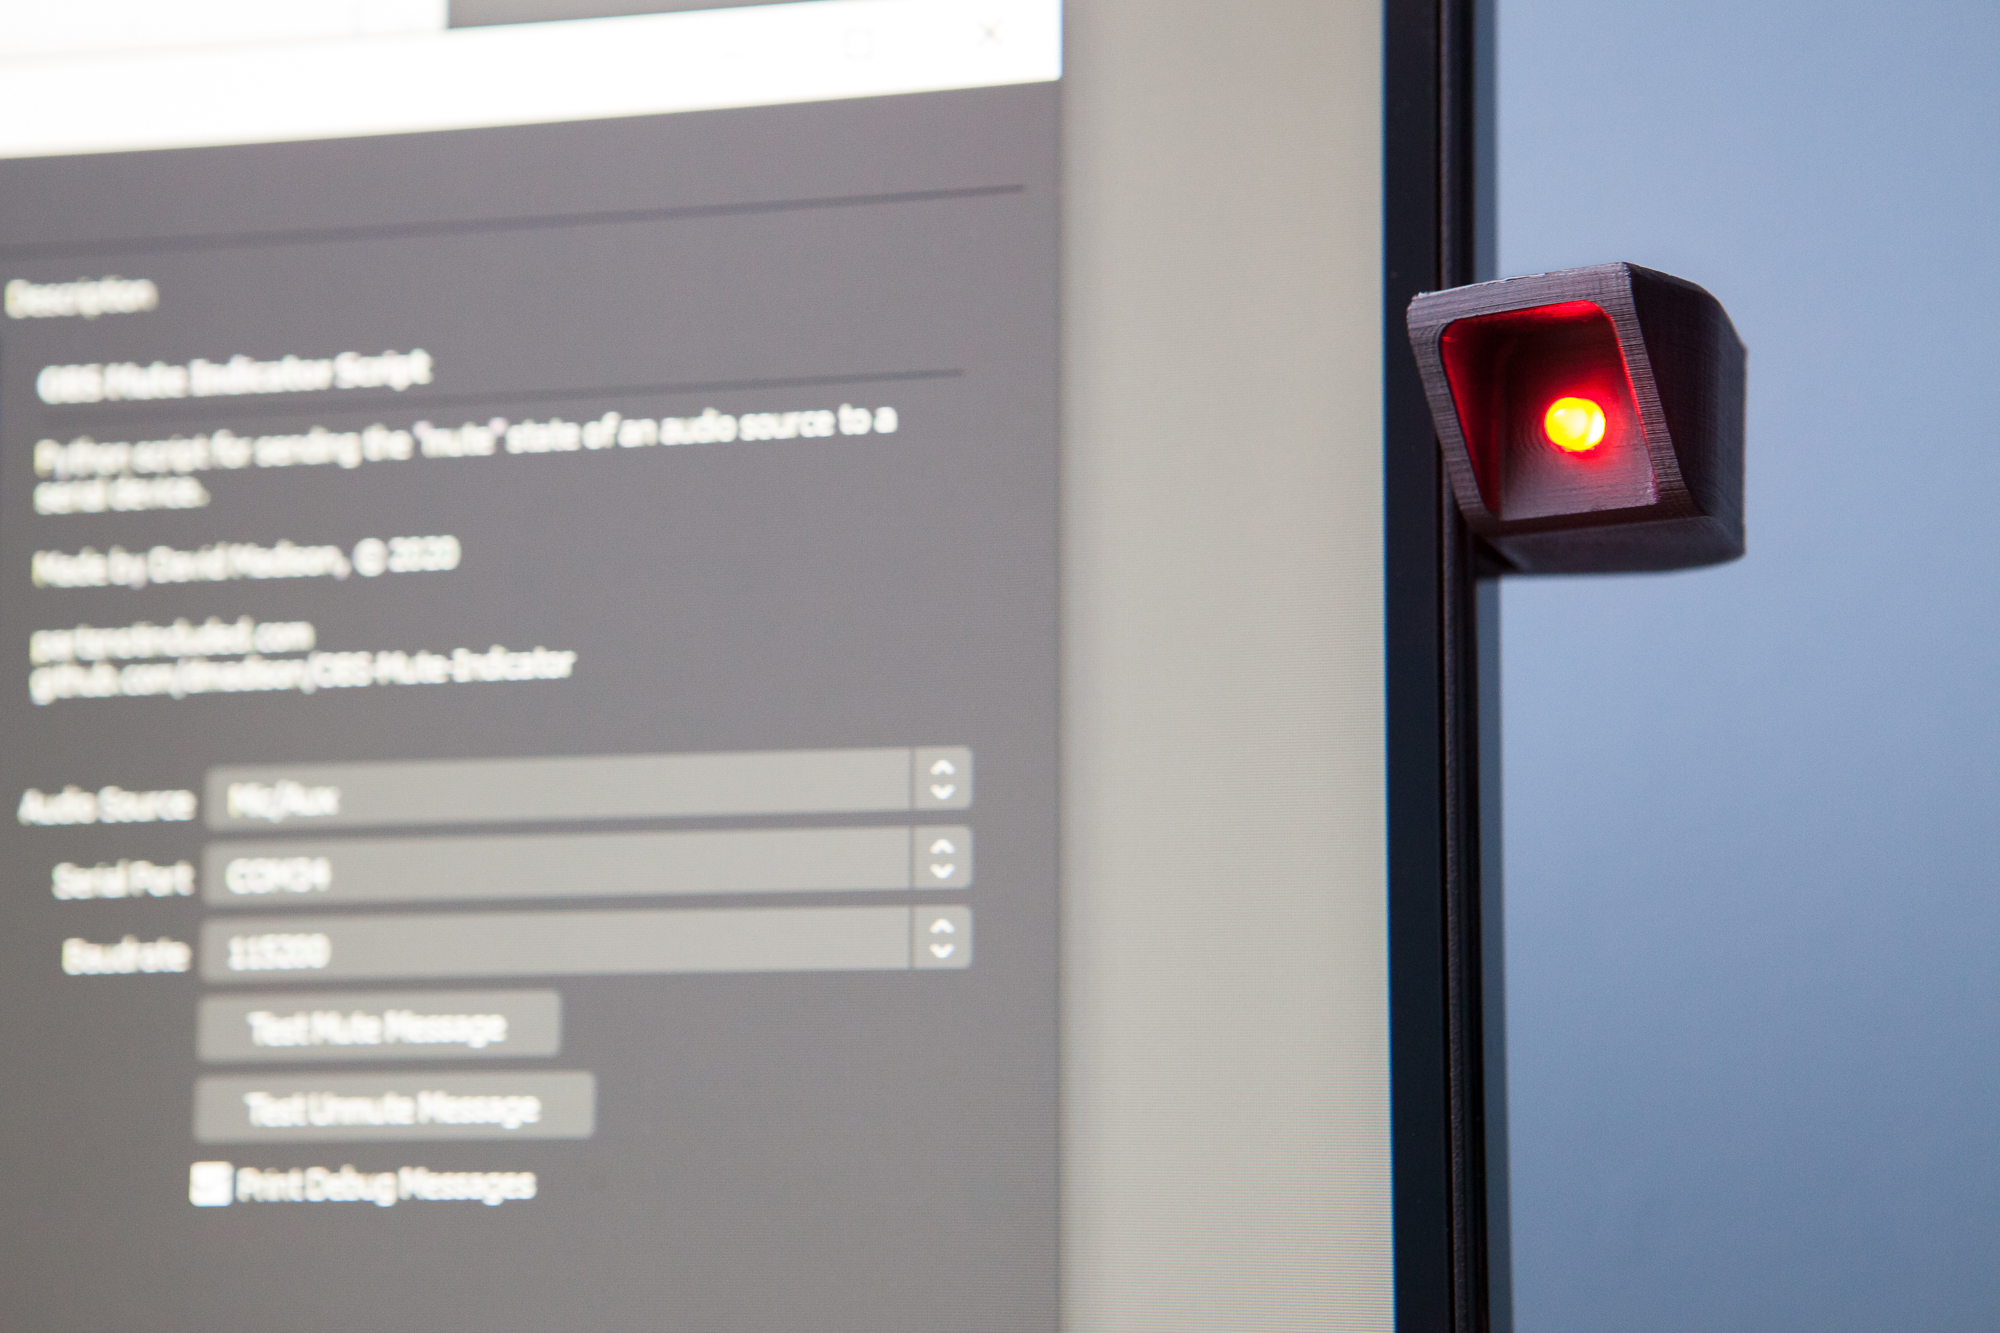
Script Options
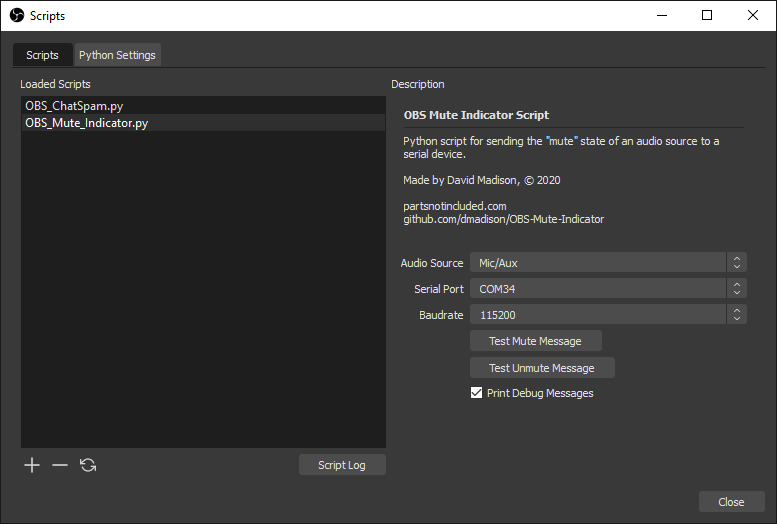
To accomplish this task I wrote a Python script called “OBS_Mute_Indicator.py”. The script hooks into the OBS scripting API and lets the user select the audio source, serial port, and baud rate from a series of list boxes. Once the script has been installed and the settings configured, everything will automatically load and run in the background with OBS.
The script makes use of Qt’s signals and slots interface for extremely low overhead while running. Once the user selects the audio source, the script adds a callback to the ‘mute’ state function using OBS’s callback handler API. Changing the audio source’s ‘mute’ setting (either by the GUI or a hotkey) will trigger this callback, telling the script to send the state over the serial bus using the chosen port.
Speaking of, the serial port connection is created on script load and then automatically closed and reopened if either the user-selected port or baudrate is changed. After waiting for the microcontroller to finish booting (1.6 s) it then sends the initial ‘mute’ state of the source over the bus. The output is a plain text (ASCII encoded) string terminated with a newline character, writing either “muted” or “unmuted” respectively depending on the state.
Indicators
With each indicator the ‘unmuted’ state is ‘off’ and the ‘muted’ state is ‘on’. All of these programs share the same parsing function for reading the ‘mute’ state from the USB serial input; the only difference is the physical indicator attached to the output.
For the indicator itself I decided to build out a few different options, just to play around with what I had on hand and figure out what worked best.
A Blinking LED
The first indicator type is a classic: a simple blinking LED.
For this the microcontroller program just sets one of its I/O pins to toggle on and off at a regular interval, set by the user during upload. By default this is 200 ms per period (5 Hz) – fast enough to call attention to itself but slow enough to not be annoying. (For good measure I also set it so that if the blinking interval is ‘0’ the pin will stay ‘on’ and not blink.) The LED attaches directly to this I/O pin using a current-limiting resistor.
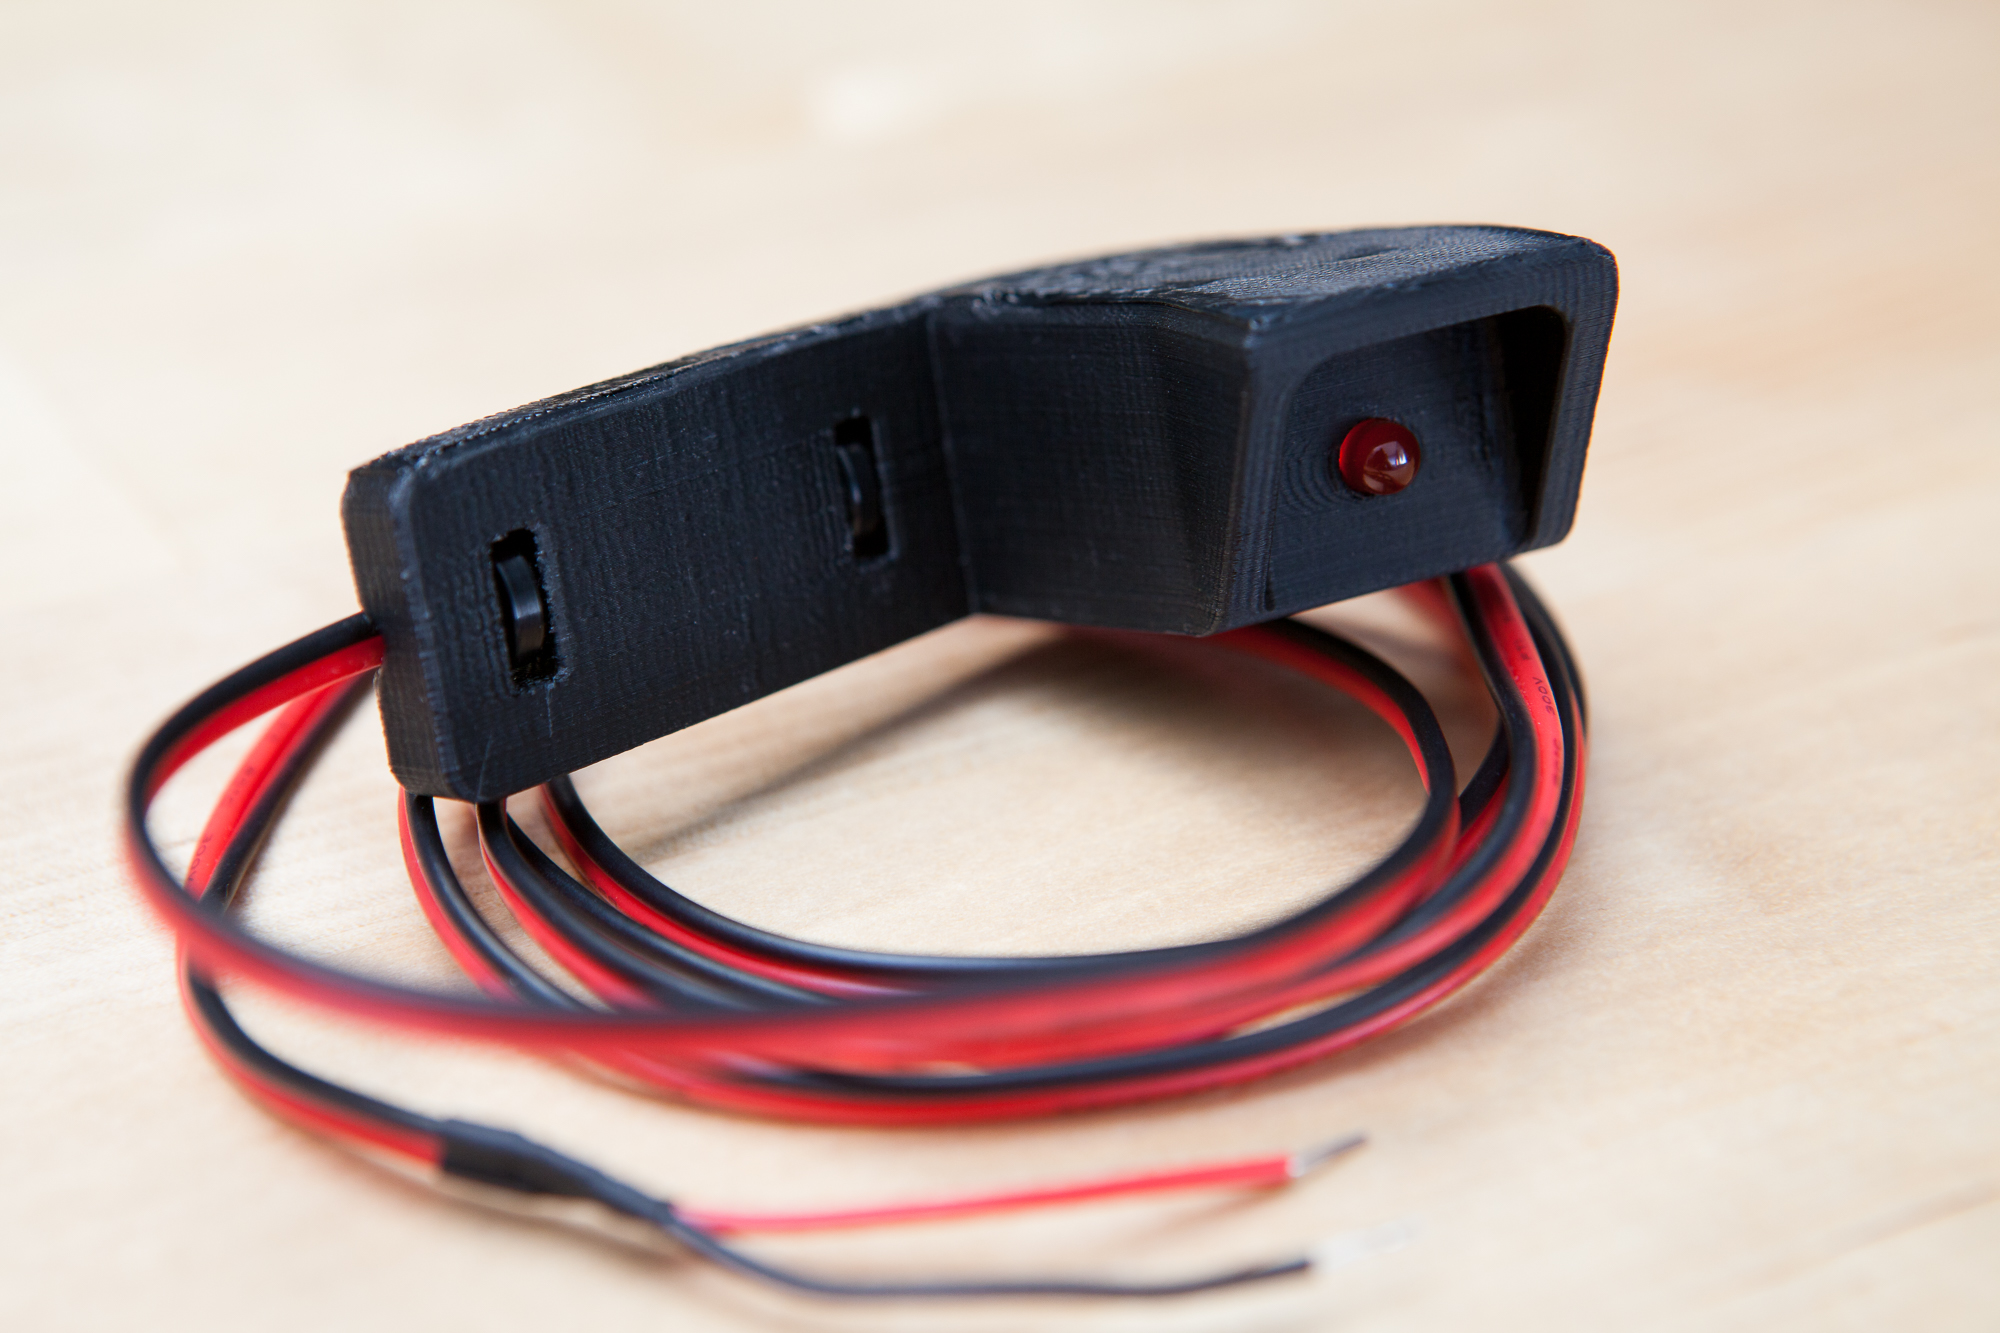
The LED seemed like it deserved a dedicated mounting point in the streamer’s eyeline, so I also designed a 3D printed “hood” that attaches to the back of the monitor and curves to point directly at the user. The LED is a friction-fit from the back of the mount and the two wires are retained in the back using zip ties. I printed this out of ABS plastic on my Printrbot Simple Metal and attached it to my monitor with a piece of VHB tape.
This is good, but it’s a little basic. Let’s try to up the ante.
A Room Light Indicator
Now this is what I’m talking about. A flashing light the size of a room is just what this project needs.
This is a 500W halogen worklight with a red theatrical gel on top. It’s plugged into a 120W relay box I built a few years ago and being controlled by the same microcontroller code that’s driving the LED above. The only difference is that I slowed down the blinking so as not to overload the mechanical relay. This could also be done with RGB “smart” lights like Phillips Hue, though I’m not lucky enough to own any of those.
It looks cool, but I think this might be a step backwards. The light is more of an ambiance; it’s visible in the background but it’s not quite “in your face” enough to act as an alert.
An LED Strip
“In your face” it is: a pulsing strip of LEDs at the base of the monitor.
I keep a short strip of addressable WS2812B LEDs handy for testing LED patterns. This is mounted to a small piece of acrylic sheet for support and soldered to a 3×1 female pin header for making quick prototype connections. I just taped this short test strip to the base of my monitor and wired it up to the microcontroller.
The code driving this is different from the previous two indicators, using the FastLED library to generate the data signal for the strip. Originally I tried having this “blink” as well, but it seemed a bit too harsh for an indicator that’s so bright and present. Instead, I rewrote the code to ‘pulse’ the LEDs on and off by fading the brightness up and down.
I’m quite happy with this one. It’s simple to put together, bright, and has a smooth effect that’s both highly visible and not too distracting.
But enough about the LEDs. It’s time for something completely different.
A Flag
This is the silliest, and for that reason I think it might be my favorite.
I drilled out a popsicle stick to accept some M2 screws and mounted it to a plastic servo arm. Then I drew some artwork on a piece of paper, stapled it to the stick, and taped the servo motor to the back of my monitor (again with more of that awesome VHB tape). Oh, and added some googly eyes for good measure.
Whenever the audio source is muted in OBS, the servo swings the flag up and waves it around. When the source is unmuted the servo swings back down and hides the flag.
The code driving this uses the Arduino Servo library to generate the PWM signal pulses for the servo. The flag’s position is tracked based on the servo’s output angle and the current “mode” it’s in (raising, waving, lowering, or down). Because the serial parsing function for the “muted” state is asynchronous, the flag’s position can be interrupted at any point in its cycle and “ping-ponged” back and forth by muting and unmuting.
Unfortunately this might have the opposite effect as was intended: the streamer might leave their microphone muted just to watch the googly-eyed flag wave about!
Further Improvements
This project had a very narrow focus: get the ‘mute’ state of a microphone from OBS to a physical indicator in the streamer’s eyeline. The core functionality of the Python script and serial communication I came up with is about as efficient and robust as I could make it, but that doesn’t mean the rest of the project couldn’t do with a few enhancements.
For one, it would be nice if you could change some of the properties for the physical indicator from OBS itself without having to upload new code, such as adjusting the ‘blink’ speed of the LED or changing the brightness. That’s all technically possible, but it would require a significantly more detailed serial parsing function on the microcontroller.
The other significant improvement would be to build a proper enclosure for the microcontroller that mounts to the back of the monitor. I was only setting this up temporarily, but for long-term use it would be better to have a sealed enclosure and mount.
And more googly eyes. I definitely could have added more googly eyes.
Parts List
Want to build a mute indicator yourself? Here is a list of the parts I used to make this a reality. Well, most of the parts.
You’ll also need a copy of the Python script for OBS and the Arduino code for the various indicators. These can be downloaded from the project’s GitHub repository.
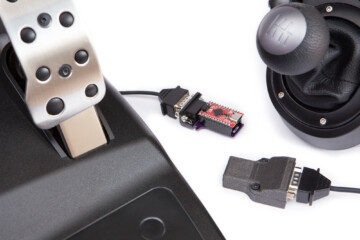
I should point out that you don’t have to use an Arduino Uno here – I just choose it because if you do have a microcontroller it’s probably the one you have. But any microcontroller with a CDC serial interface will work.
(Note that these are Amazon Affiliate links which help fund the content on this site. Thank you for your support!)
All Indicators
LED Light
- 5 mm Red LED
- 220 Ohm 1/4W Resistor
- Hatchbox ABS Plastic, 1.75 mm
- 3M VHB Mounting Tape
Room Light
- 500W Halogen Worklight
- DIY Relay Box for 120W power (containing 5V Relay Module)
- Rosco Roscolux #24 Filter – Scarlet